
Homemade Nutella
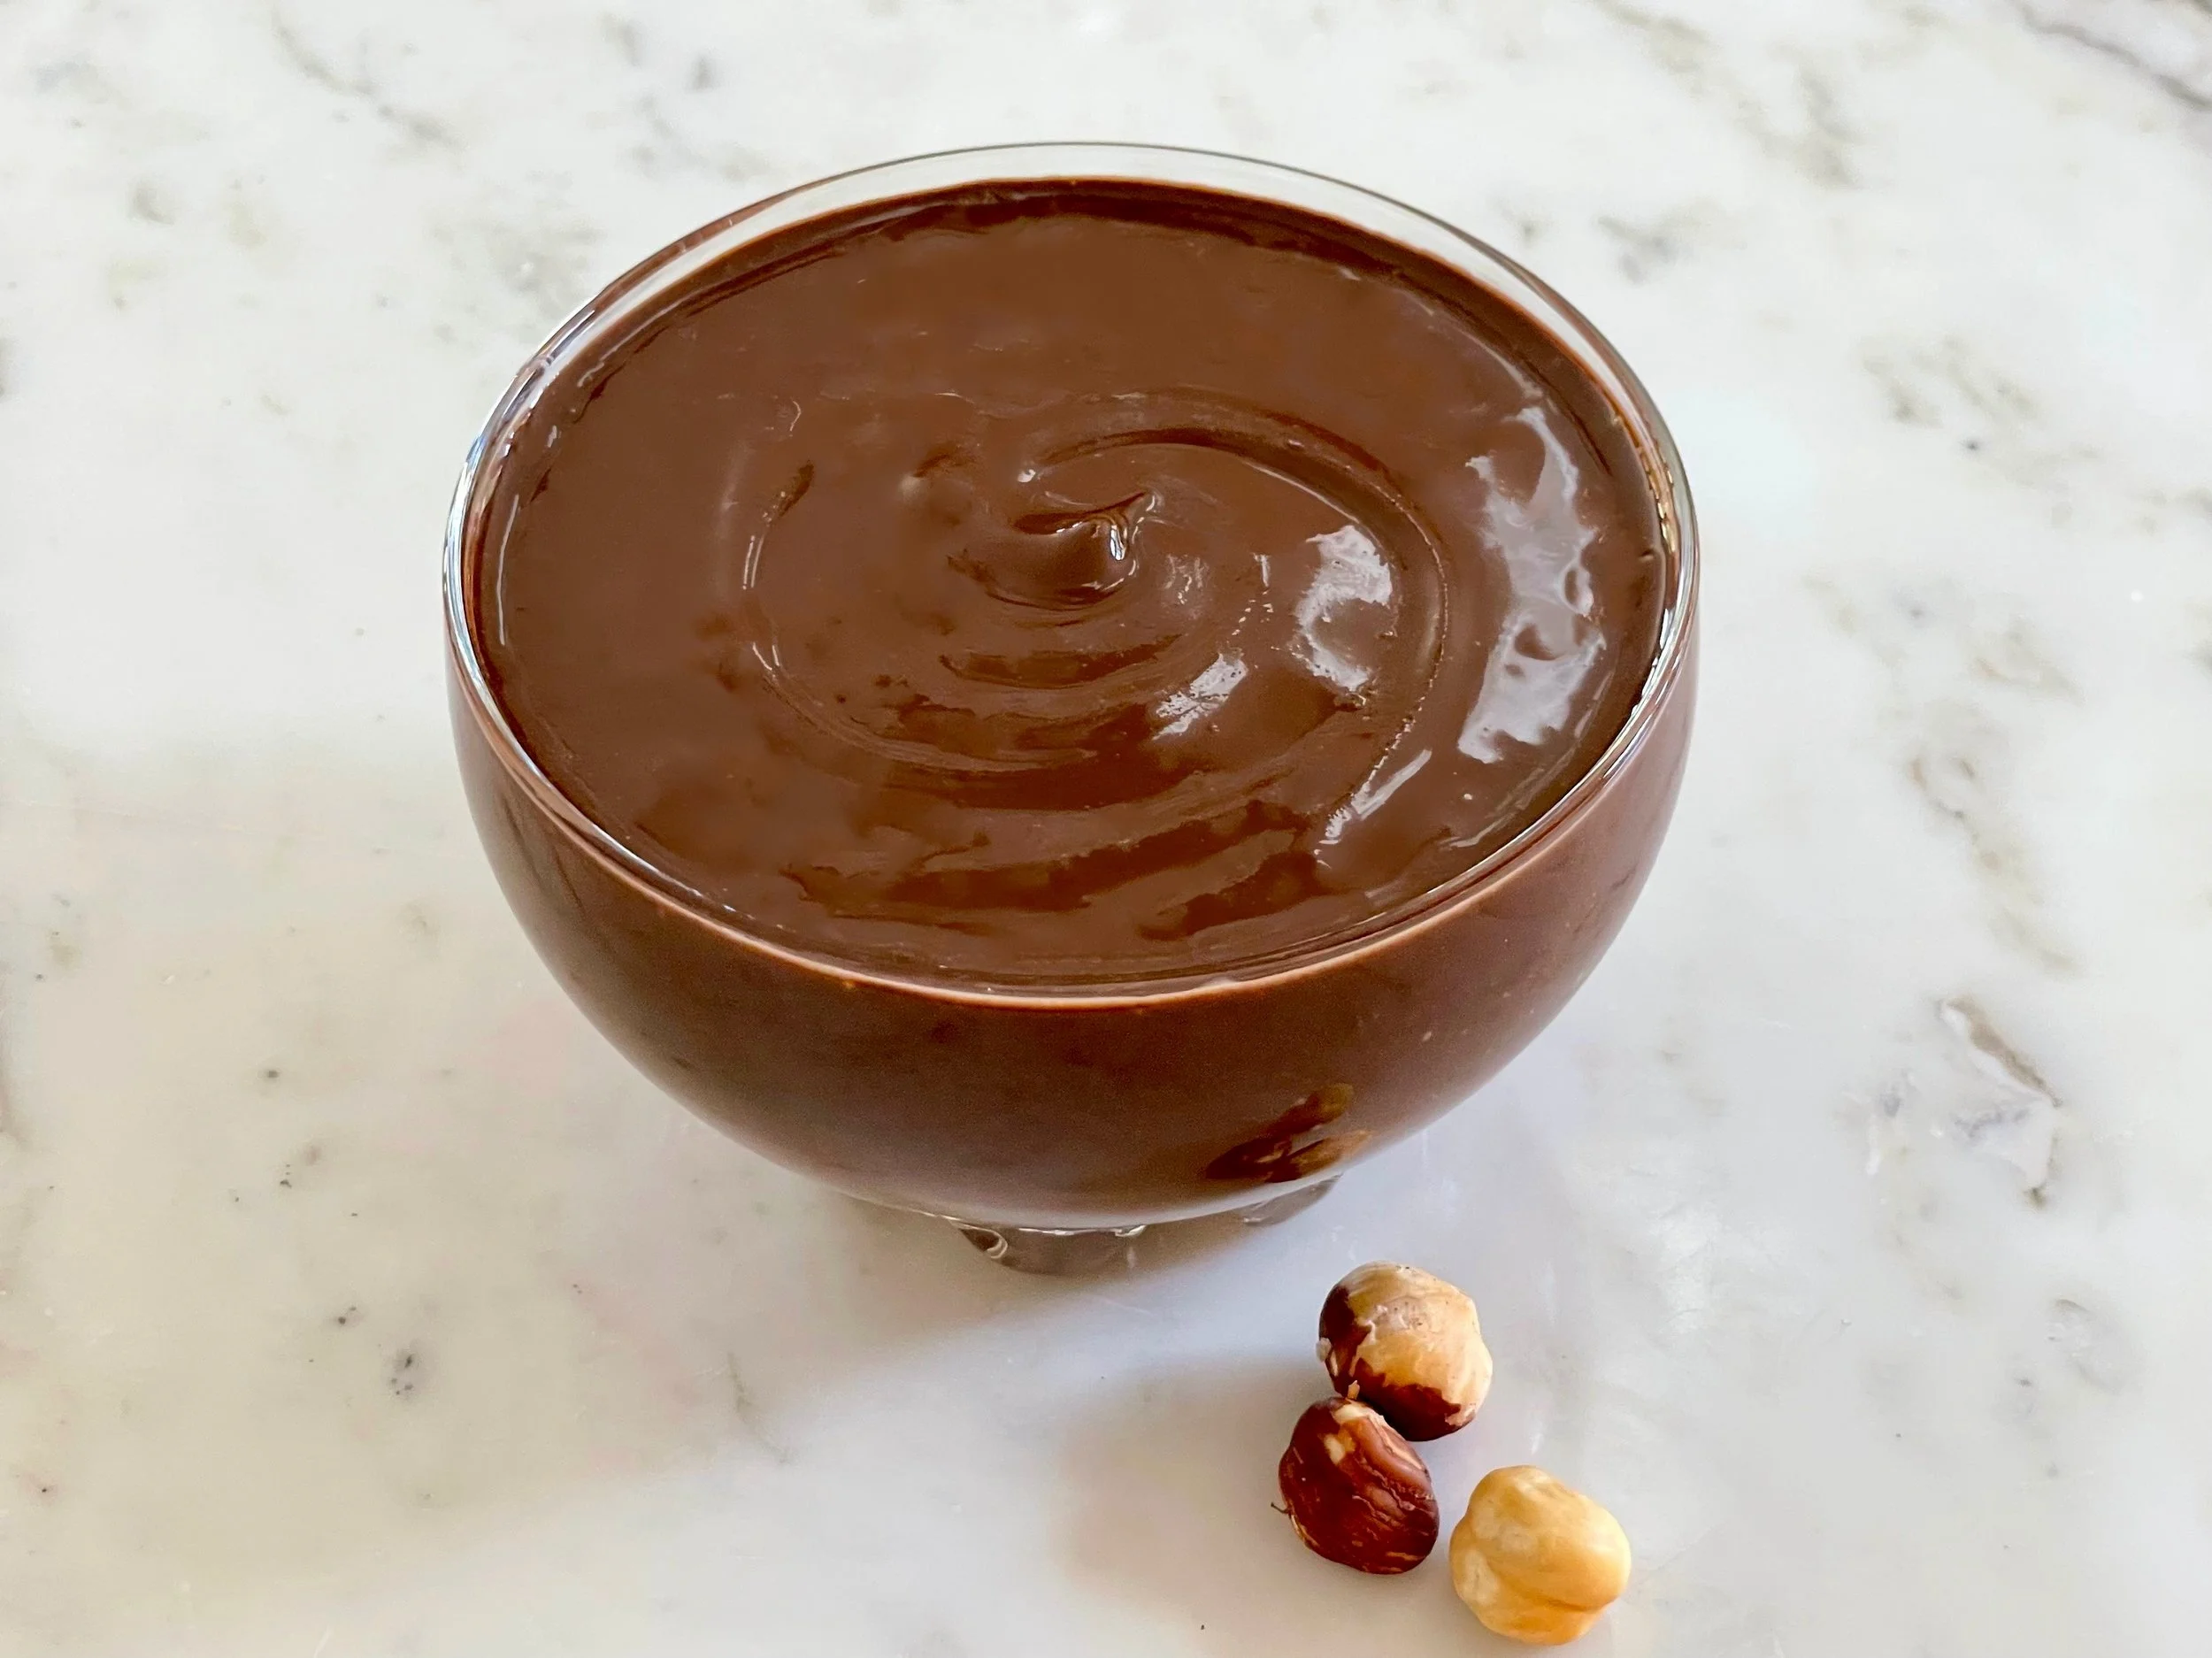
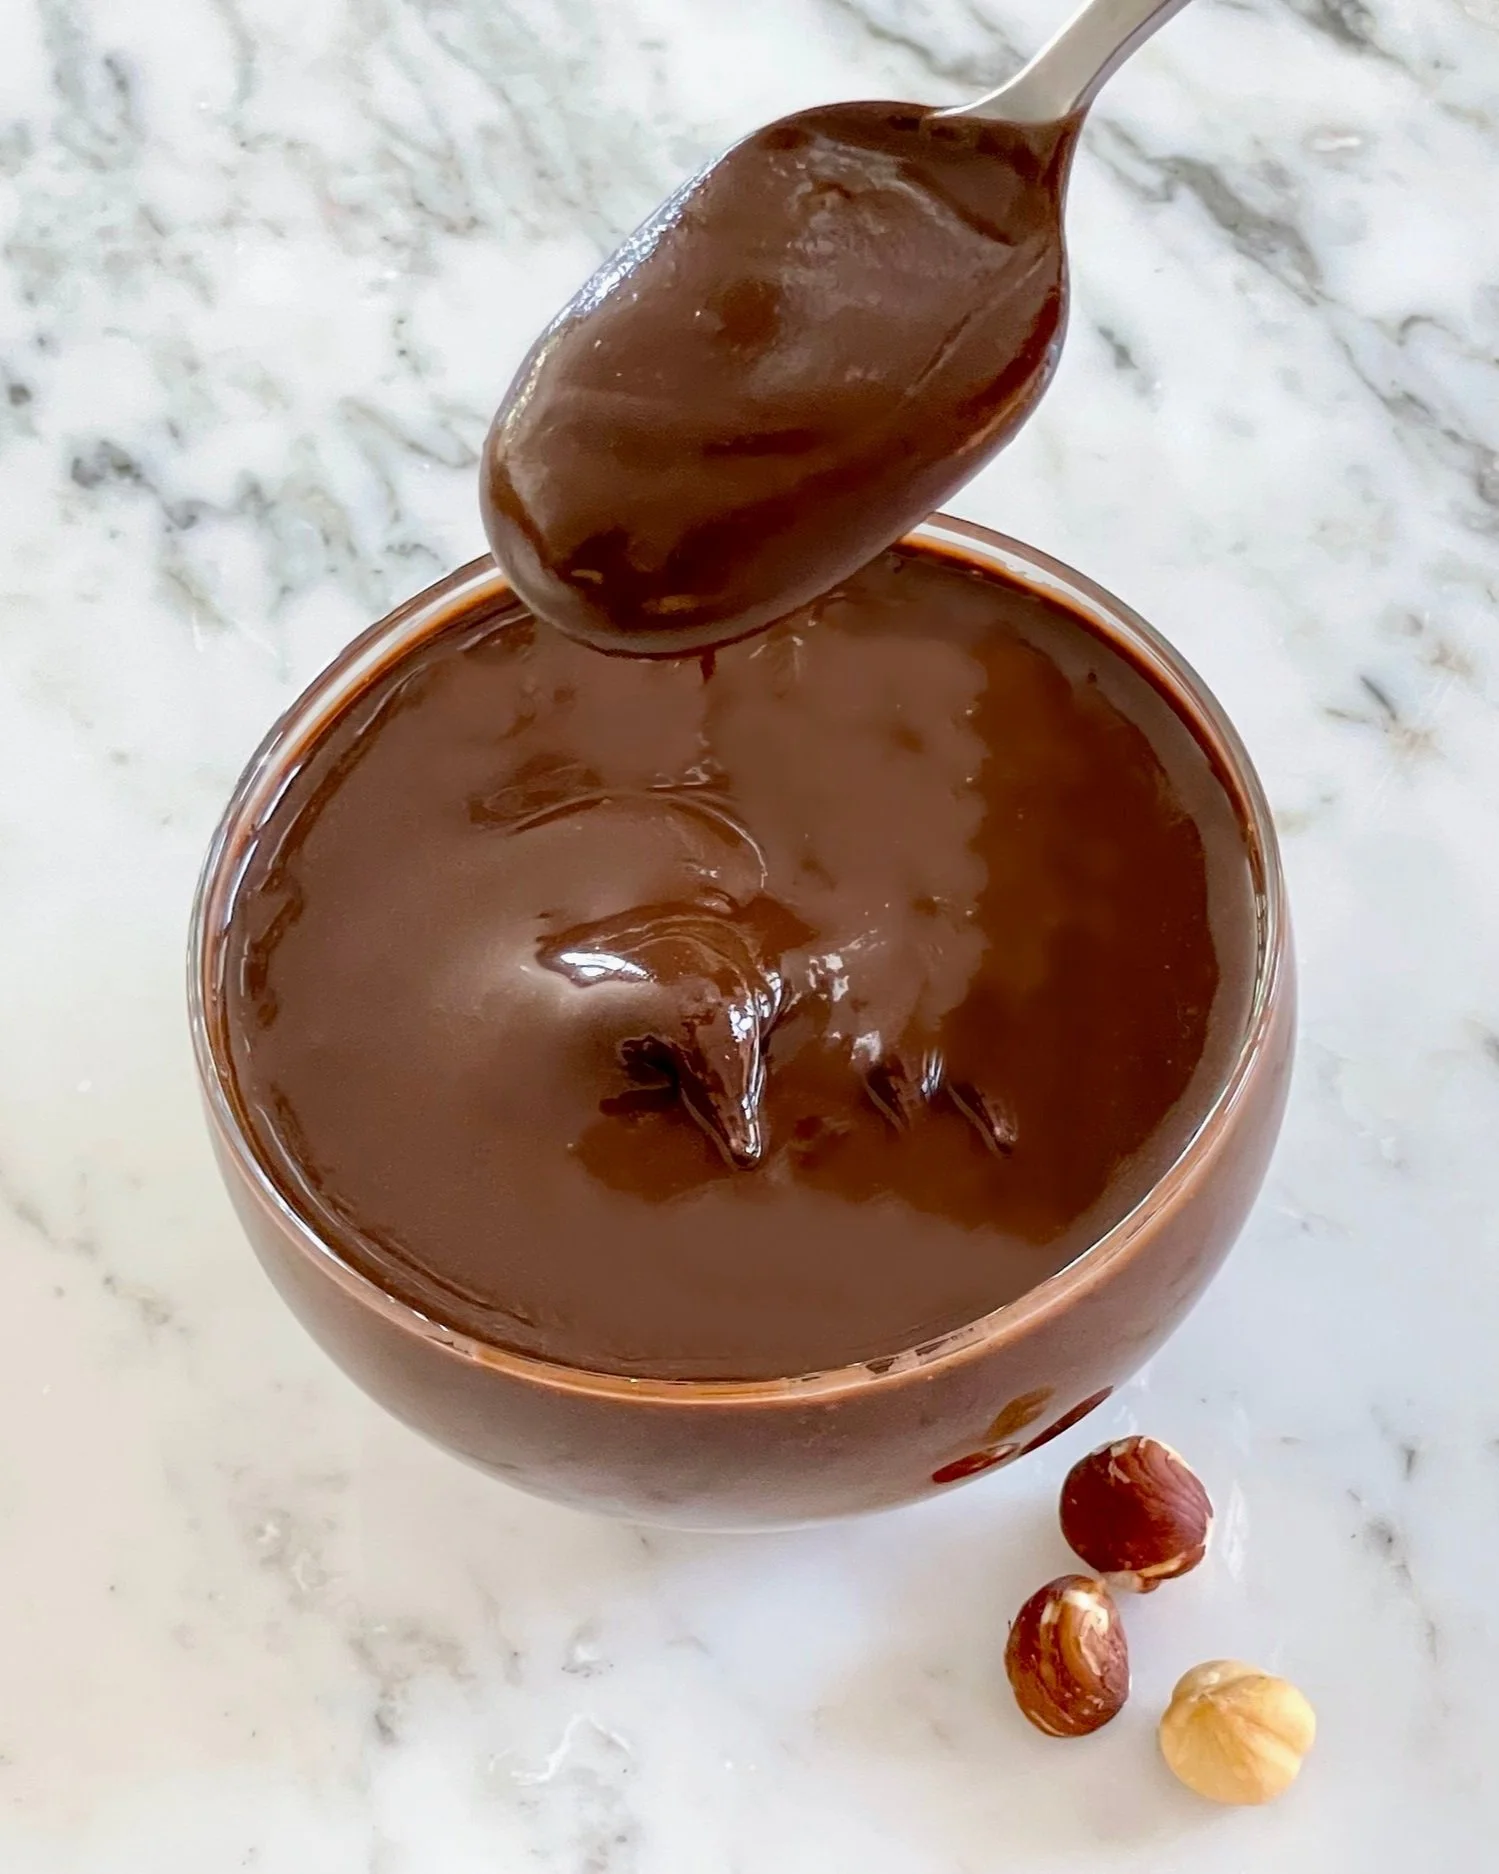
My Homemade Nutella is rich and chocolaty, and quite addicting! Dry roasted hazelnuts are blended with semi-sweet chocolate, Dutch processed cocoa, and a few other ingredients to produce a silky smooth spread that is delicious on toast, Graham crackers, fresh strawberries, ice cream, or even by the spoonful! It’s also amazing in my Nutty Indoor S’mores.
This dark chocolate hazelnut spread is incredibly yummy and much healthier than the original store bought version. To learn how to make this tasty spread recipe, see the printable recipe card below. Take a look at the recipe video, or get Step by Step Instructions for a more detailed explanation of this recipe. Interested in the history of Nutella? Be sure to visit my Blog Comments & Tips below and read all about it.
Sign up for a free subscription to our monthly newsletter and access to exclusive content.
To browse some of our favorite kitchen essentials, gadgets, and pantry items, visit our Recommended Products page.
RECIPE
(Check out our Step by Step Instructions below the recipe card.)

HOMEMADE NUTELLA
Ingredients
Instructions
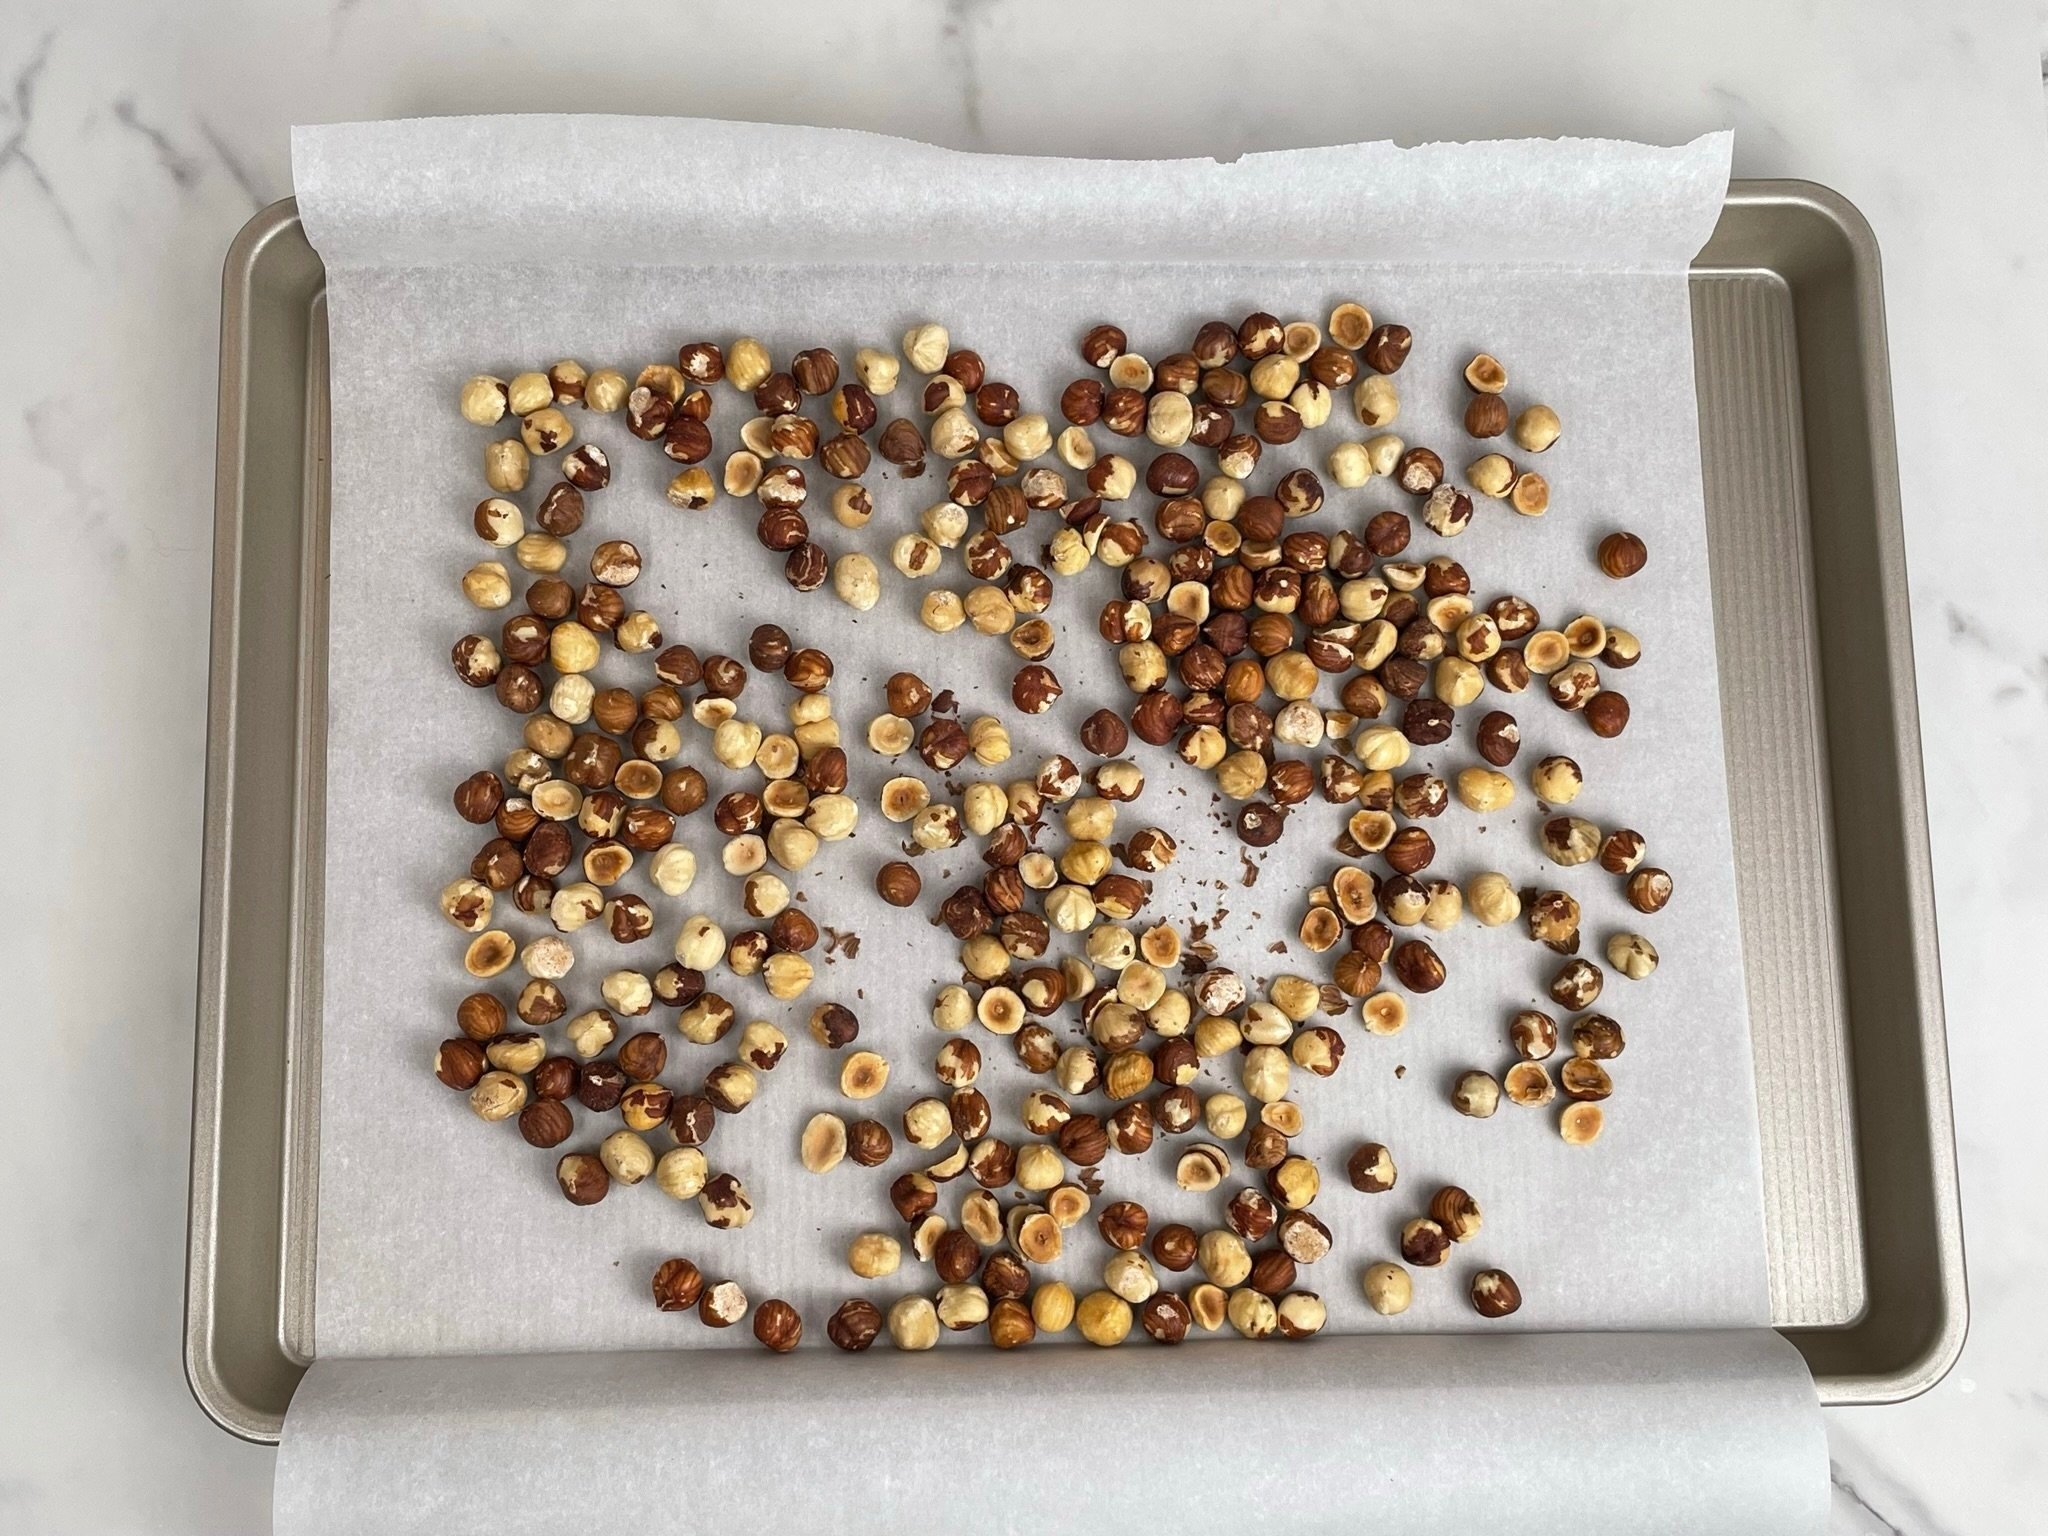
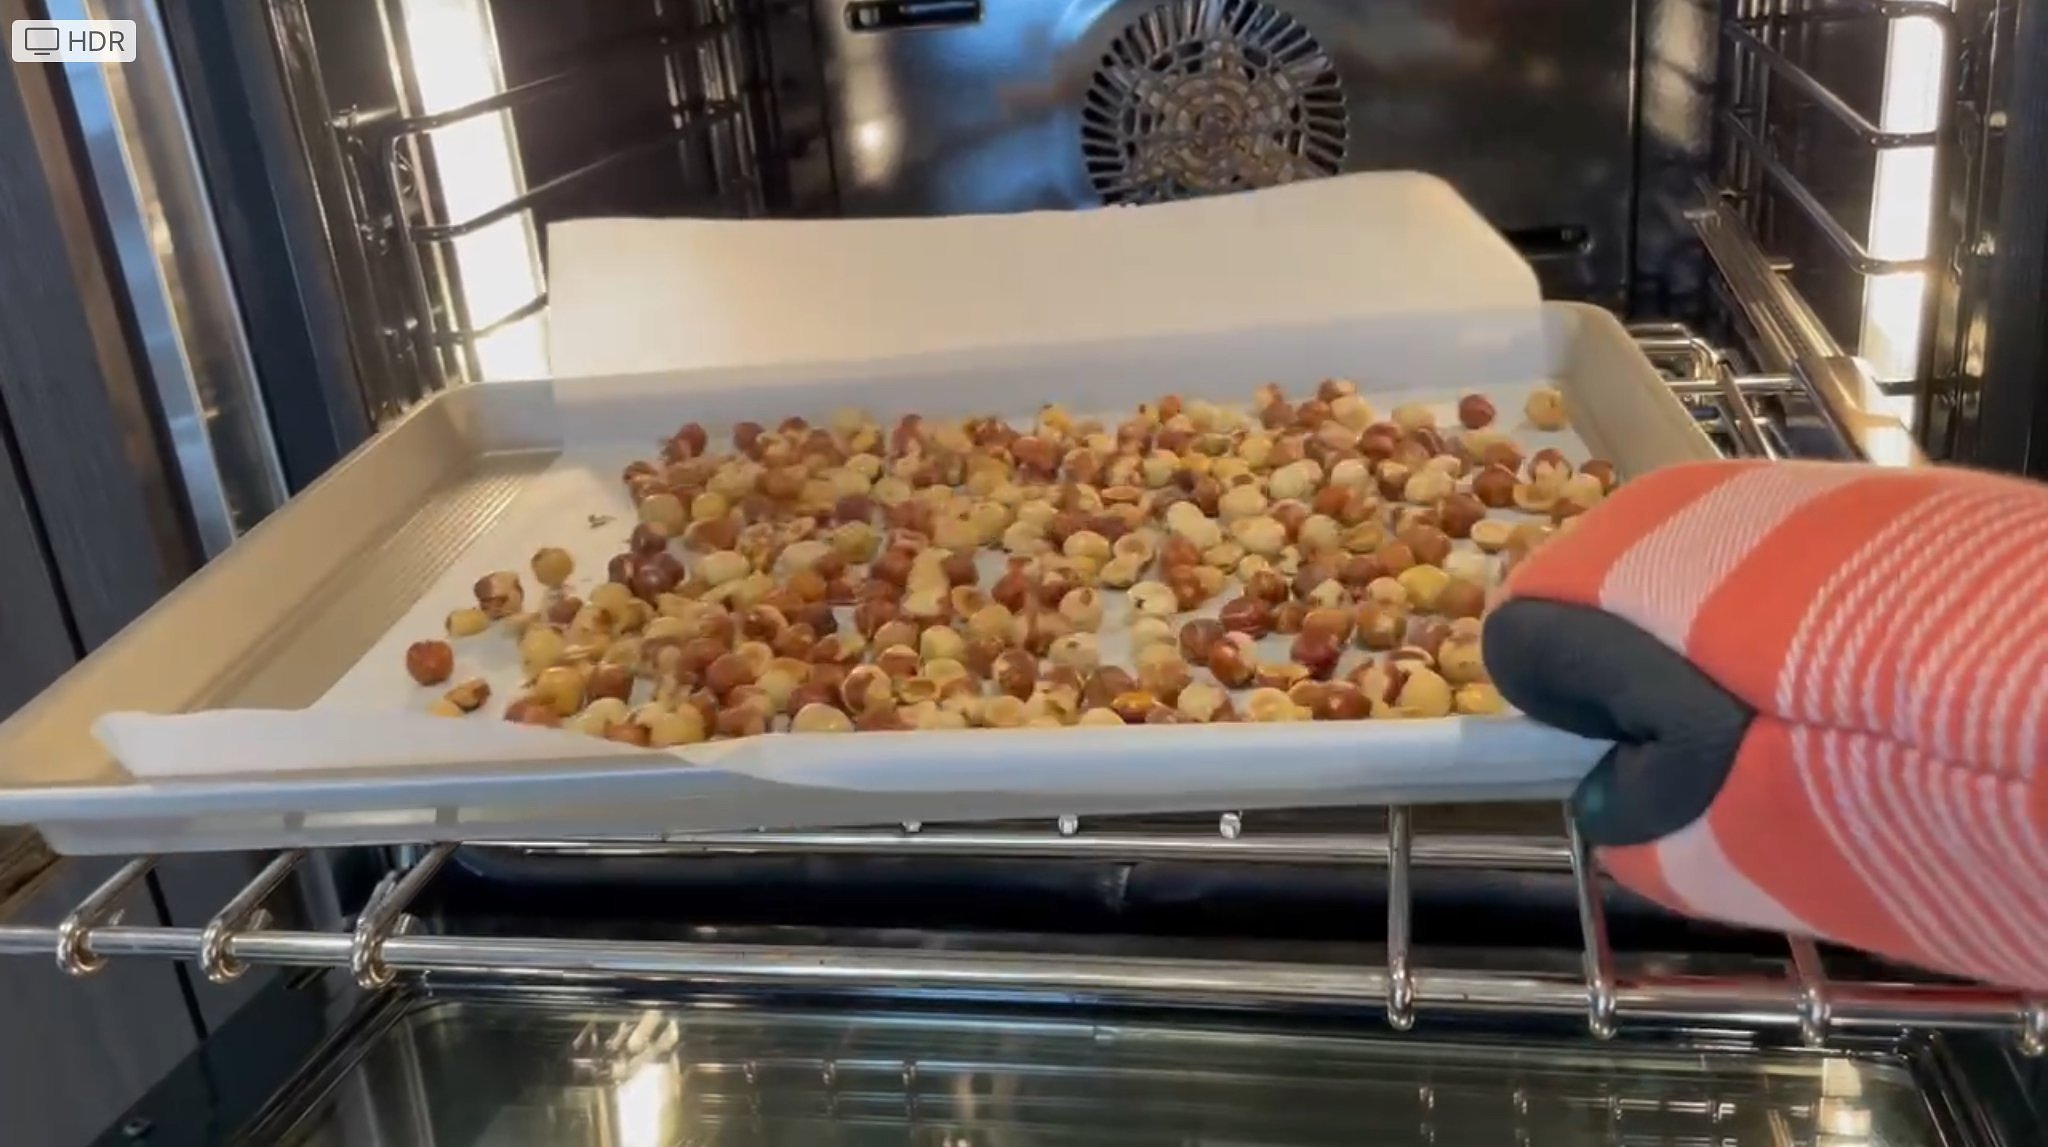
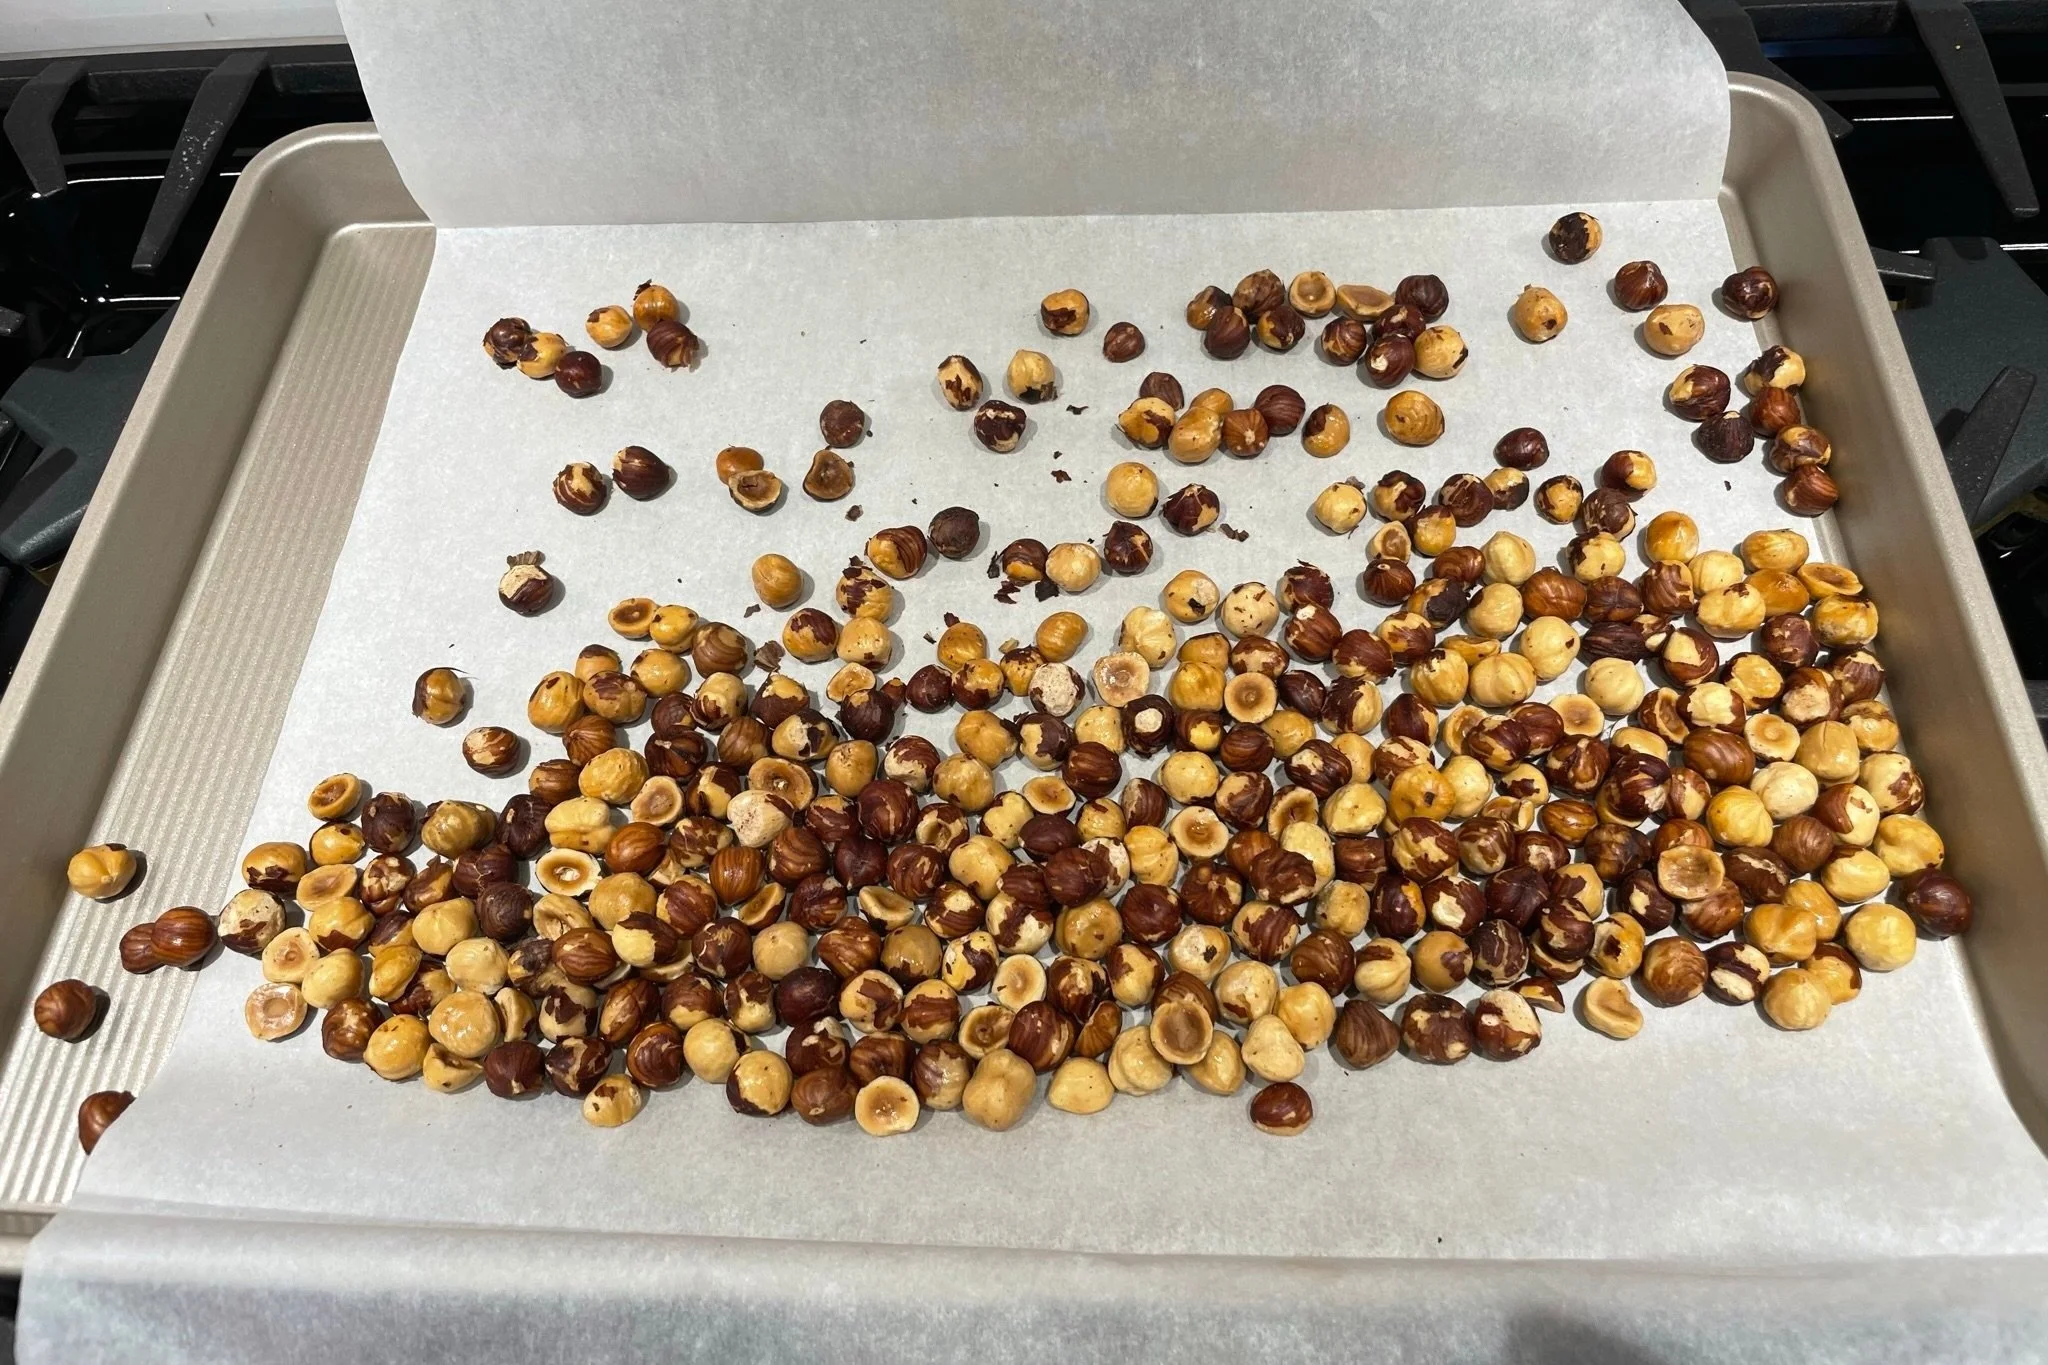
- Place rack in the center of the oven and preheat oven to 375°F. Line a baking sheet pan with parchment paper. Spread roasted hazelnuts in a single layer on the baking sheet. Roast nuts for 10 to 15 minutes until warmed through and fragrant, shaking the pan halfway through the baking process.
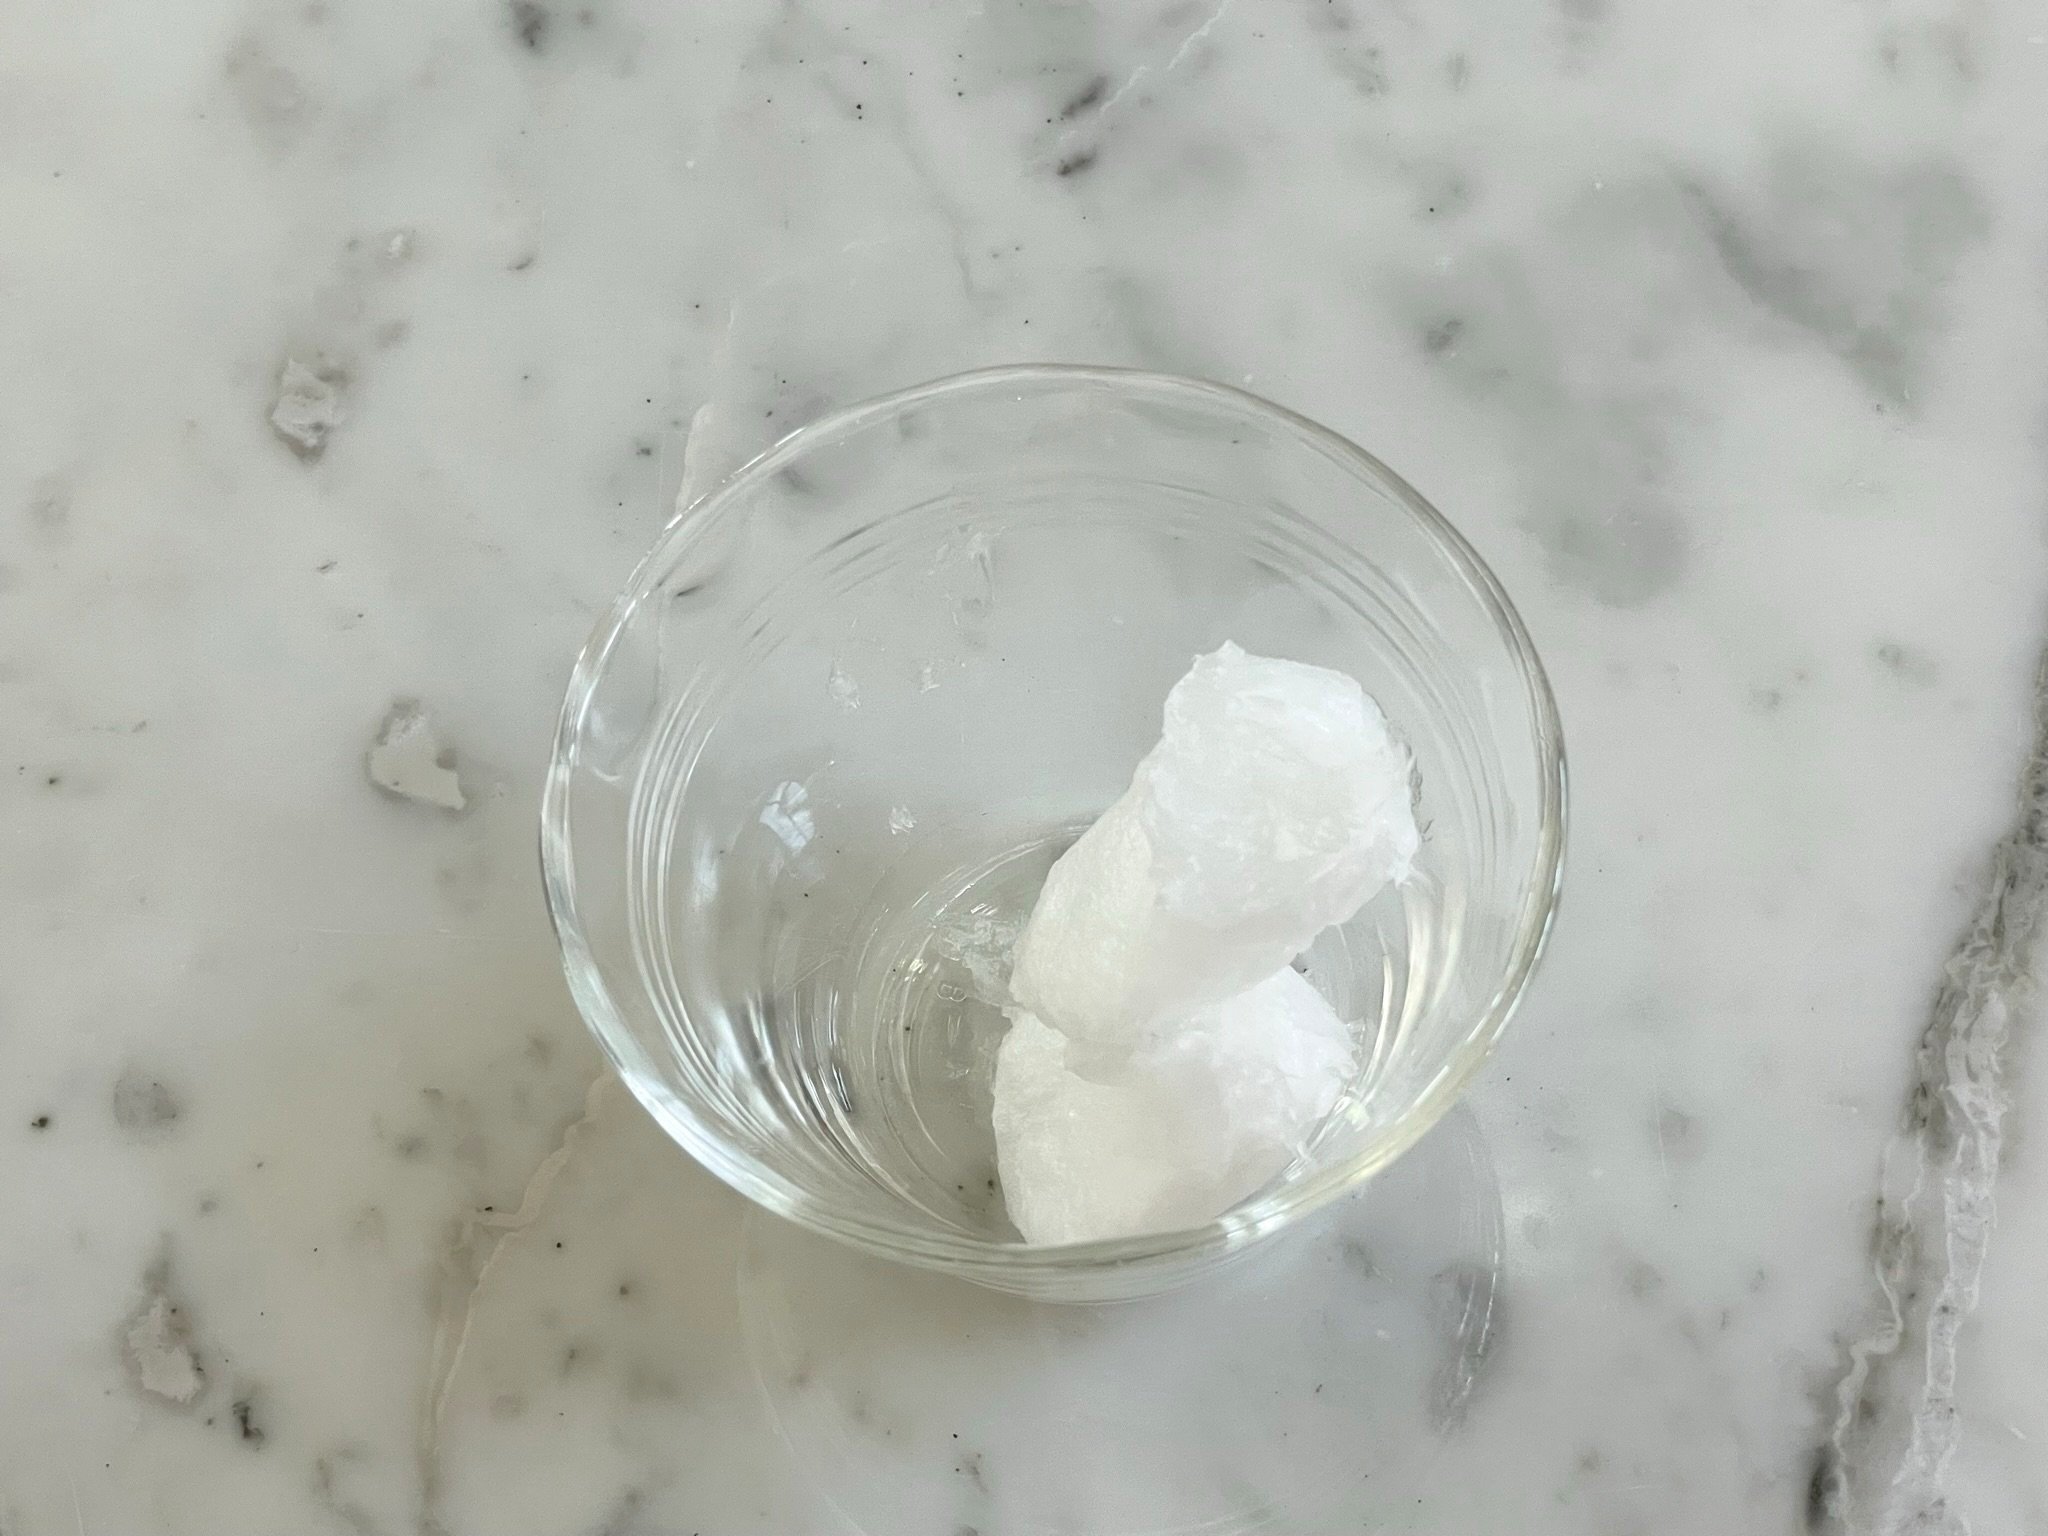
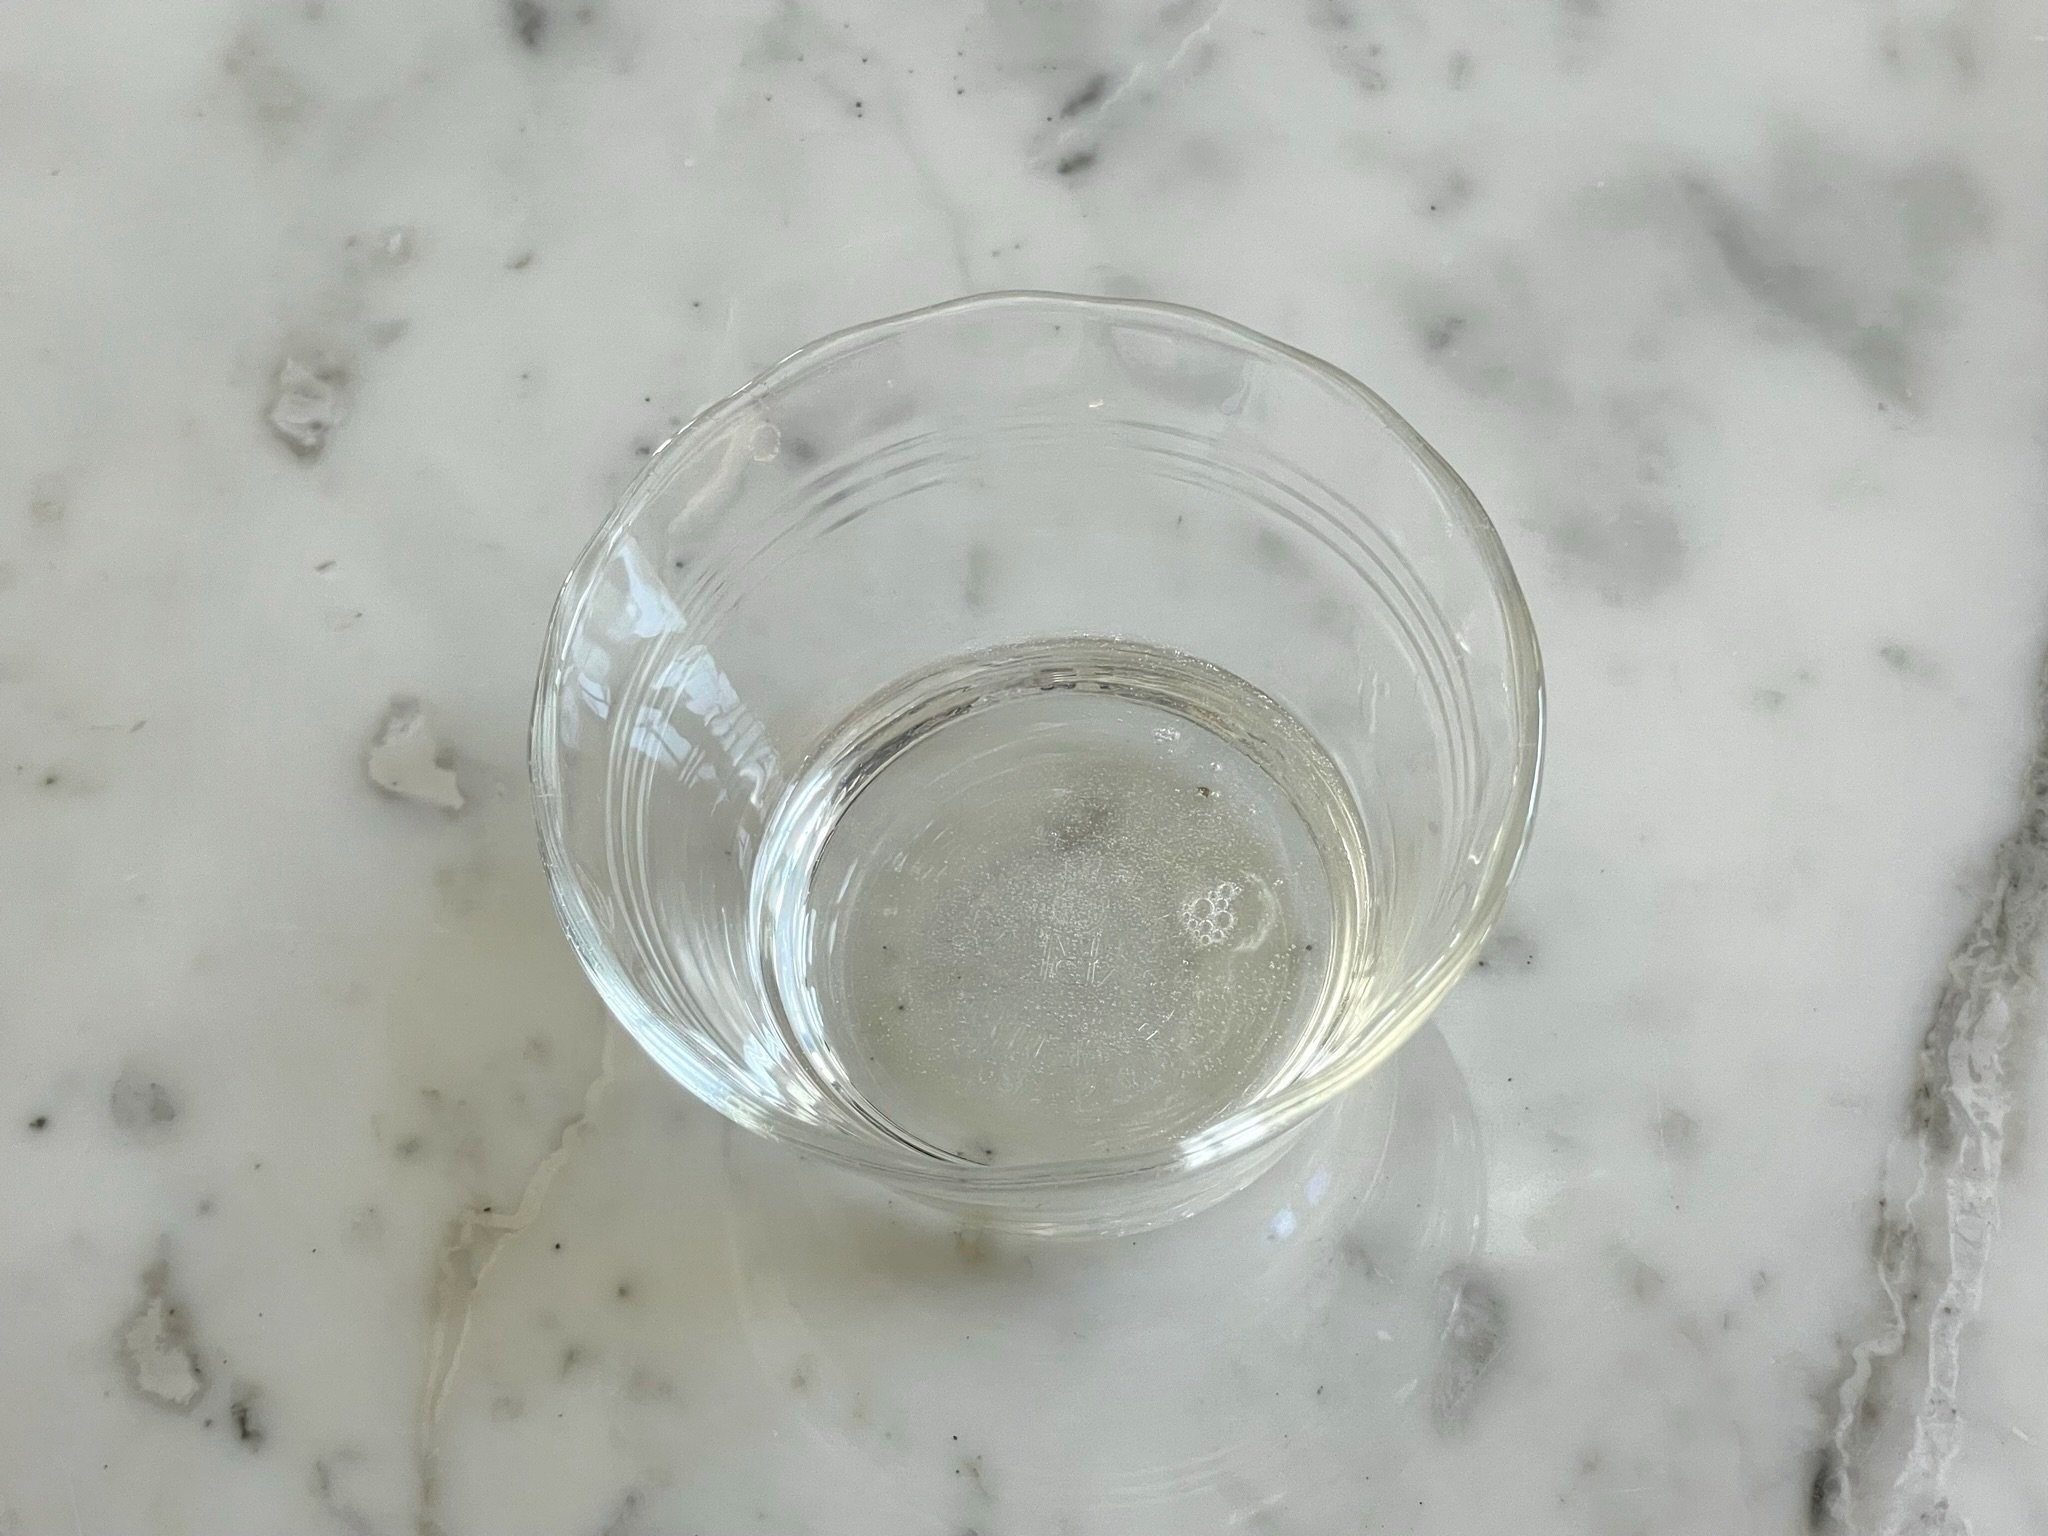
- While nuts are roasting, melt coconut oil (see Note #1) in the microwave (about 15 to 20 seconds), and set aside.
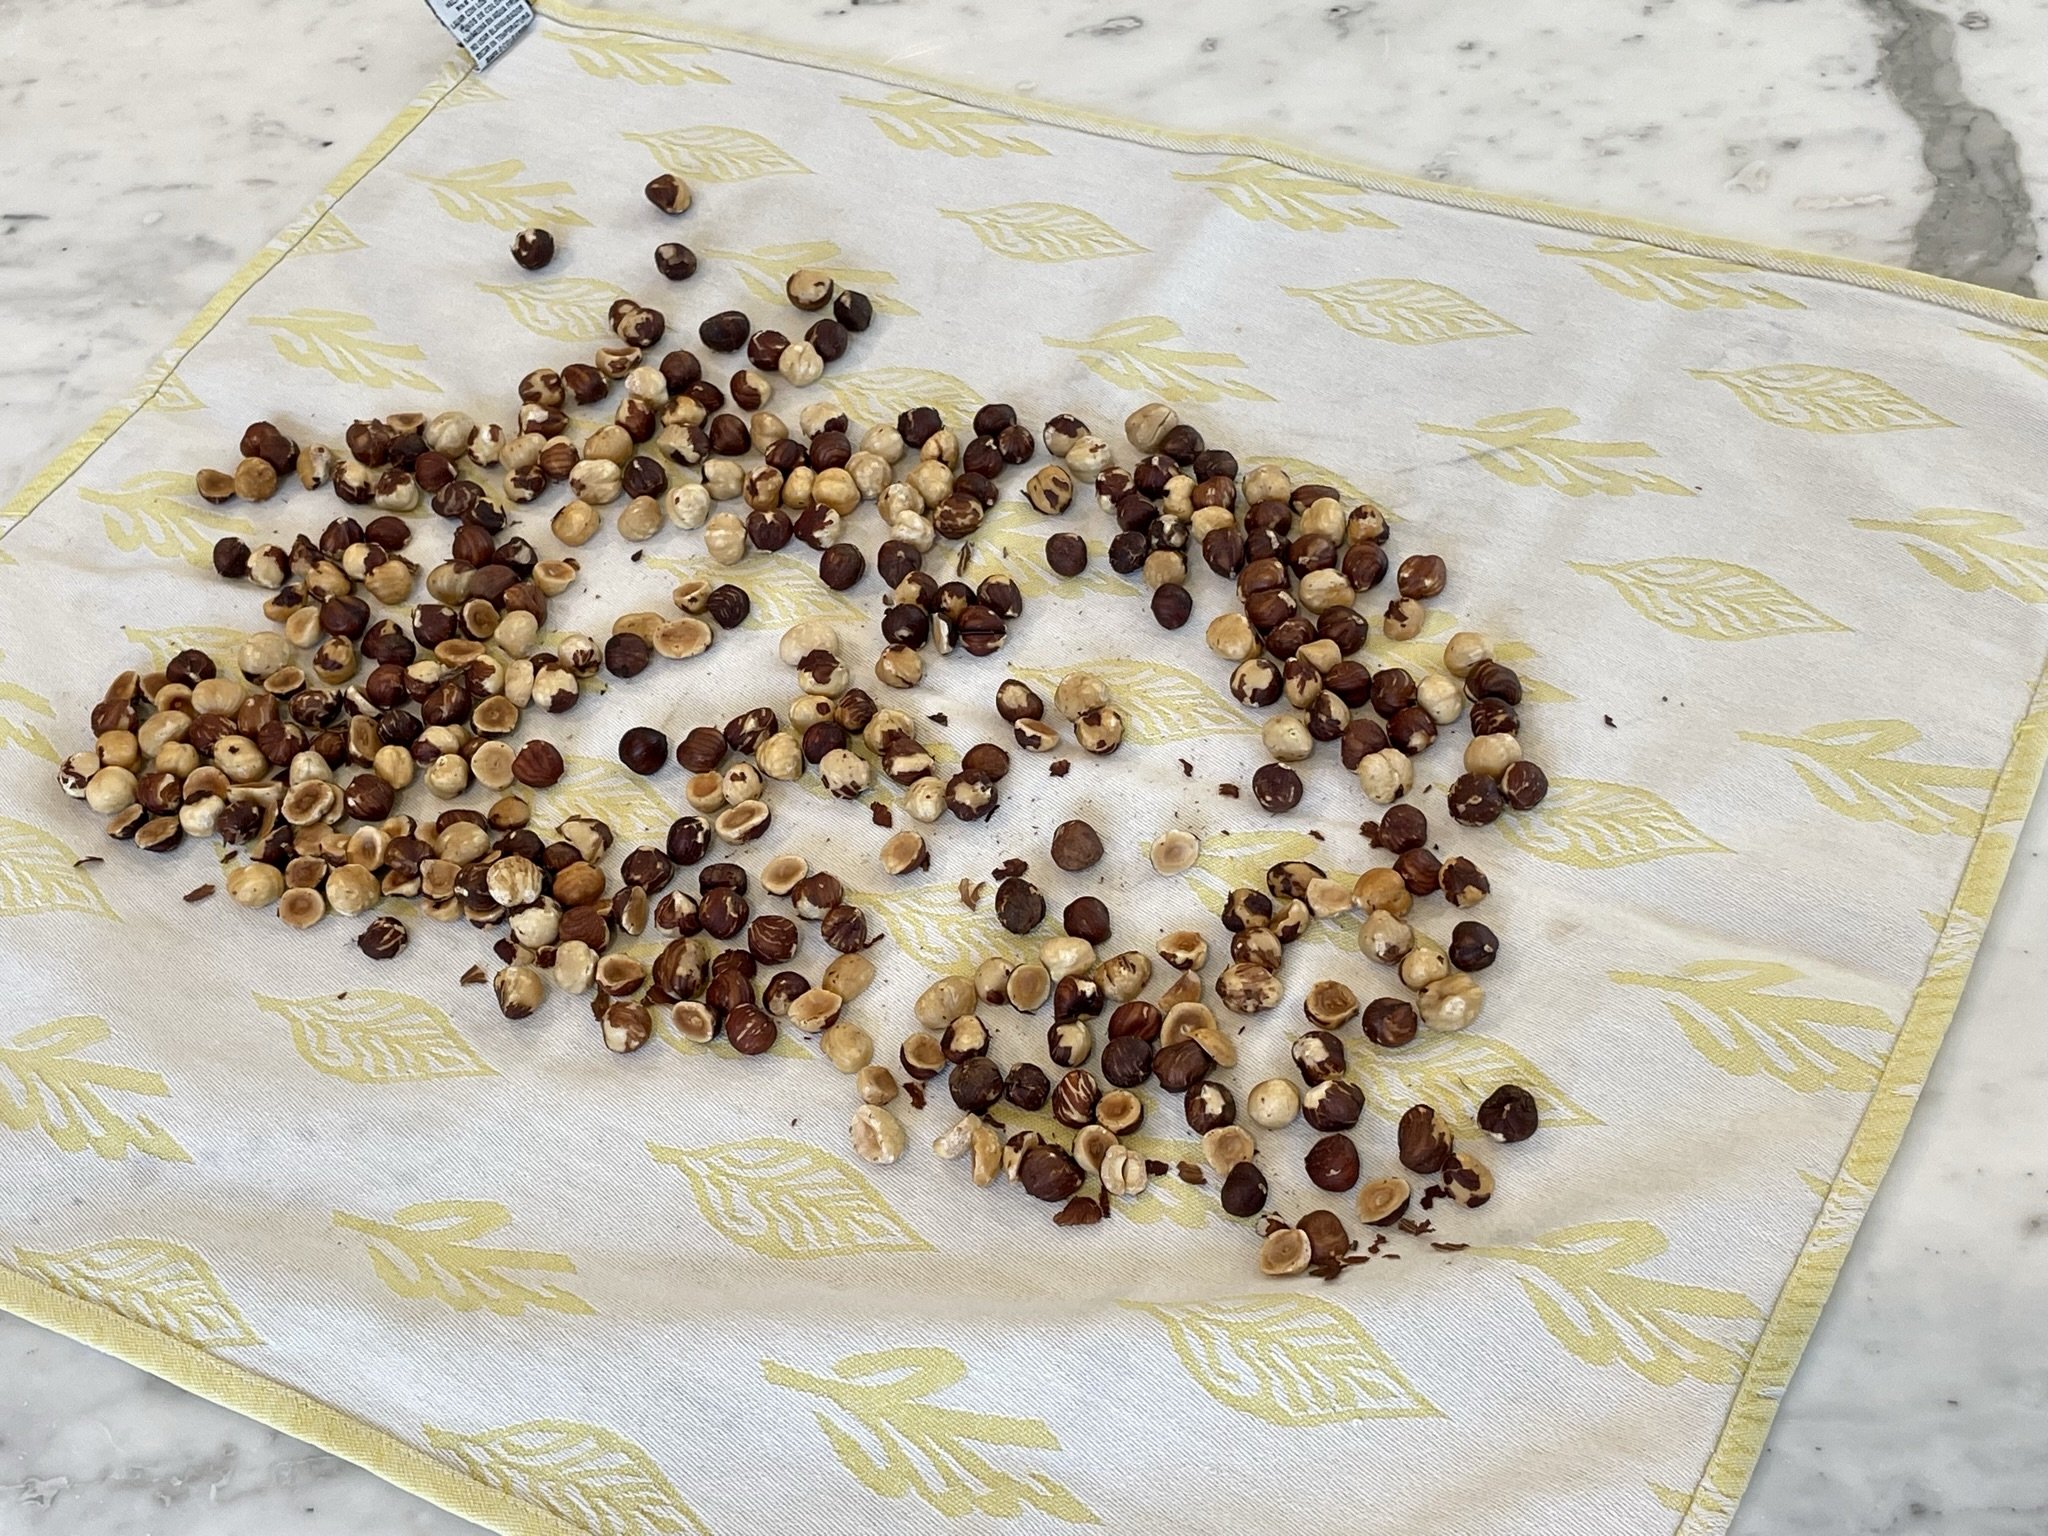
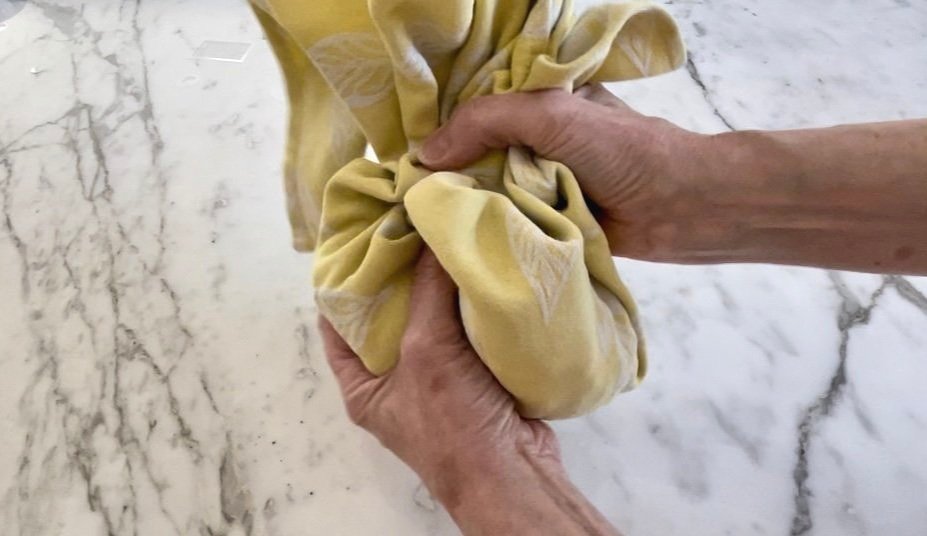
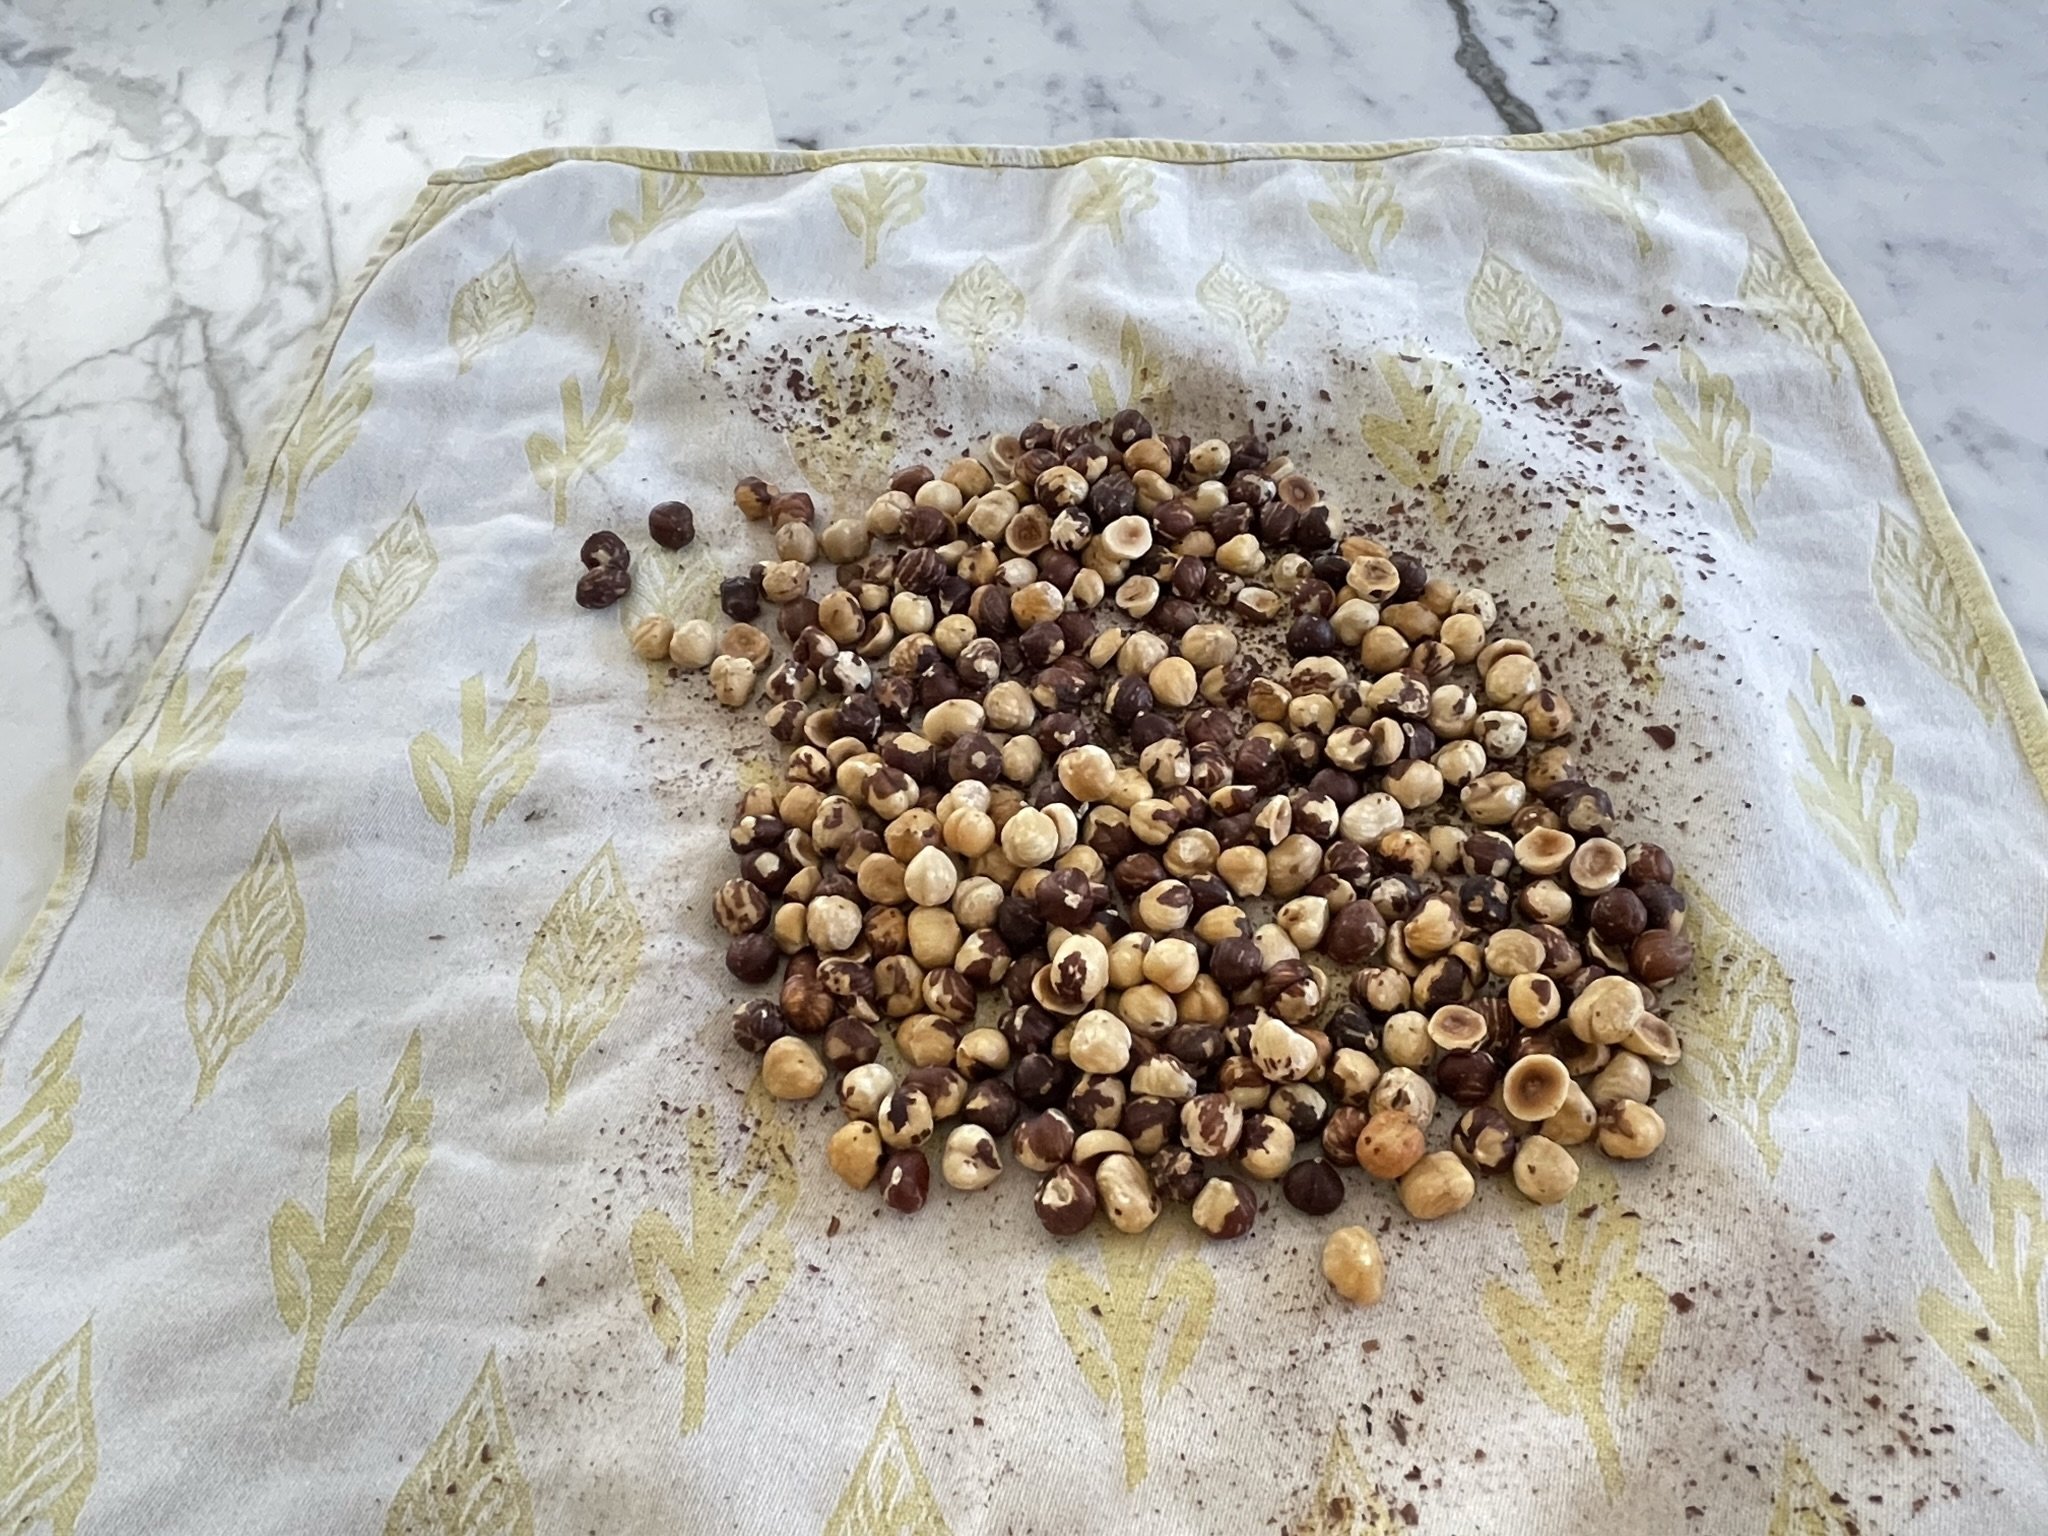
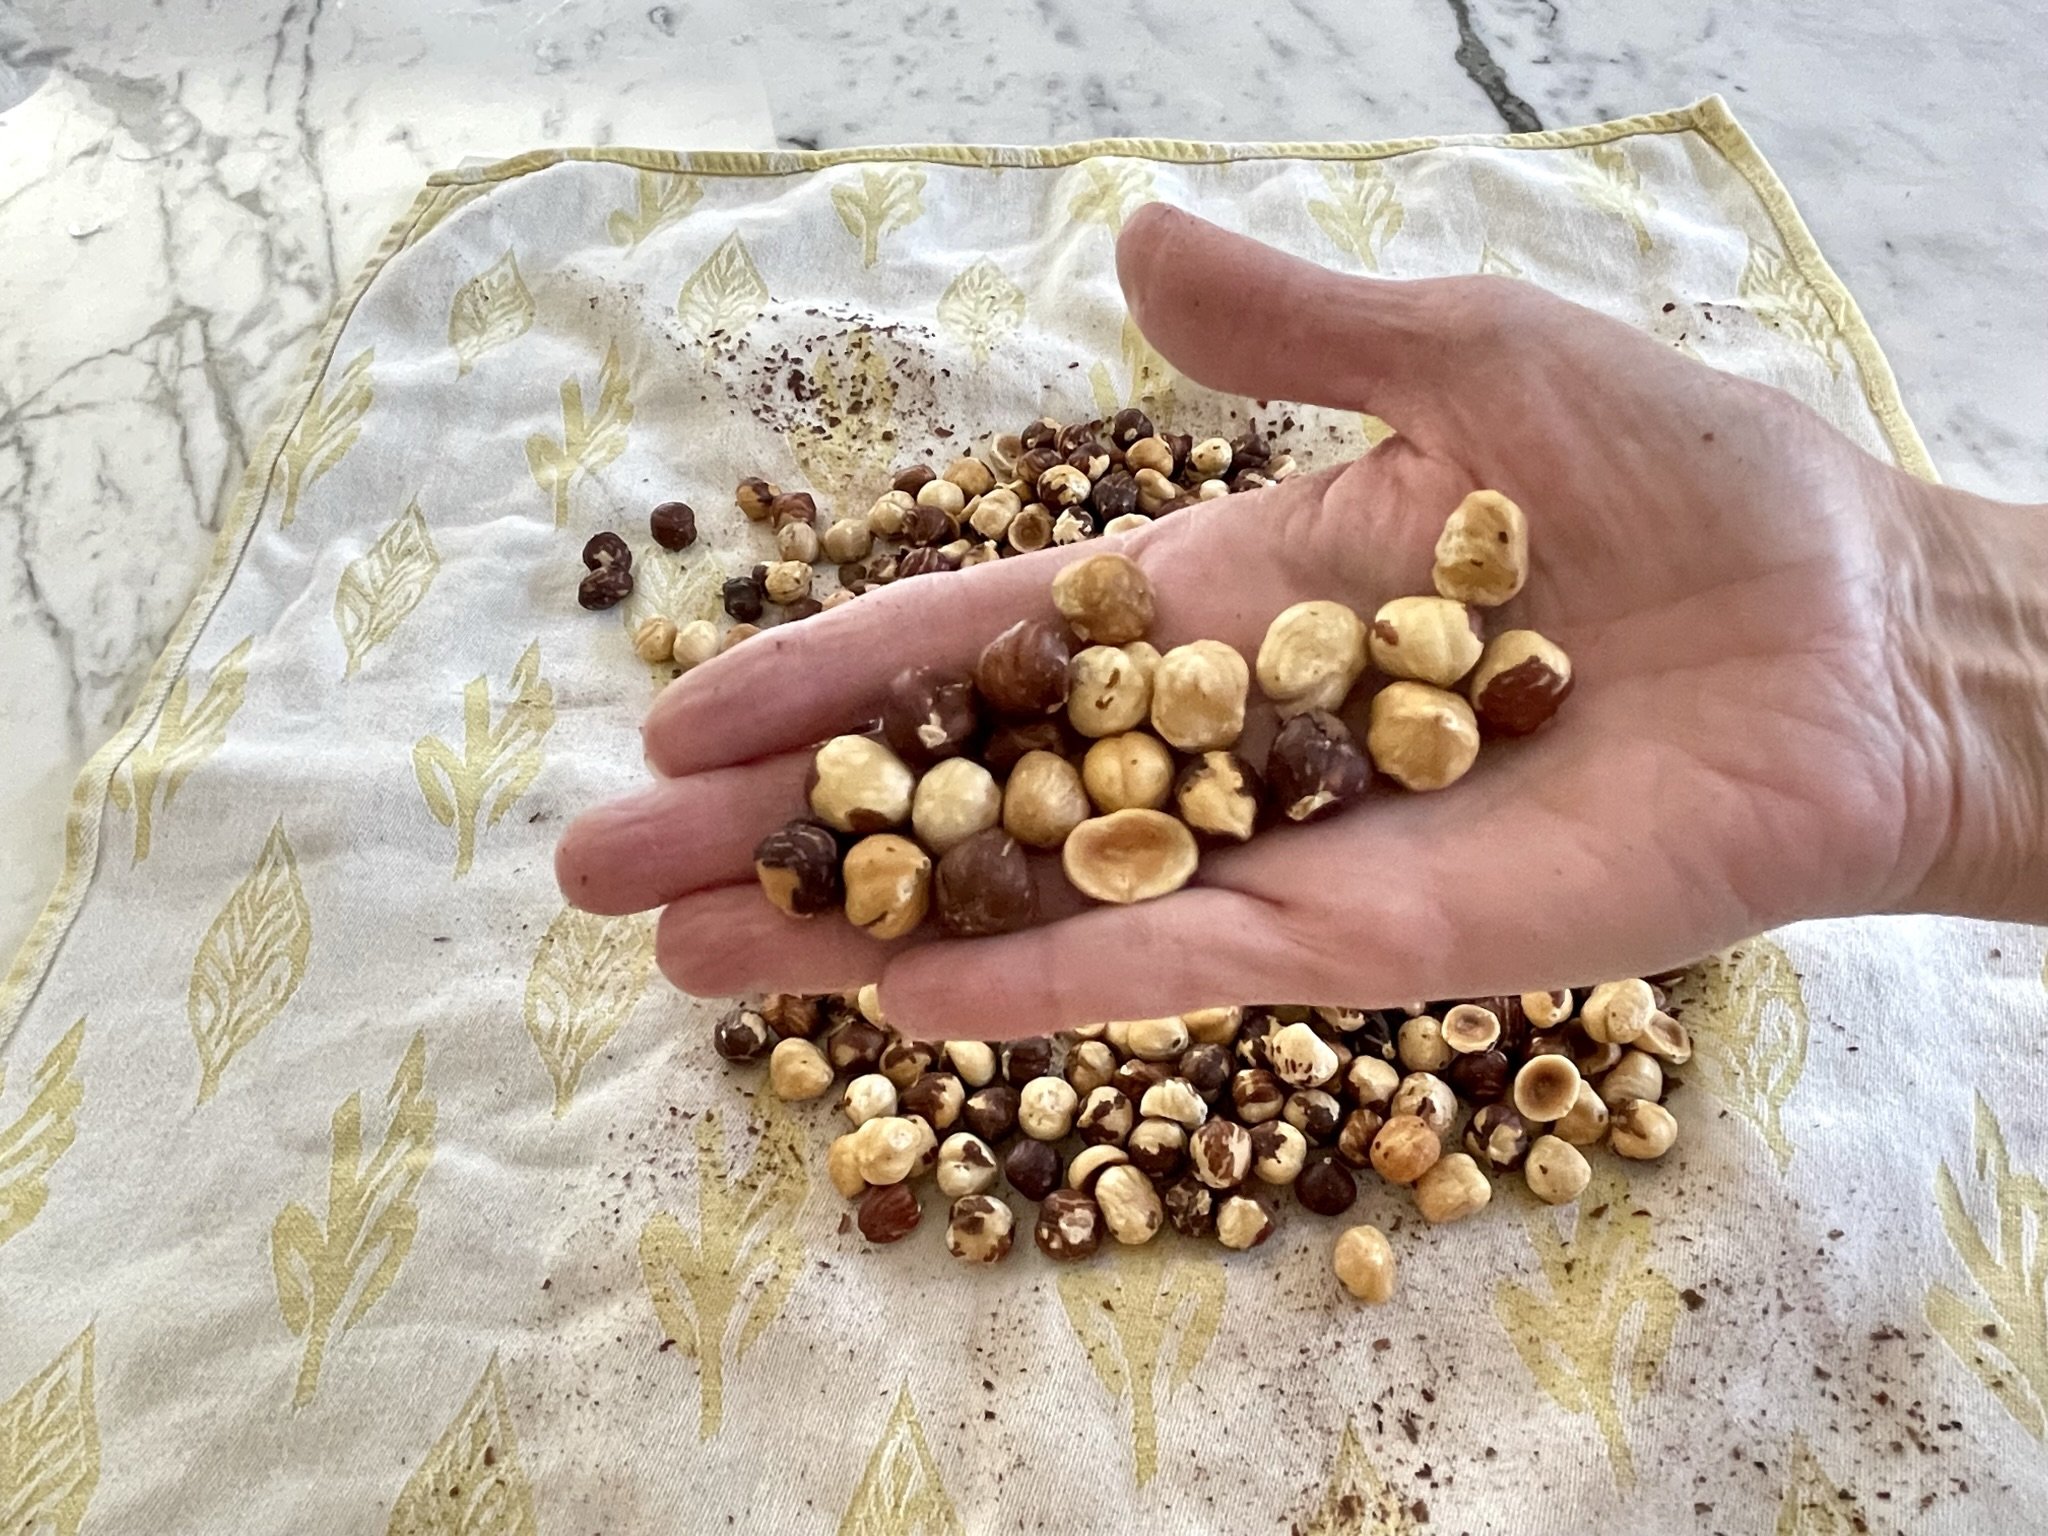
- Once nuts are roasted, transfer to a dry and clean kitchen towel, and let cool (only 1-2 minutes). Gather the ends of the towel together, rub the bottom of the towel firmly against the warm nuts to separate the skins. Unwrap and separate nuts from the skins.
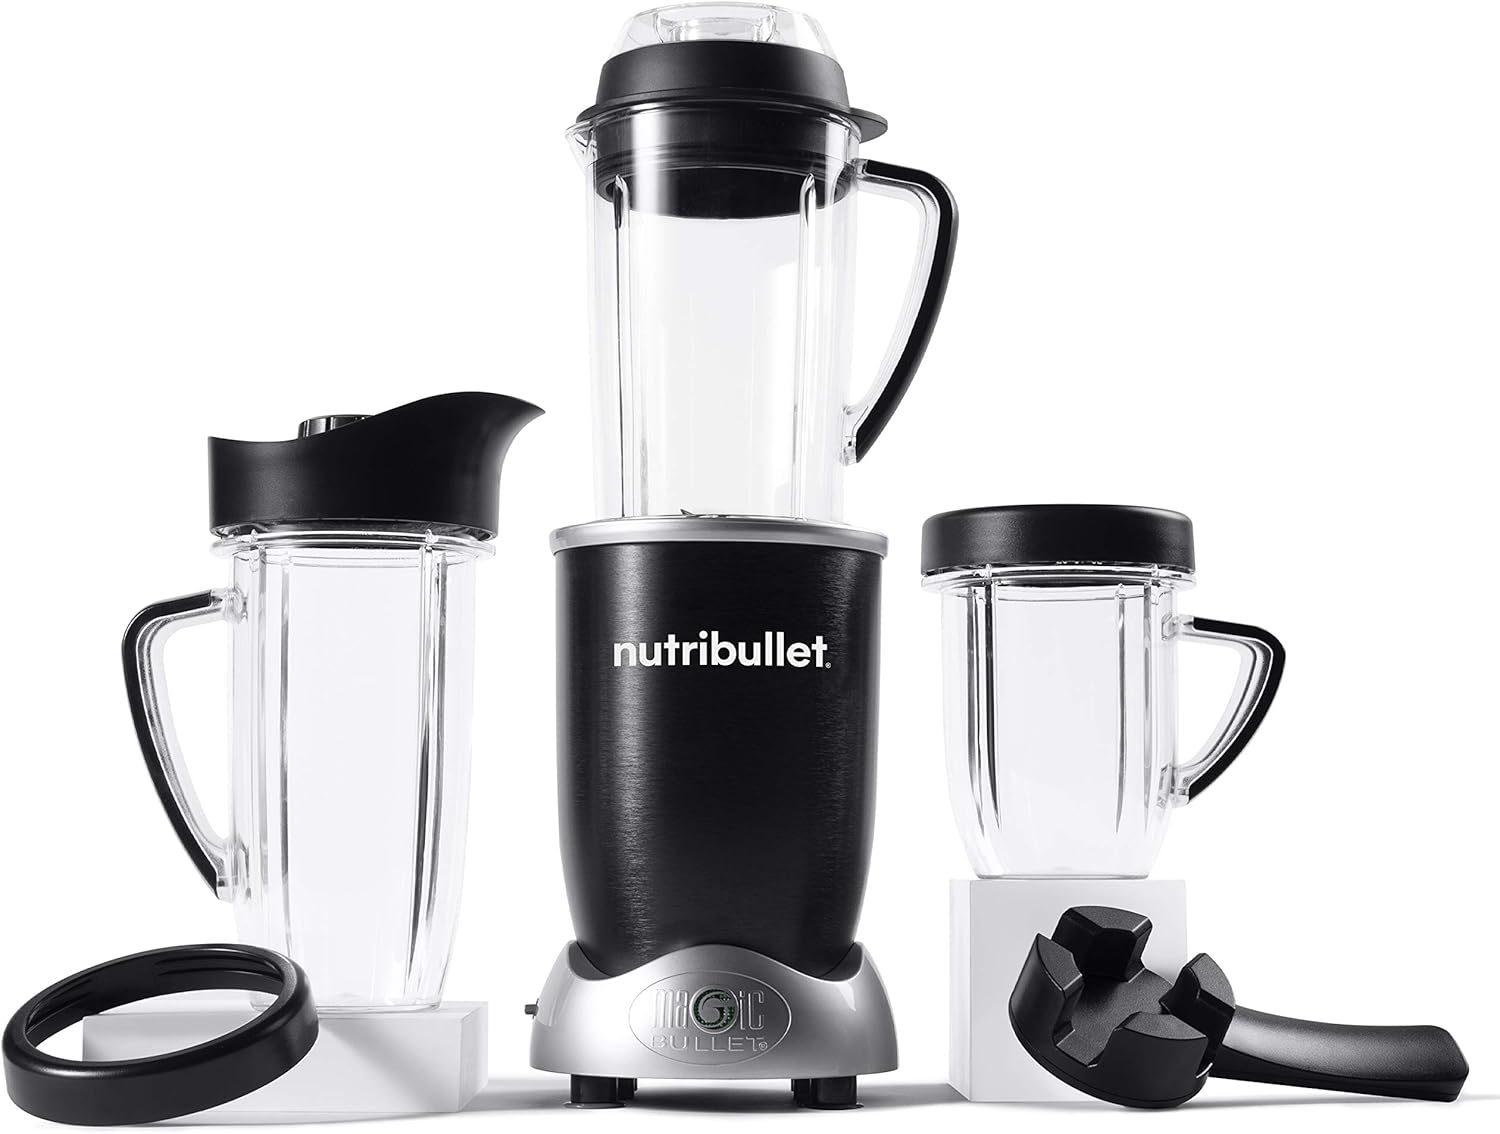
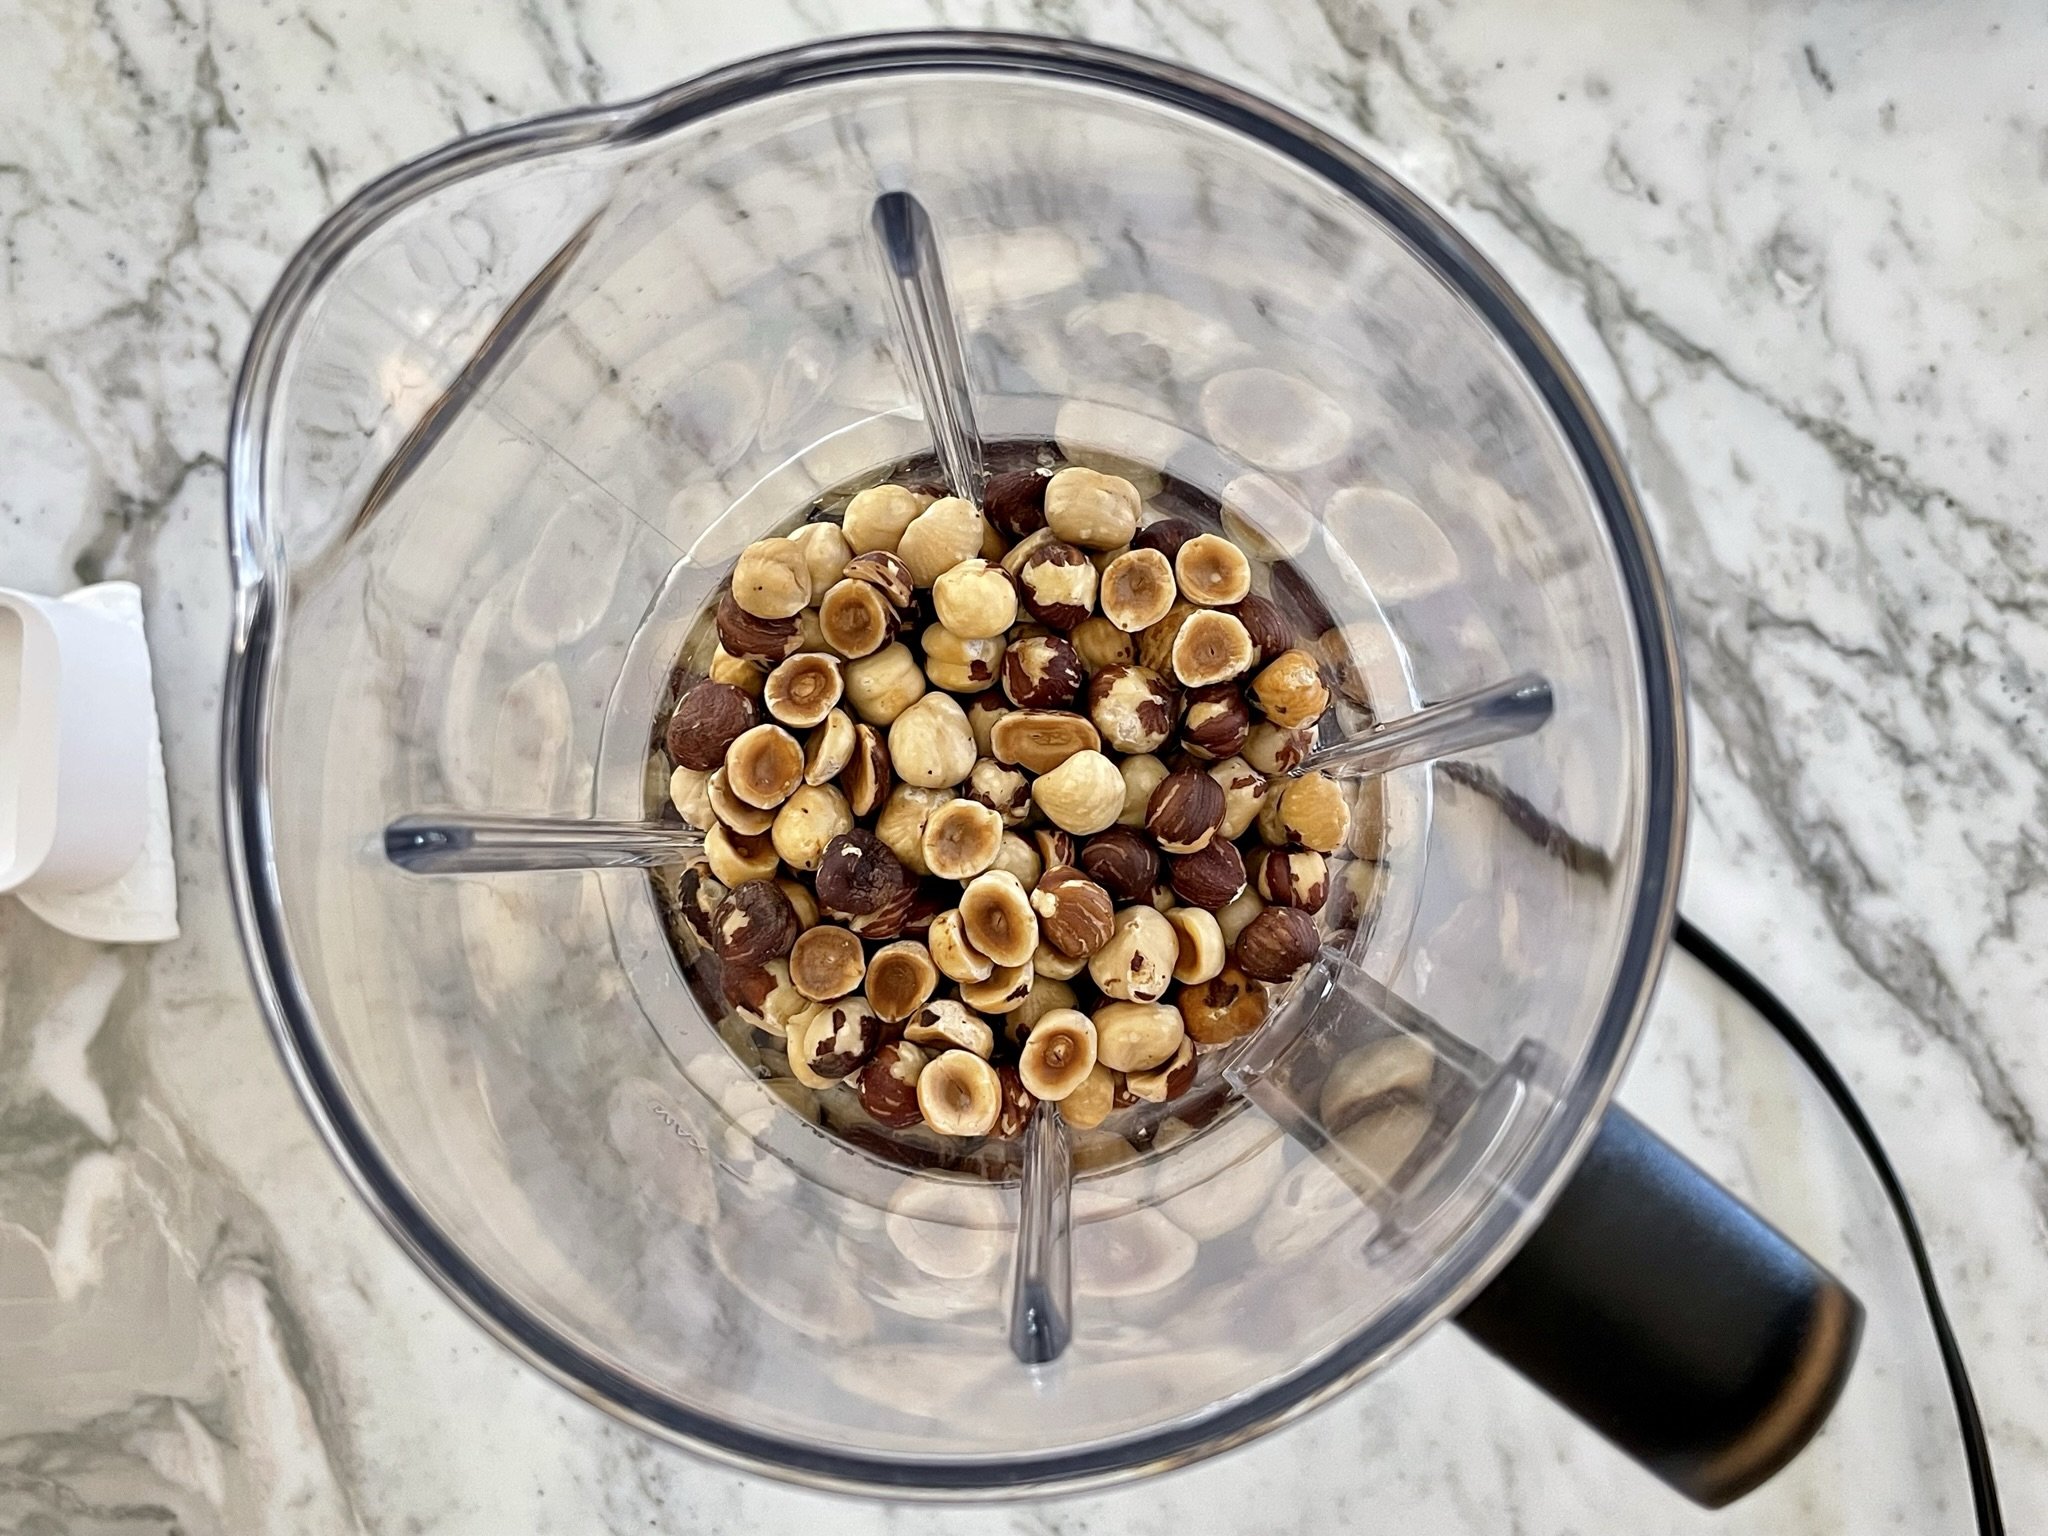
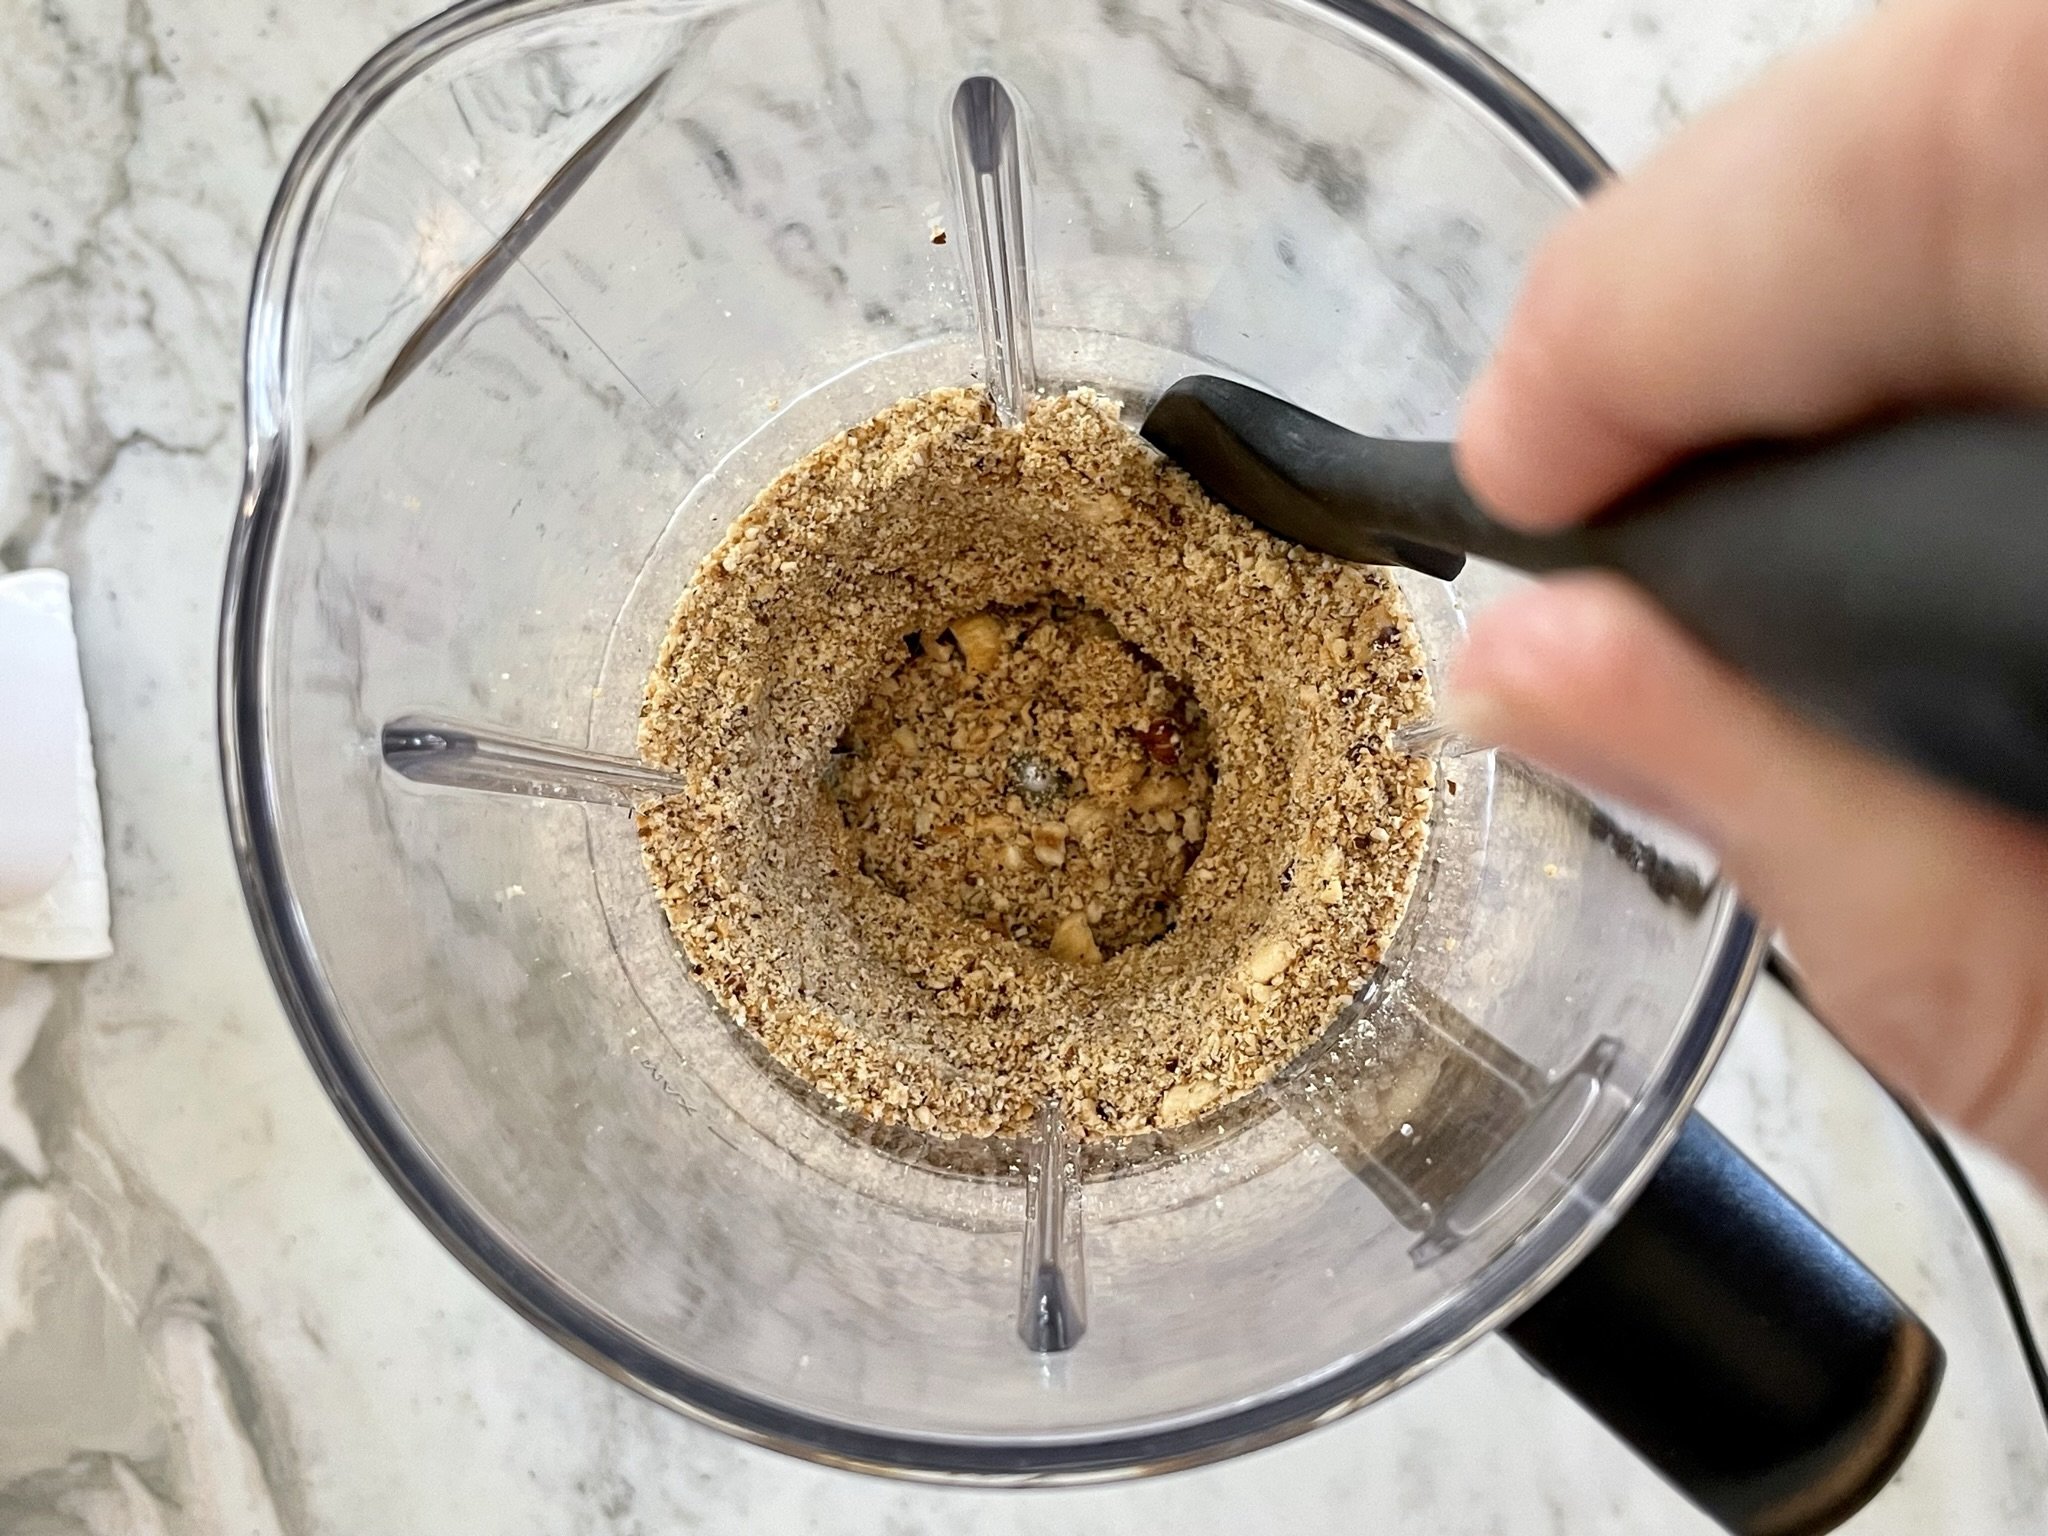
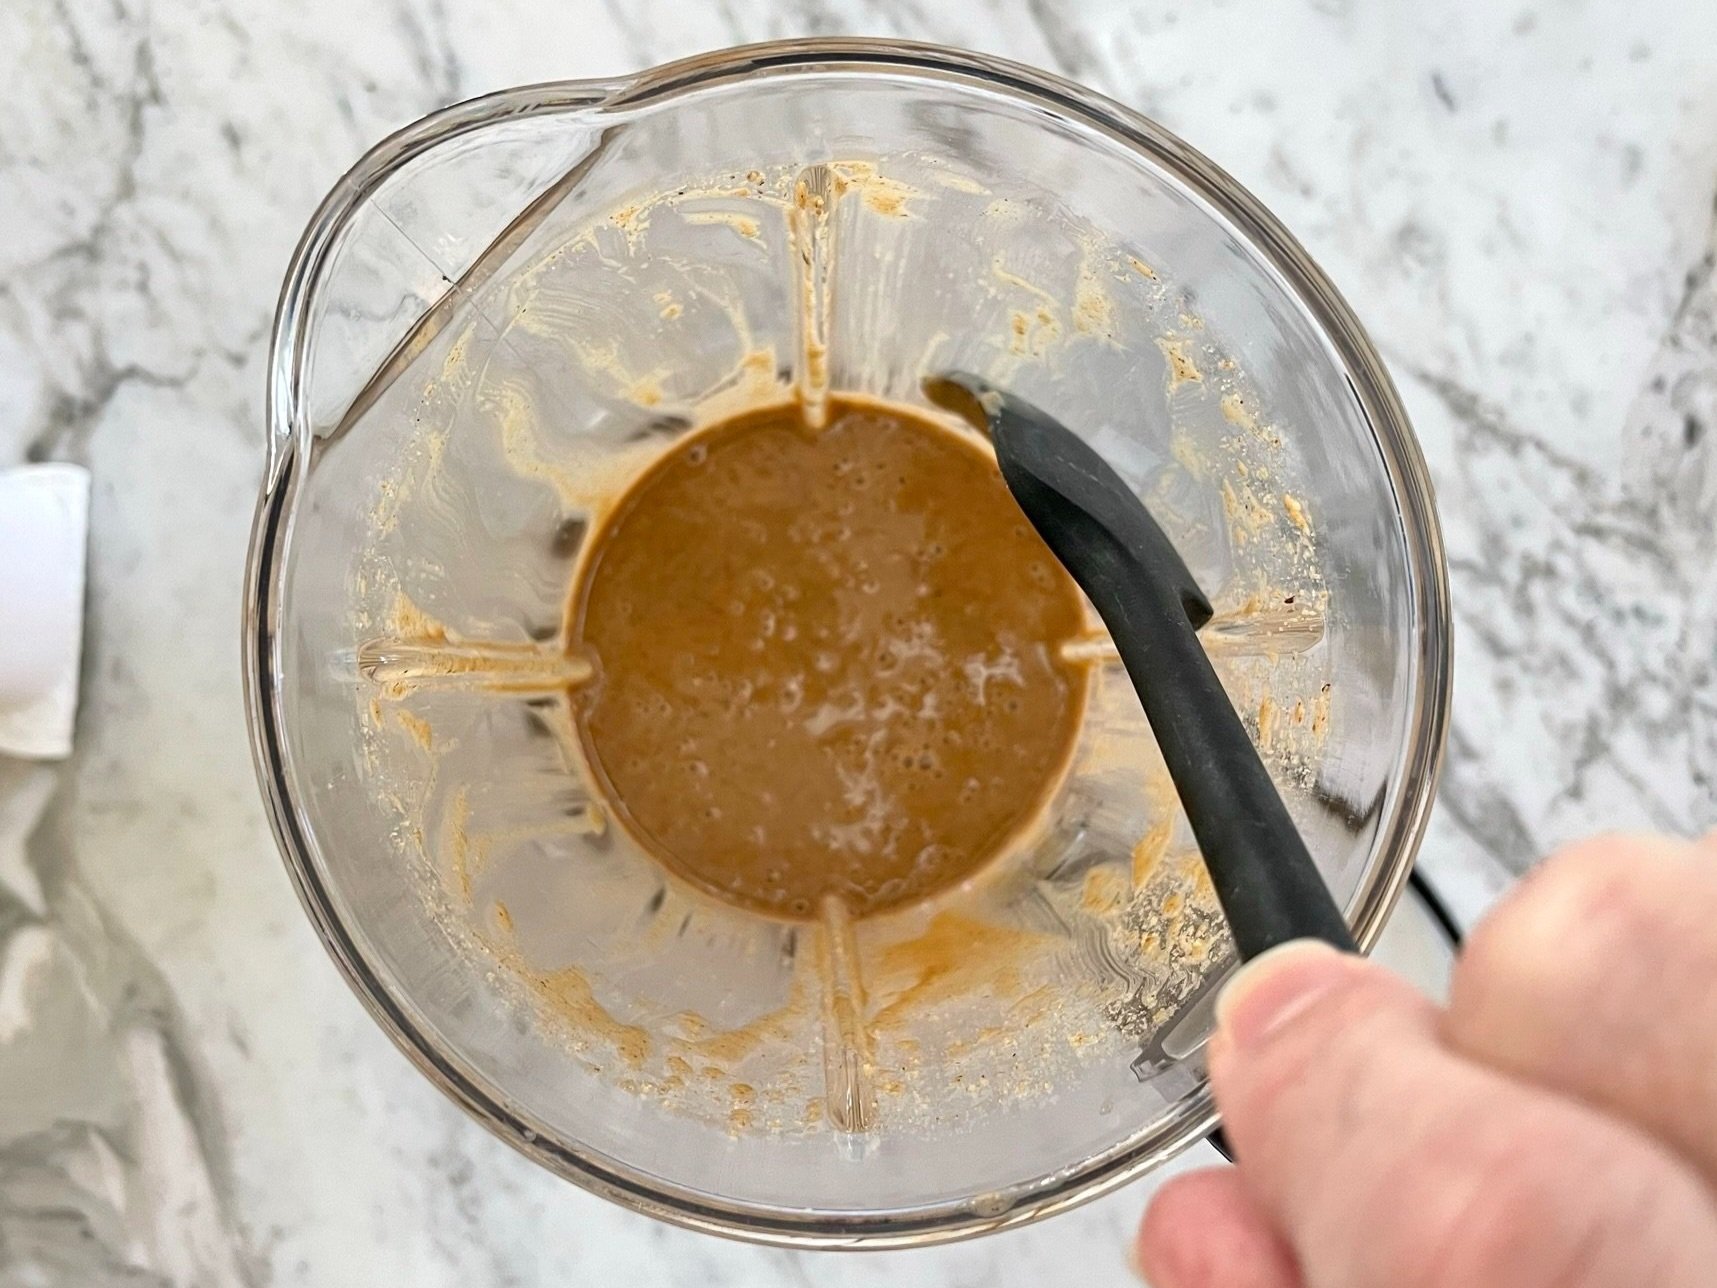
- Add warm nuts to a high speed blender (see Note #2), pulse a few times, then process for 15 seconds. Scrape down bottom and sides of the blender with a silicone spatula. With blender running, drizzle in melted coconut oil, and process for 4 minutes.
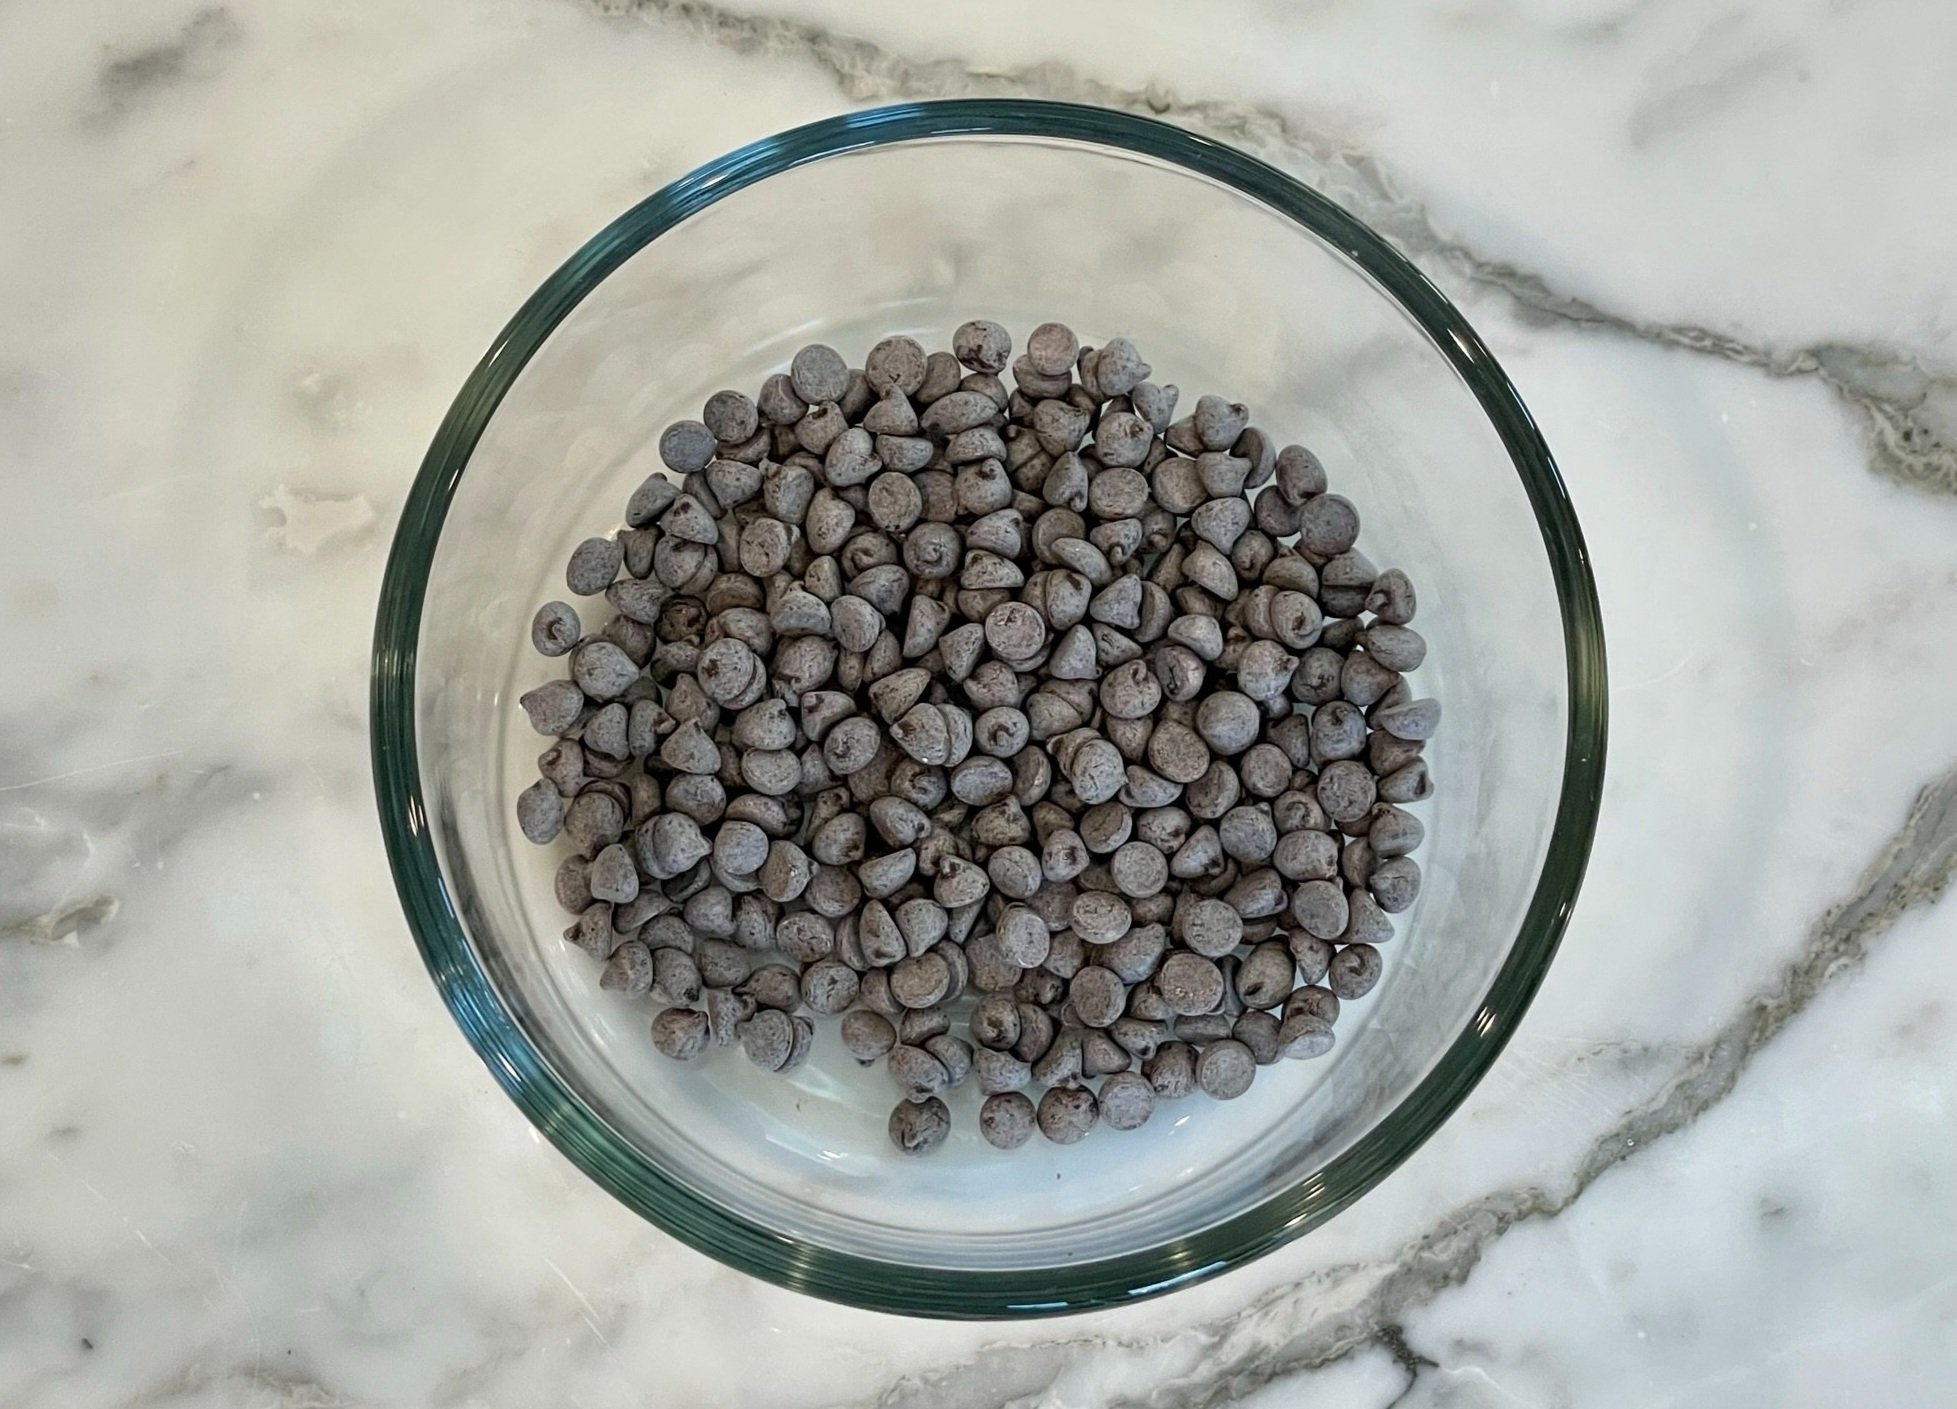
- While nuts are processing, melt chocolate chips in the microwave for 30 seconds, stir, then microwave again in increments of 15 seconds (stirring every 15 seconds) until almost melted. Remove from the microwave, and stir until all chips are melted, and chocolate is shiny. Set aside.
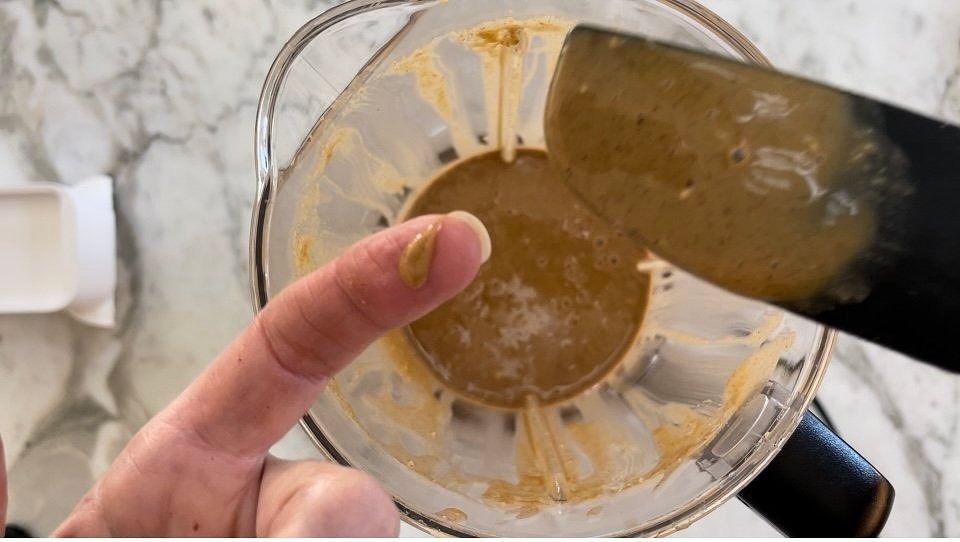
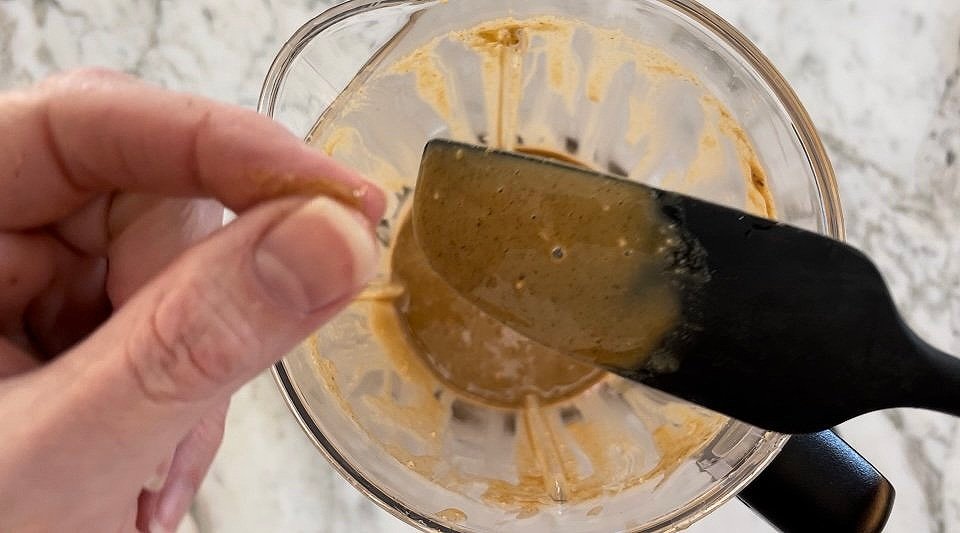
- Once nuts have finished processing, scrape blender again, and test for smoothness. Rub mixture between your thumb and index finger (CAUTION: nut mixture will be fairly hot!). If gritty, continue to process until smooth.
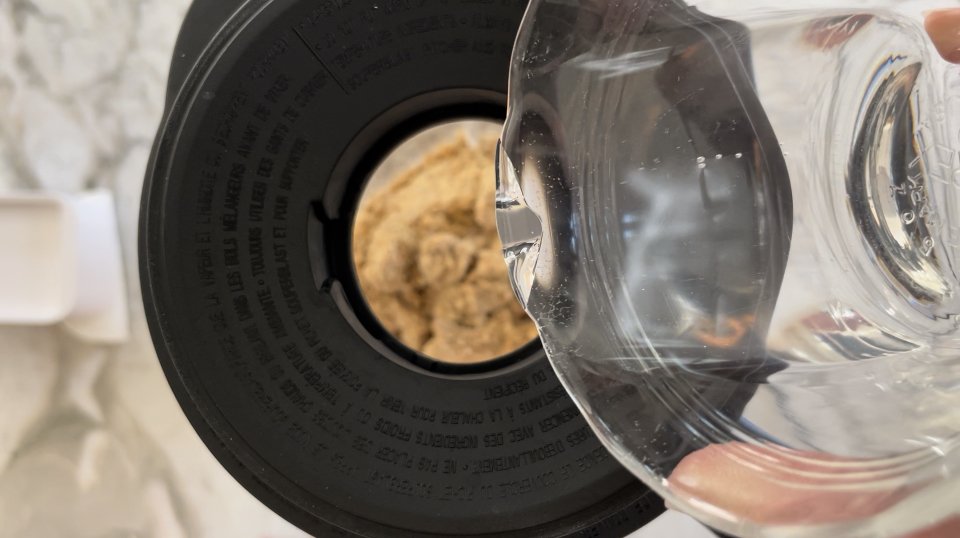
- Add powdered sugar, and cocoa powder. Blend until combined, and scrape again.
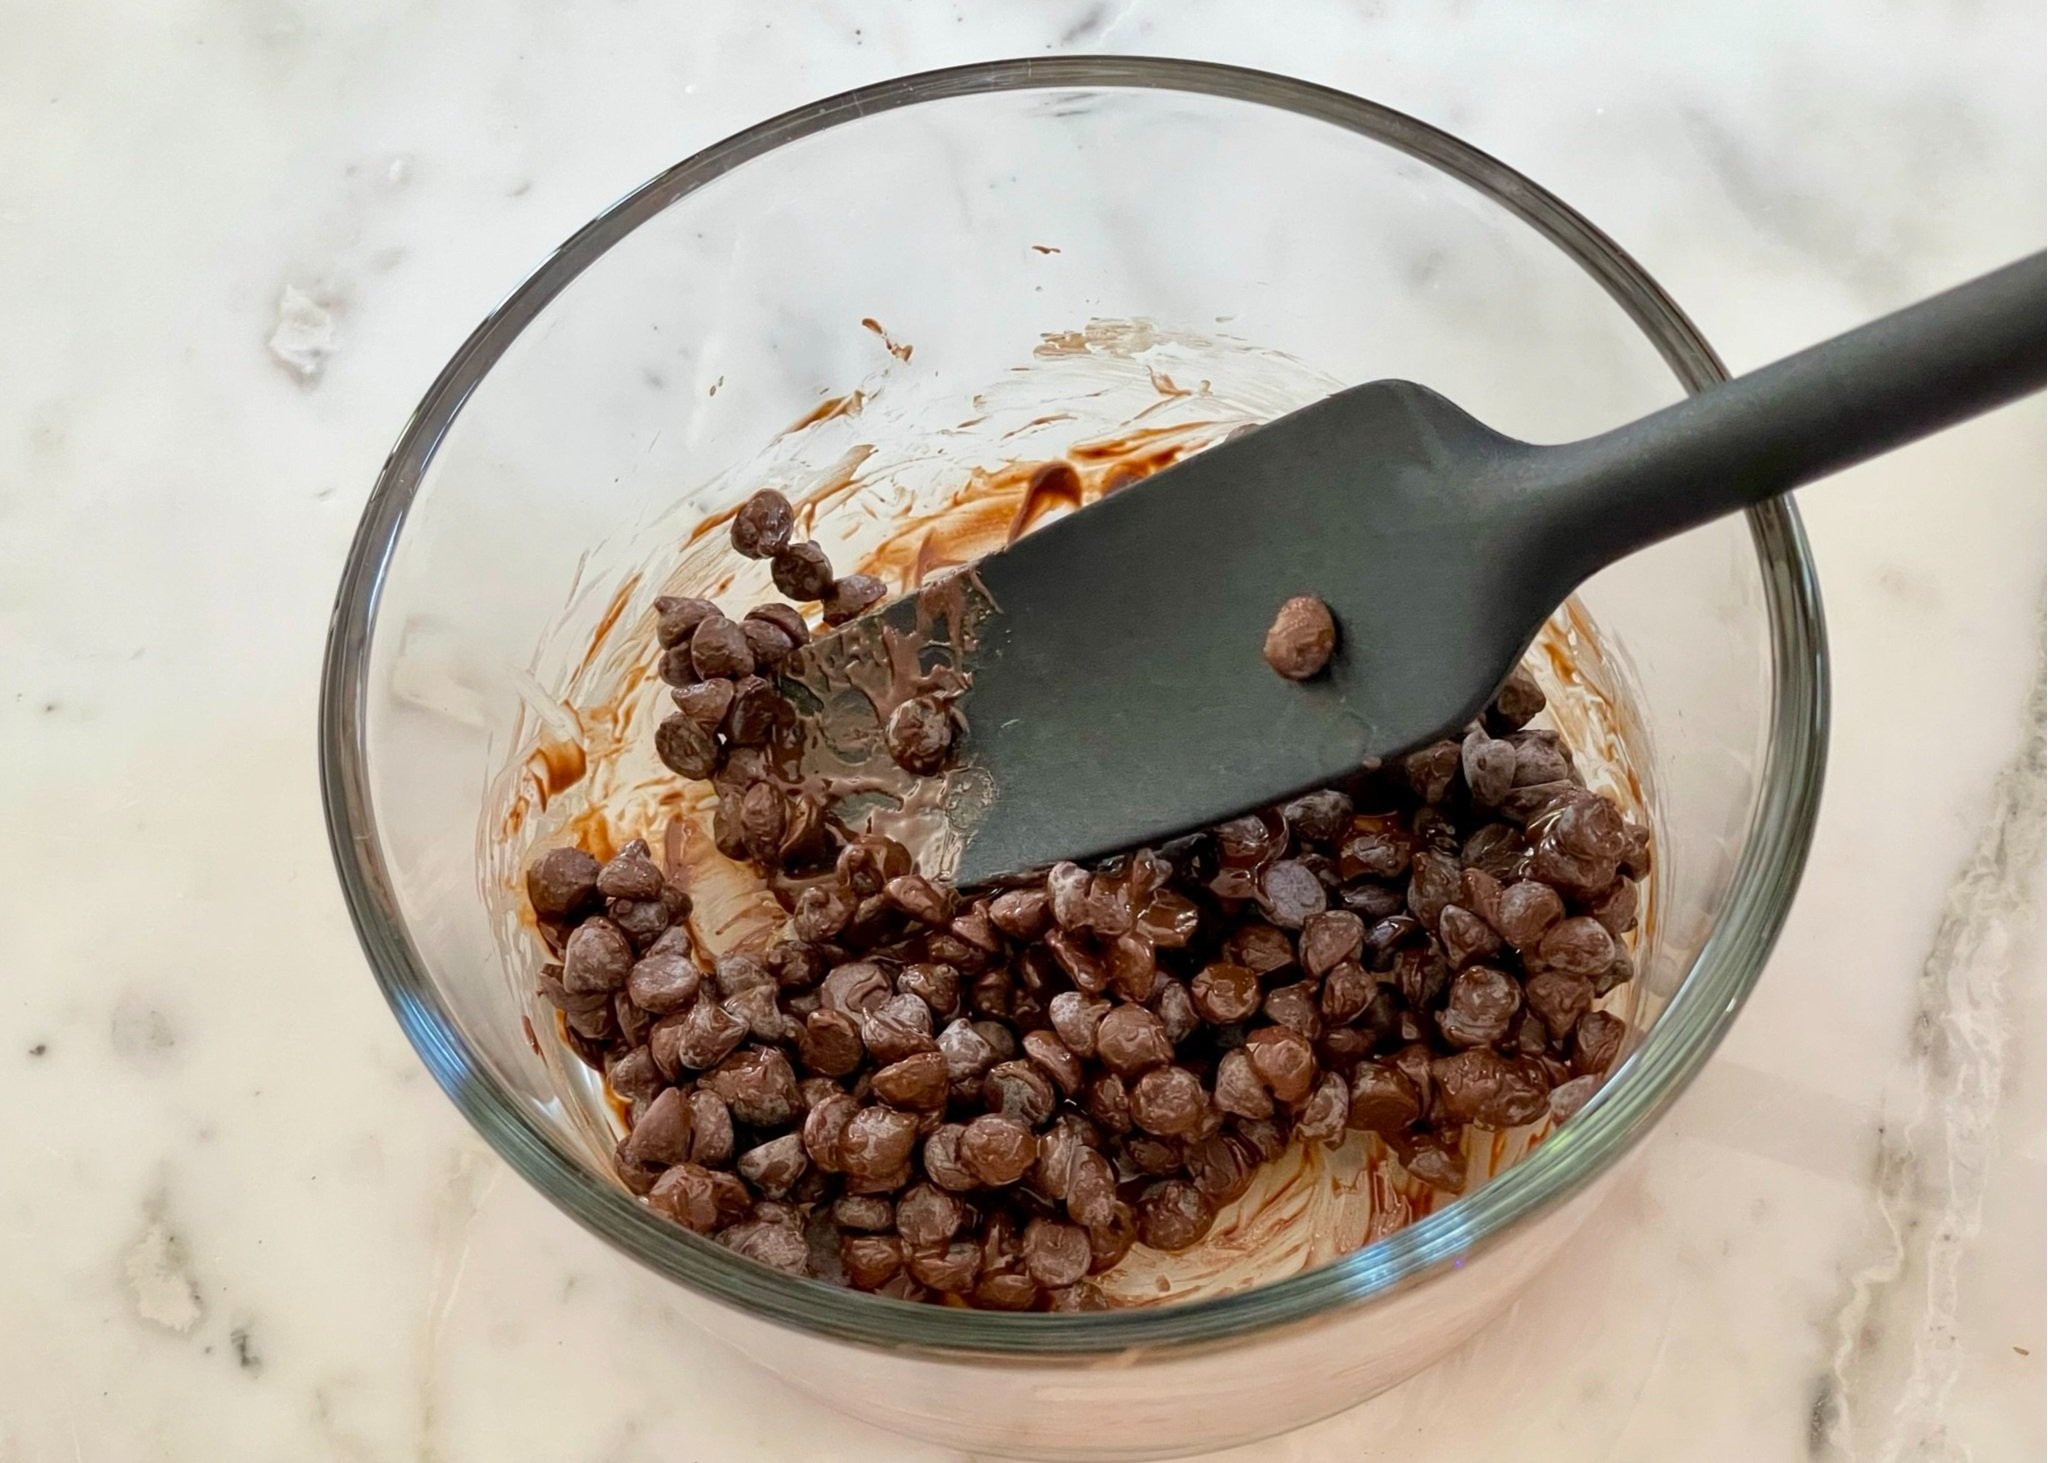
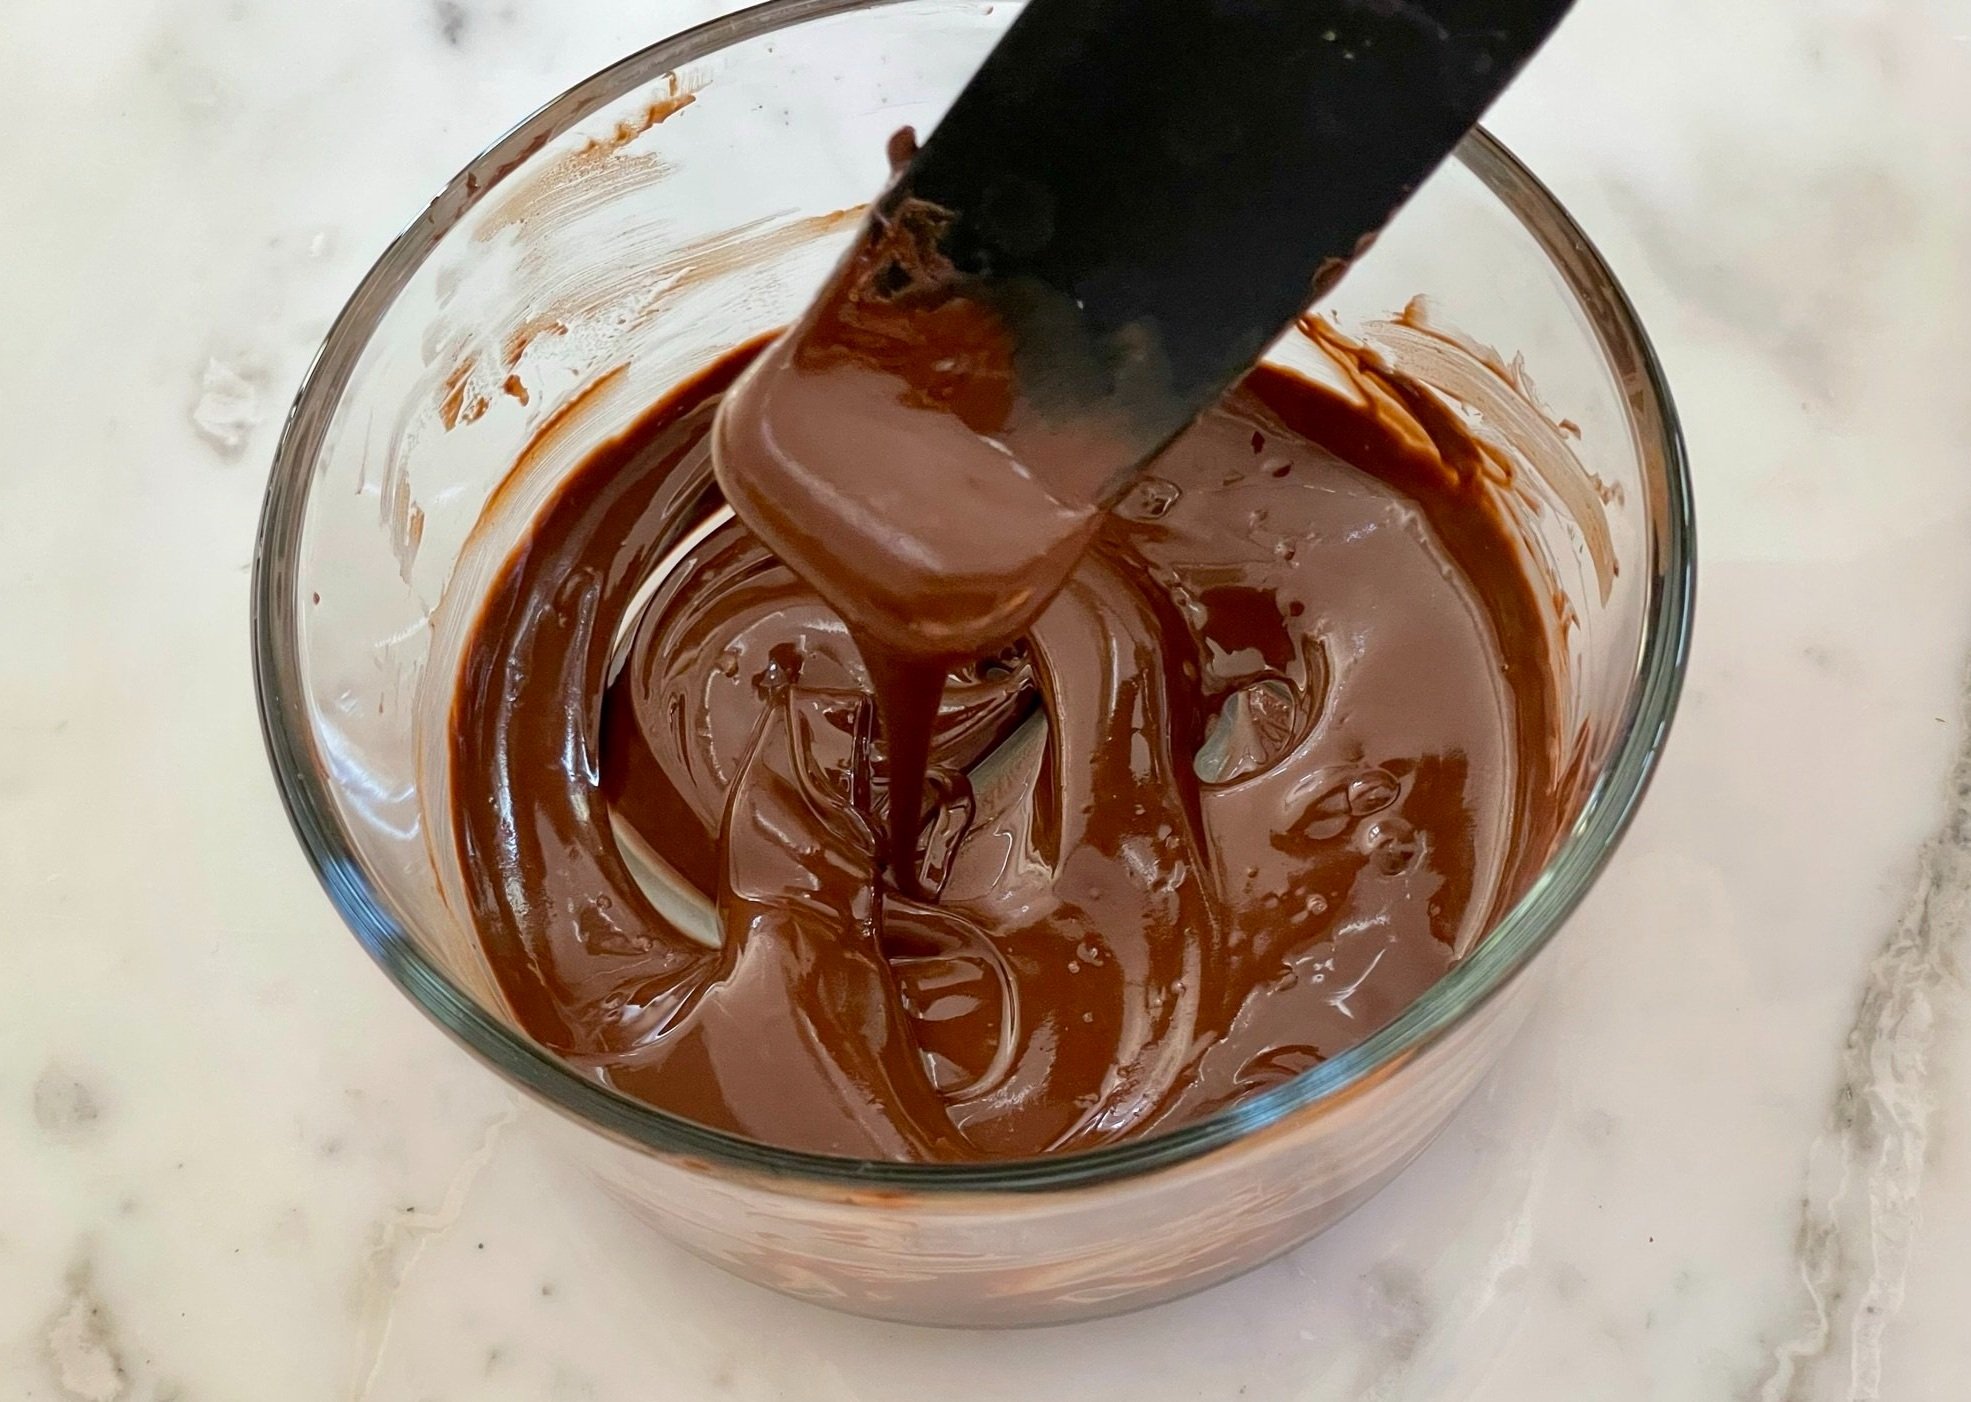
- Add warm melted chocolate, vanilla, and sea salt. Cover and process until smooth and creamy (see Note #3). Transfer to an airtight glass container, and allow to cool uncovered at room temperature. Once cooled, cover and refrigerate until ready to use.
Notes
- If your coconut oil is already in liquid form, you can skip this step as there is no need to melt. I used unrefined coconut oil, which solidifies in colder temperatures.
- Both the NutriBullet high speed blender, and the Vitamix high-speed blender work extremely well for this recipe.
- The hazelnut spread may appear liquidy due to the heat from processing in the high speed blender. The mixture will become thicker as the mixture cools. Refrigeration will solidify the spread.
- Store refrigerated in an airtight glass container for up to one month. For a softer consistency, allow the spread to sit at room temperature for about 5 minutes before using.
- Recipe can be made ahead!
- It’s amazing on my Nutty Indoor S’mores.
- Makes about 1 ¾ cups (28 servings, 1 tablespoon per serving).


Nutrition Facts
Calories
98.64Fat (grams)
8.38Sat. Fat (grams)
1.72Carbs (grams)
6.58Fiber (grams)
1.54Net carbs
5.04Sugar (grams)
4.36Protein (grams)
2.05Sodium (milligrams)
21.2Cholesterol (grams)
0Nutritional information provided is strictly an estimate and will vary based on ingredient brands and cooking methods.
Step by Step Instructions

PREPARATION
Organize all your tools and ingredients before you begin. Getting all your ingredients in one place at the beginning will shorten your prep time.
STEP 1
Place rack in the center of the oven and preheat oven to 375°F. Line a baking sheet pan with parchment paper. Spread 2 cups of unsalted dry roasted hazelnuts (10 ounces) in a single layer on the baking sheet. Roast nuts for 10 to 15 minutes until warmed through and fragrant, shaking the pan halfway through the roasting process.
Note: Although you are starting off with roasted hazelnuts, it’s important that you roast them again to warm them up and become fragrant. Just be careful not to burn them.
STEP 2
While nuts are roasting, add 2 tablespoons coconut oil (see Note below) to a small microwave dish, melt in the microwave (about 15 to 20 seconds), and set aside.
Note: If your coconut oil is already in liquid form, you can skip this step as there is no need to melt. I used unrefined coconut oil, which solidifies in colder temperatures.
STEP 3a
Once nuts are roasted and fragrant, remove from the oven.
STEP 3b
Transfer hazelnuts to a dry, clean kitchen towel, and let cool slightly (only 1-2 minutes). Then gather the ends of the towel together, rubbing the bottom of the towel firmly against the warm hazelnuts to separate the skins. Unwrap and separate the nuts from the skins (discard skins).
STEP 4
Add warm nuts to a high speed blender (see Note below), pulse a few times, then process for 15 seconds. Stop and scrape down the bottom and sides of the blender with a silicone spatula. With the blender running, drizzle in melted coconut oil, and process for 4 minutes.
Note: Both the NutriBullet high speed blender, and the Vitamix high-speed blender work extremely well for this recipe.
STEP 5
While the nuts are processing, add ¼ cup semi-sweet chocolate chips to a small microwave safe bowl. Melt in the microwave for 30 seconds, stir, then microwave again in increments of 15 seconds (stirring every 15 seconds) until almost melted. Remove from the microwave, and stir until all chips are melted, and chocolate is shiny. Set aside.
STEP 6
Once nuts have finished processing, scrape the blender again, and test for smoothness by rubbing a little mixture between your thumb and index finger (CAUTION: nut mixture will be fairly hot!). If it feels gritty, continue to process until smooth, and test again. Once there is no grit, continue with the next step.
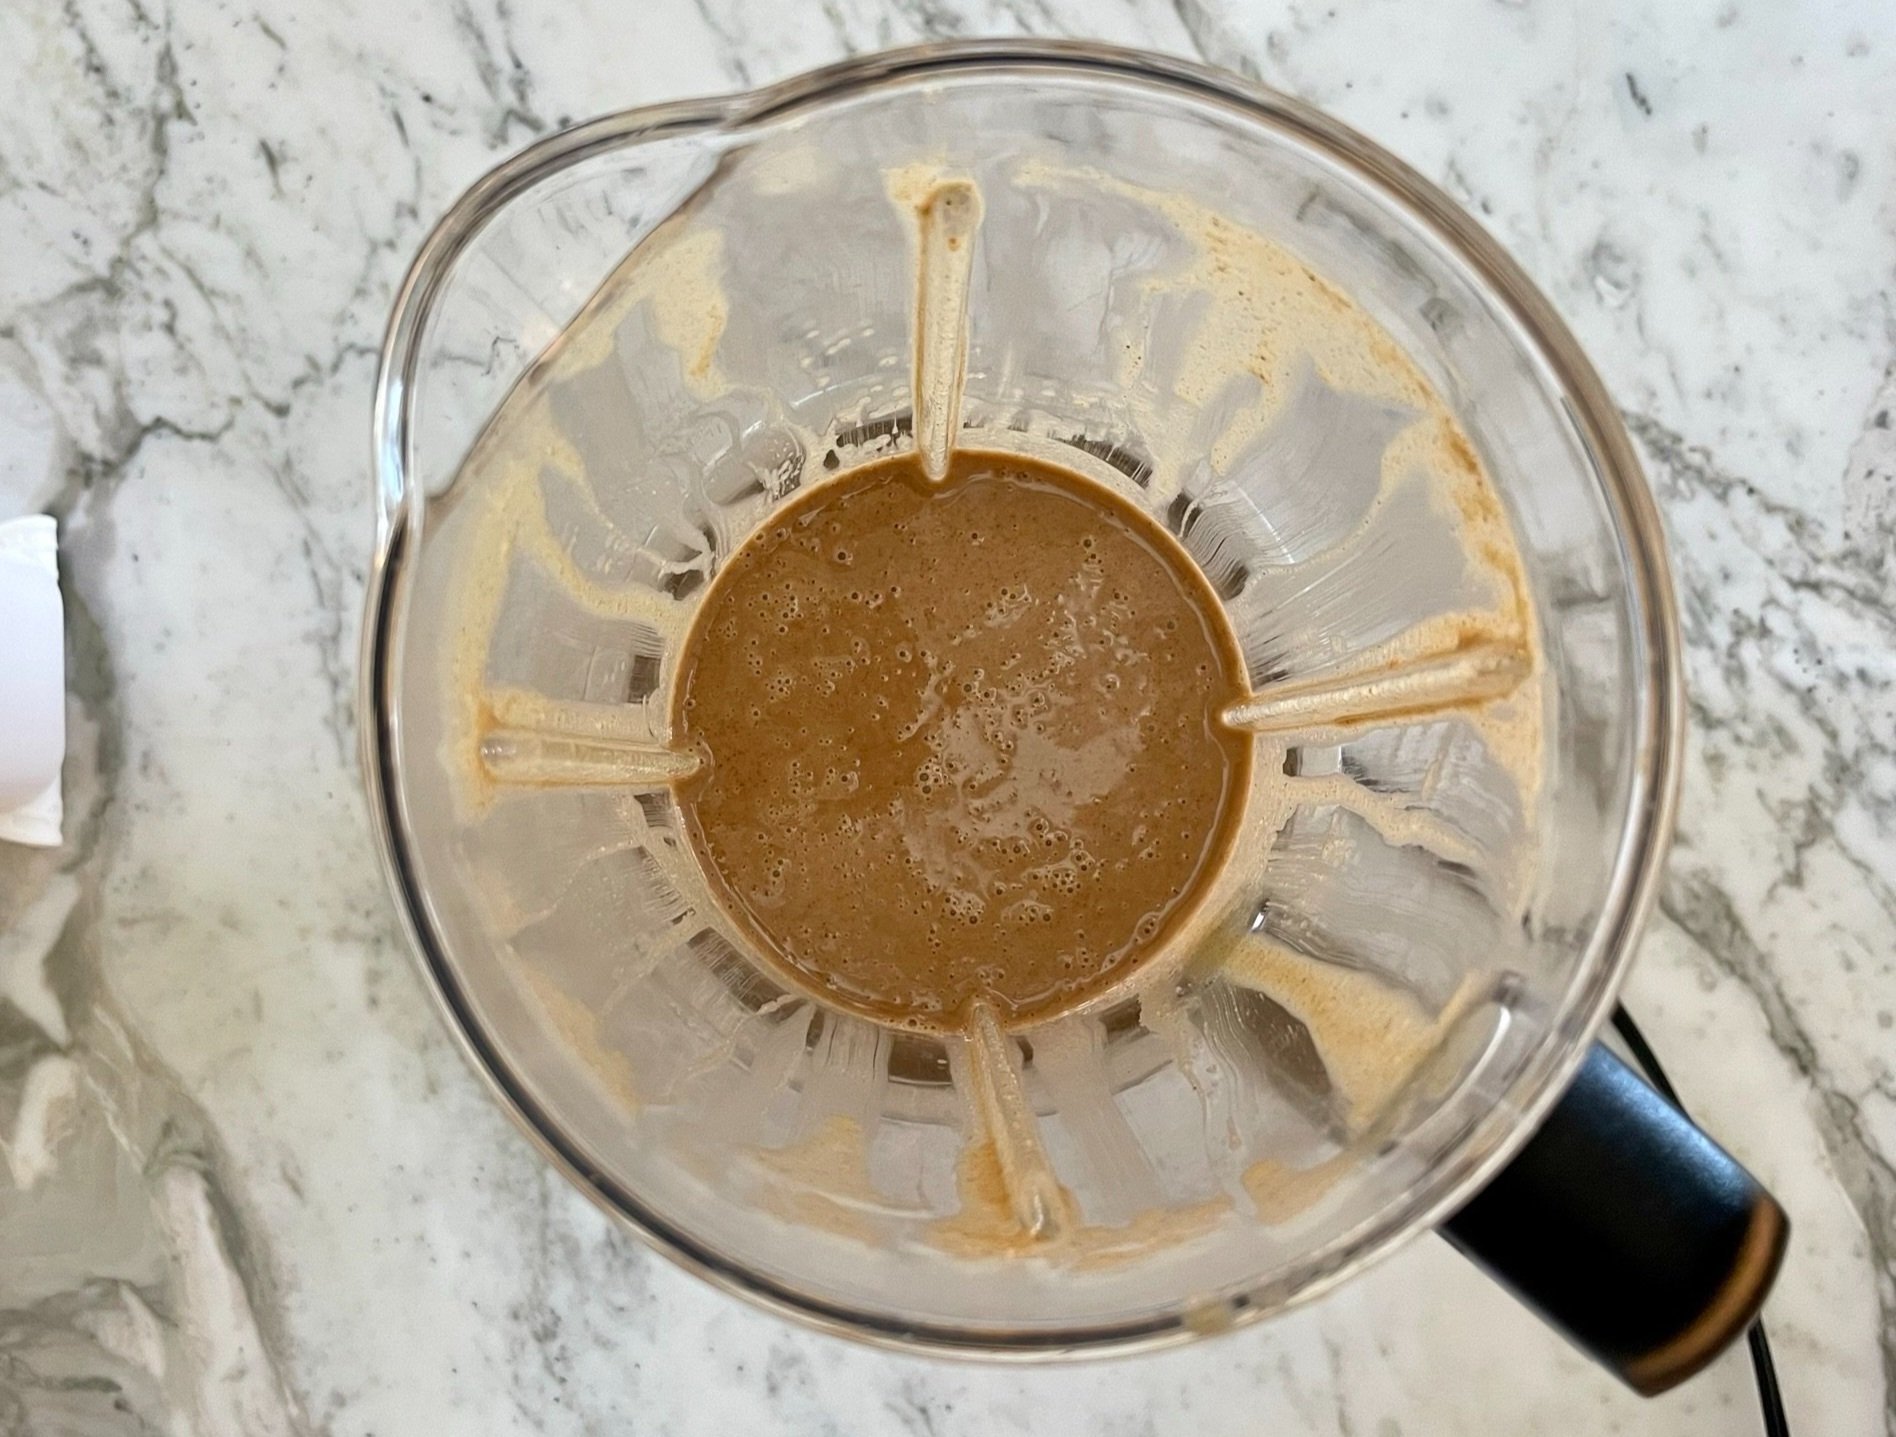
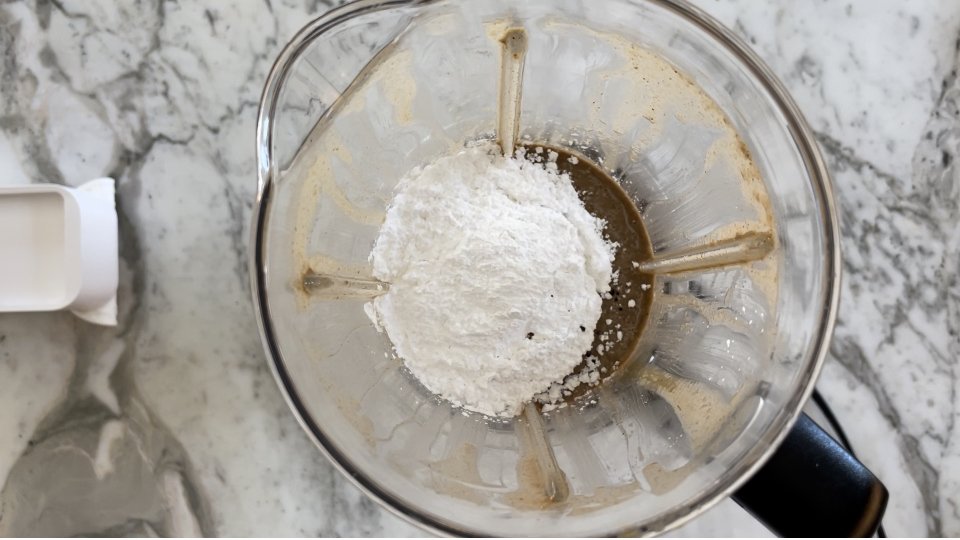
STEP 7
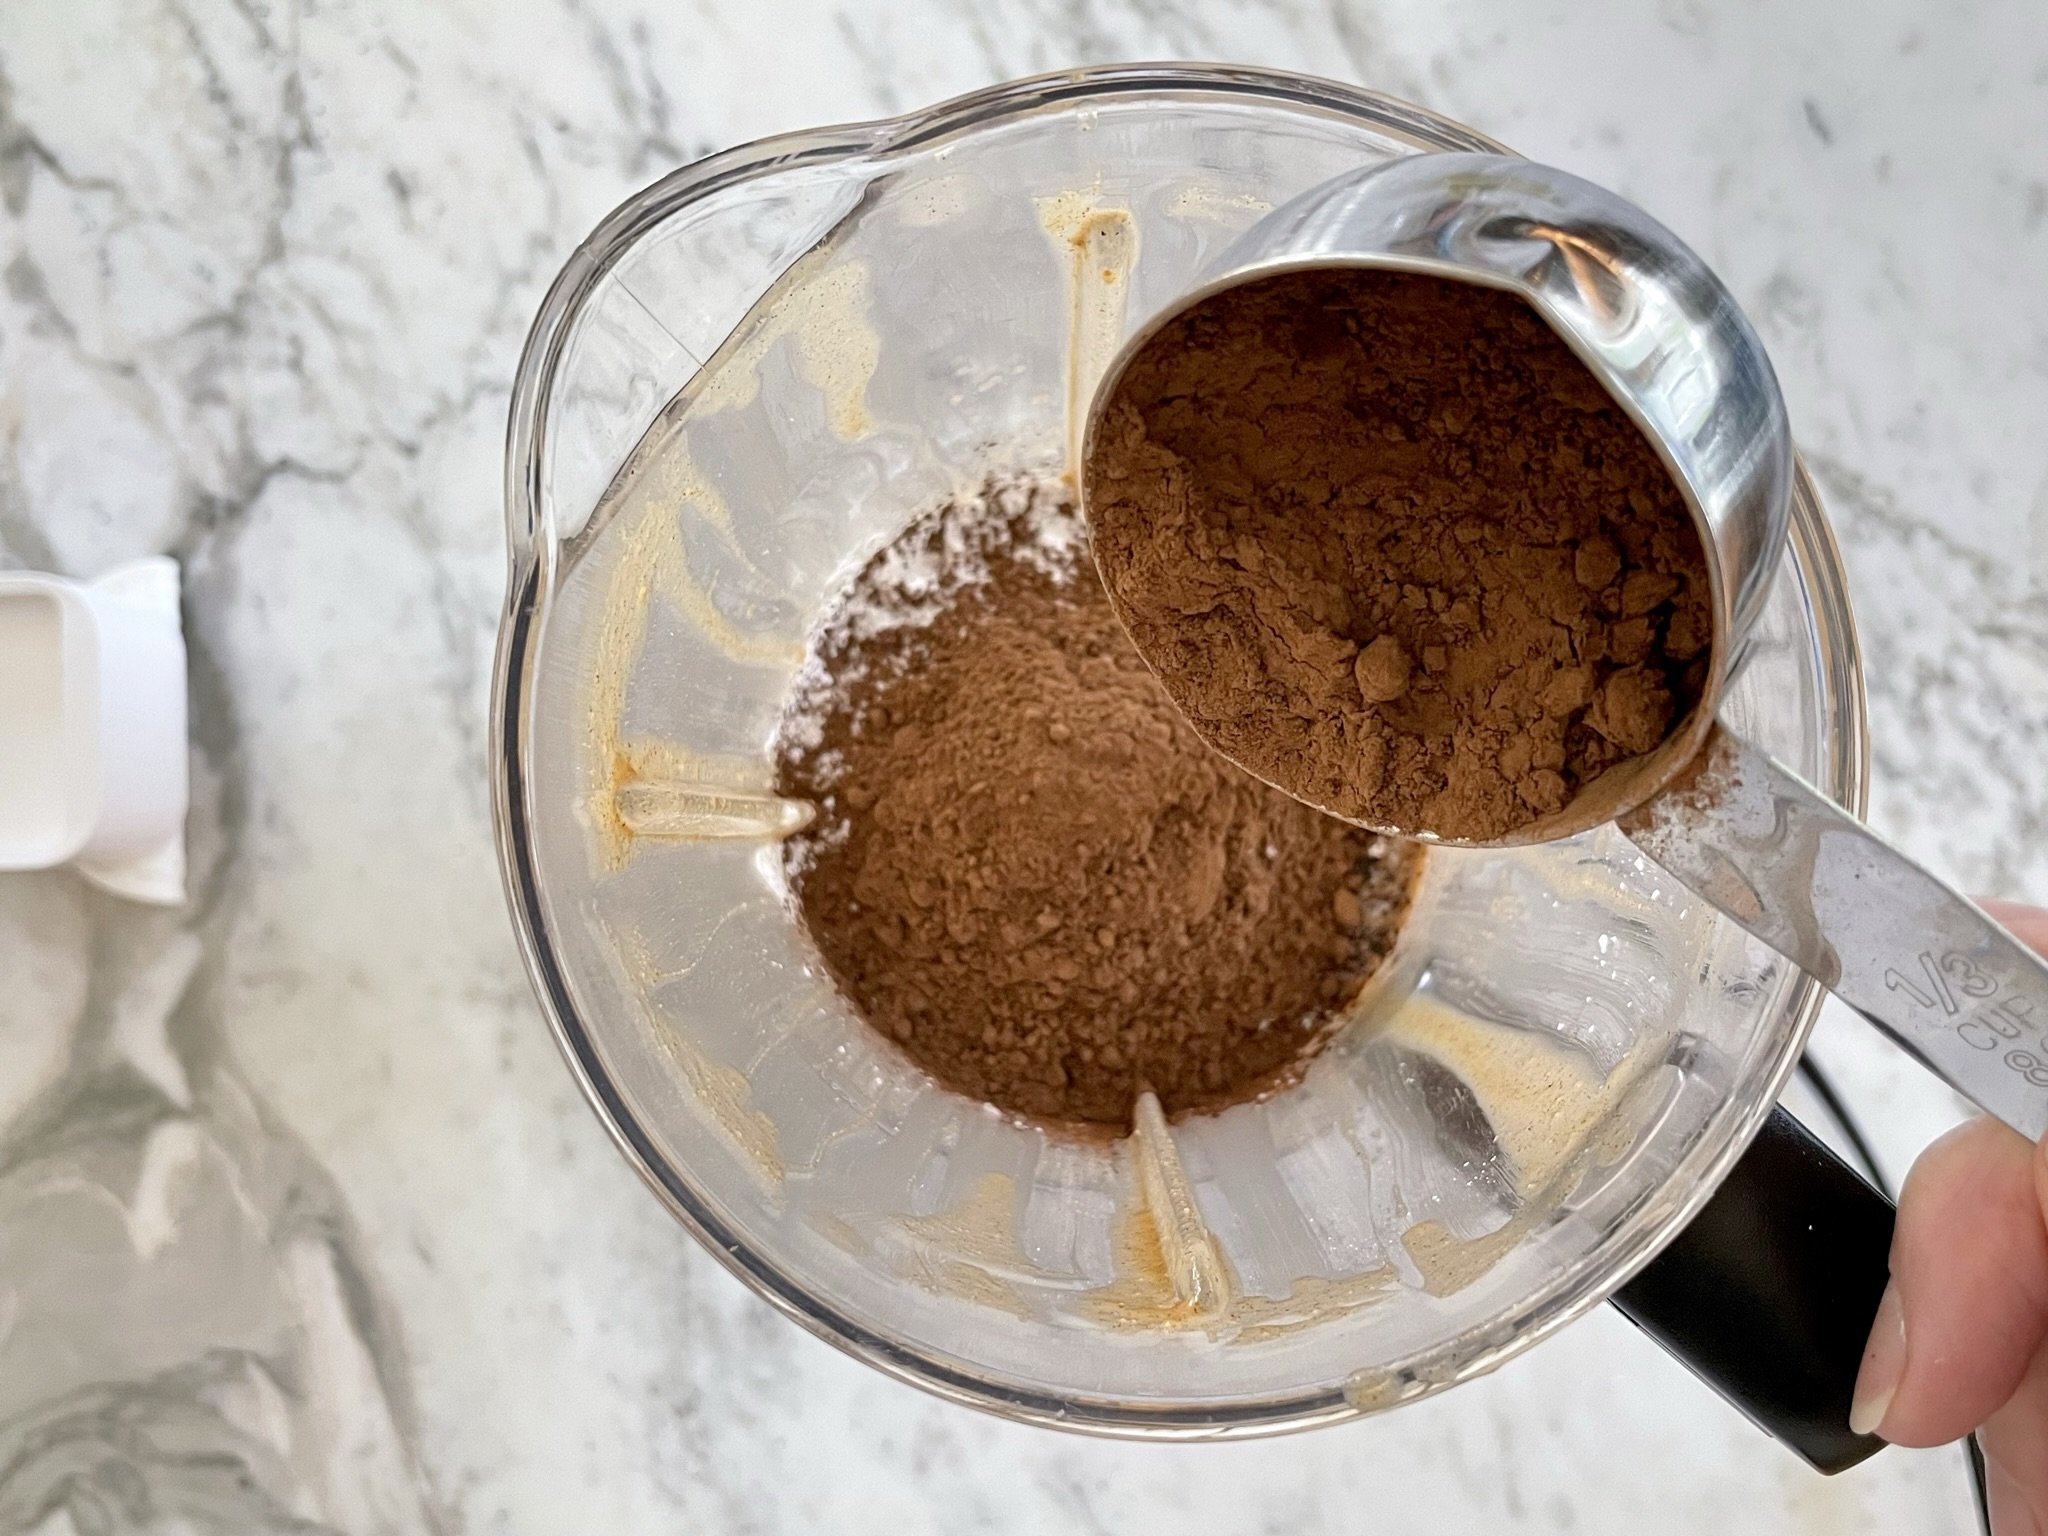
Add ¾ cup aerated powdered sugar (see Note below), and ⅓ cup unsweetened Dutch processed cocoa powder. Blend until combined, and scrape down bottom and sides again.
Note: To learn how to aerate powdered sugar, visit my Tips & Tricks page and watch the how to video, TIP #1 - Aerate & Measure Flour. This tip not only works for flour, but most dry ingredients.
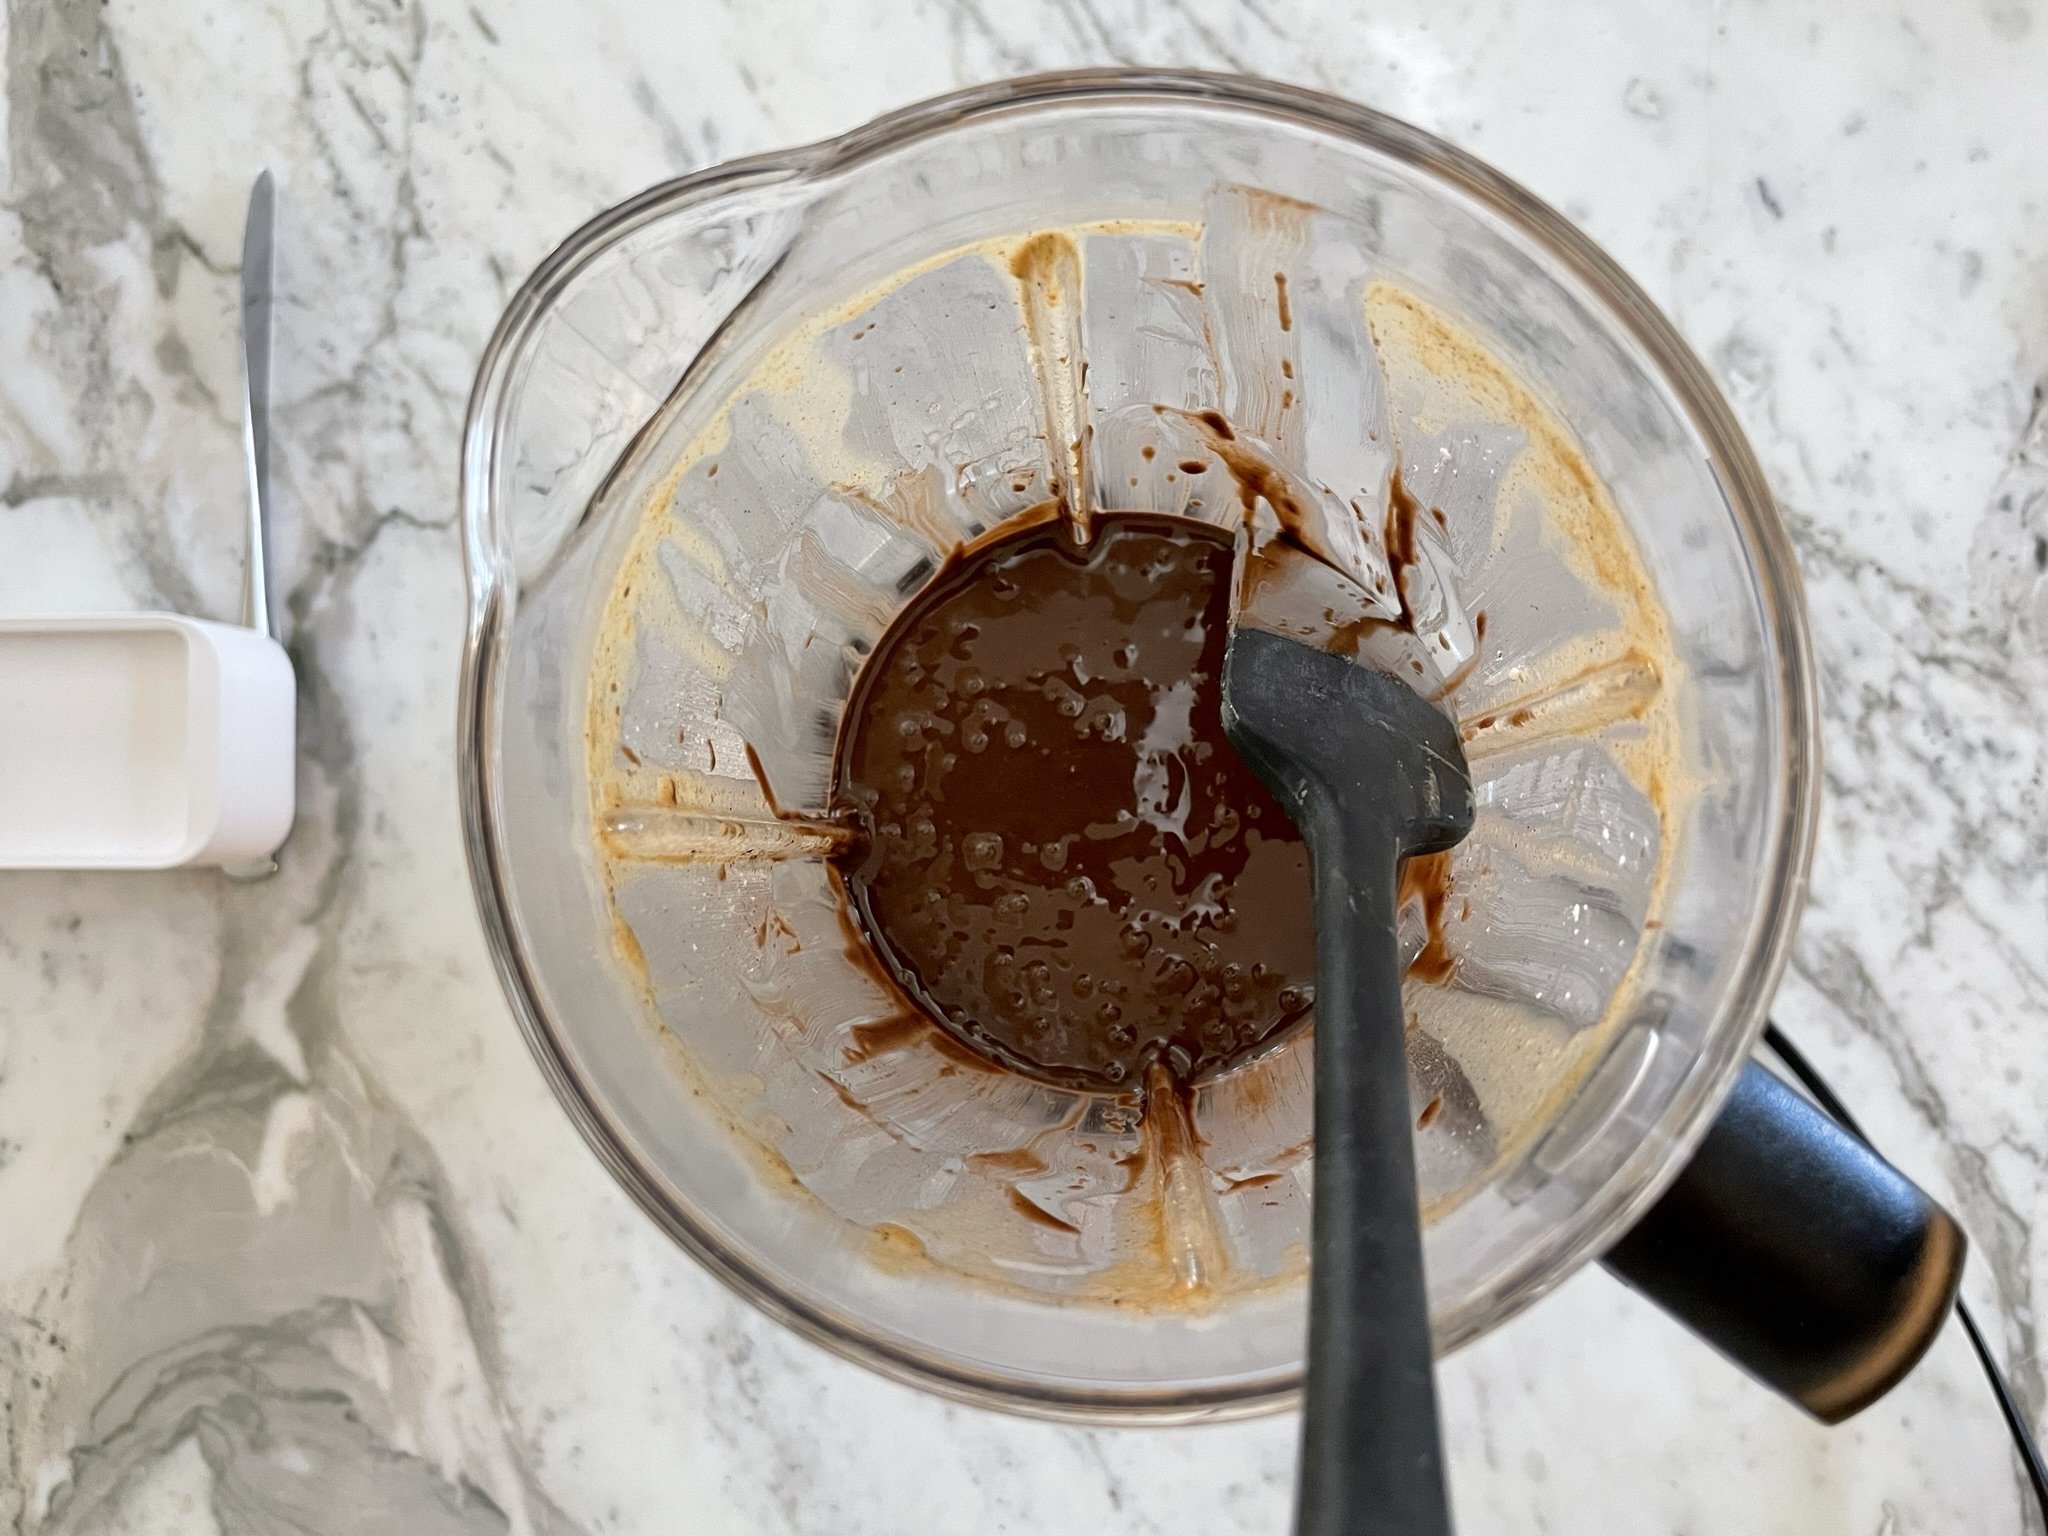
STEP 8a
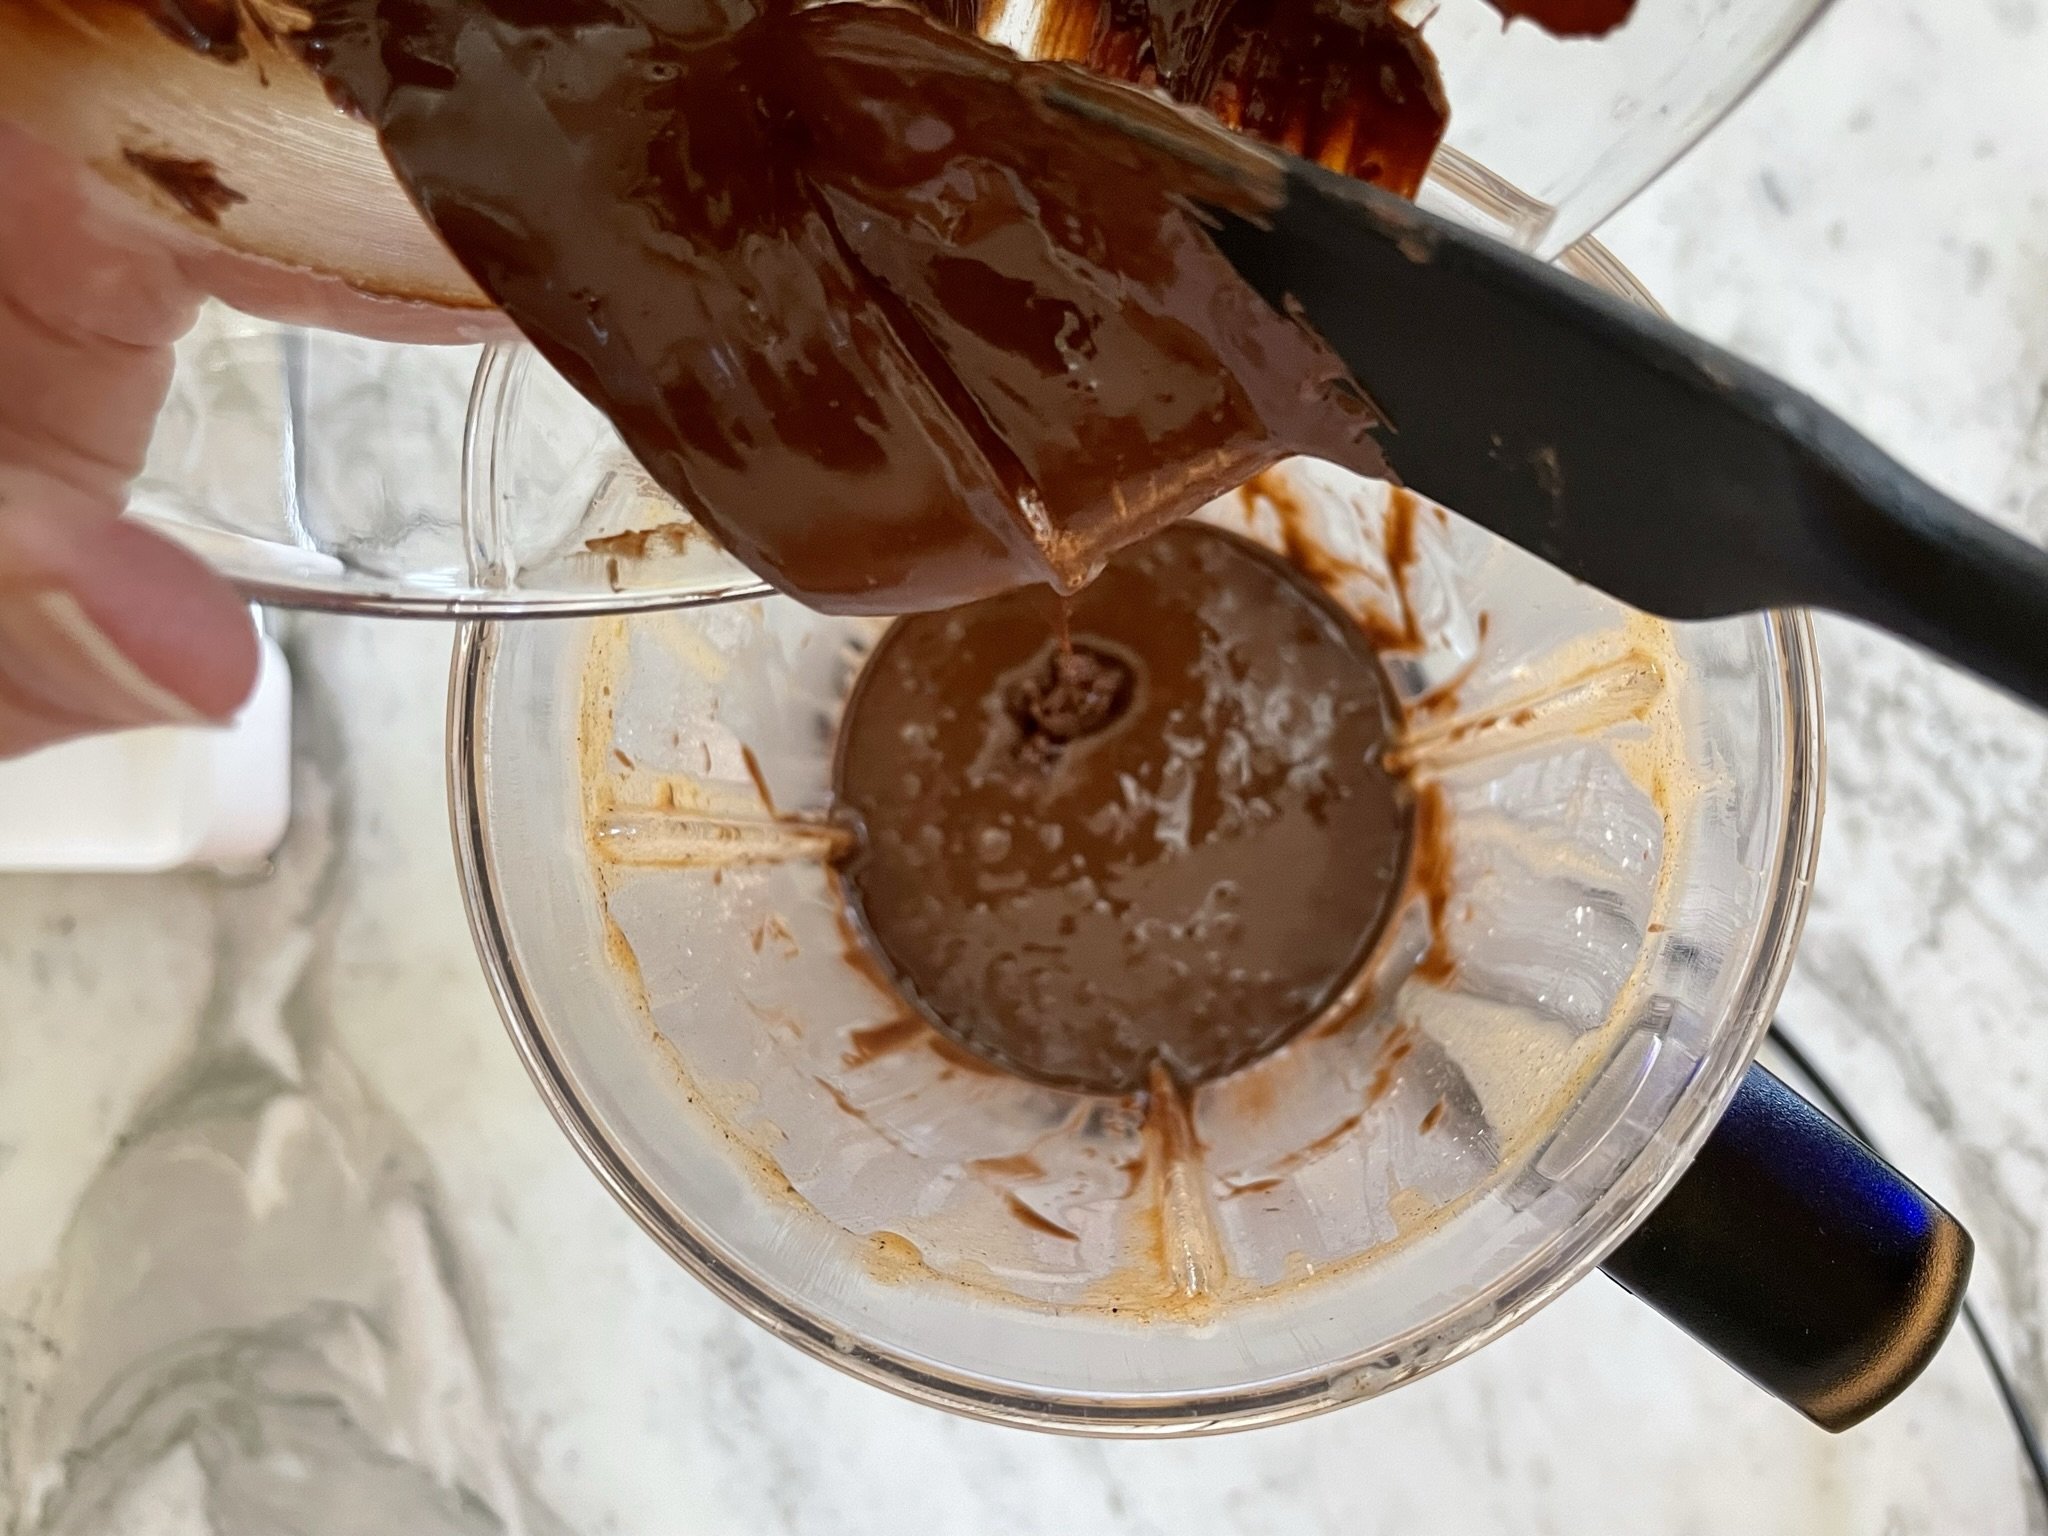
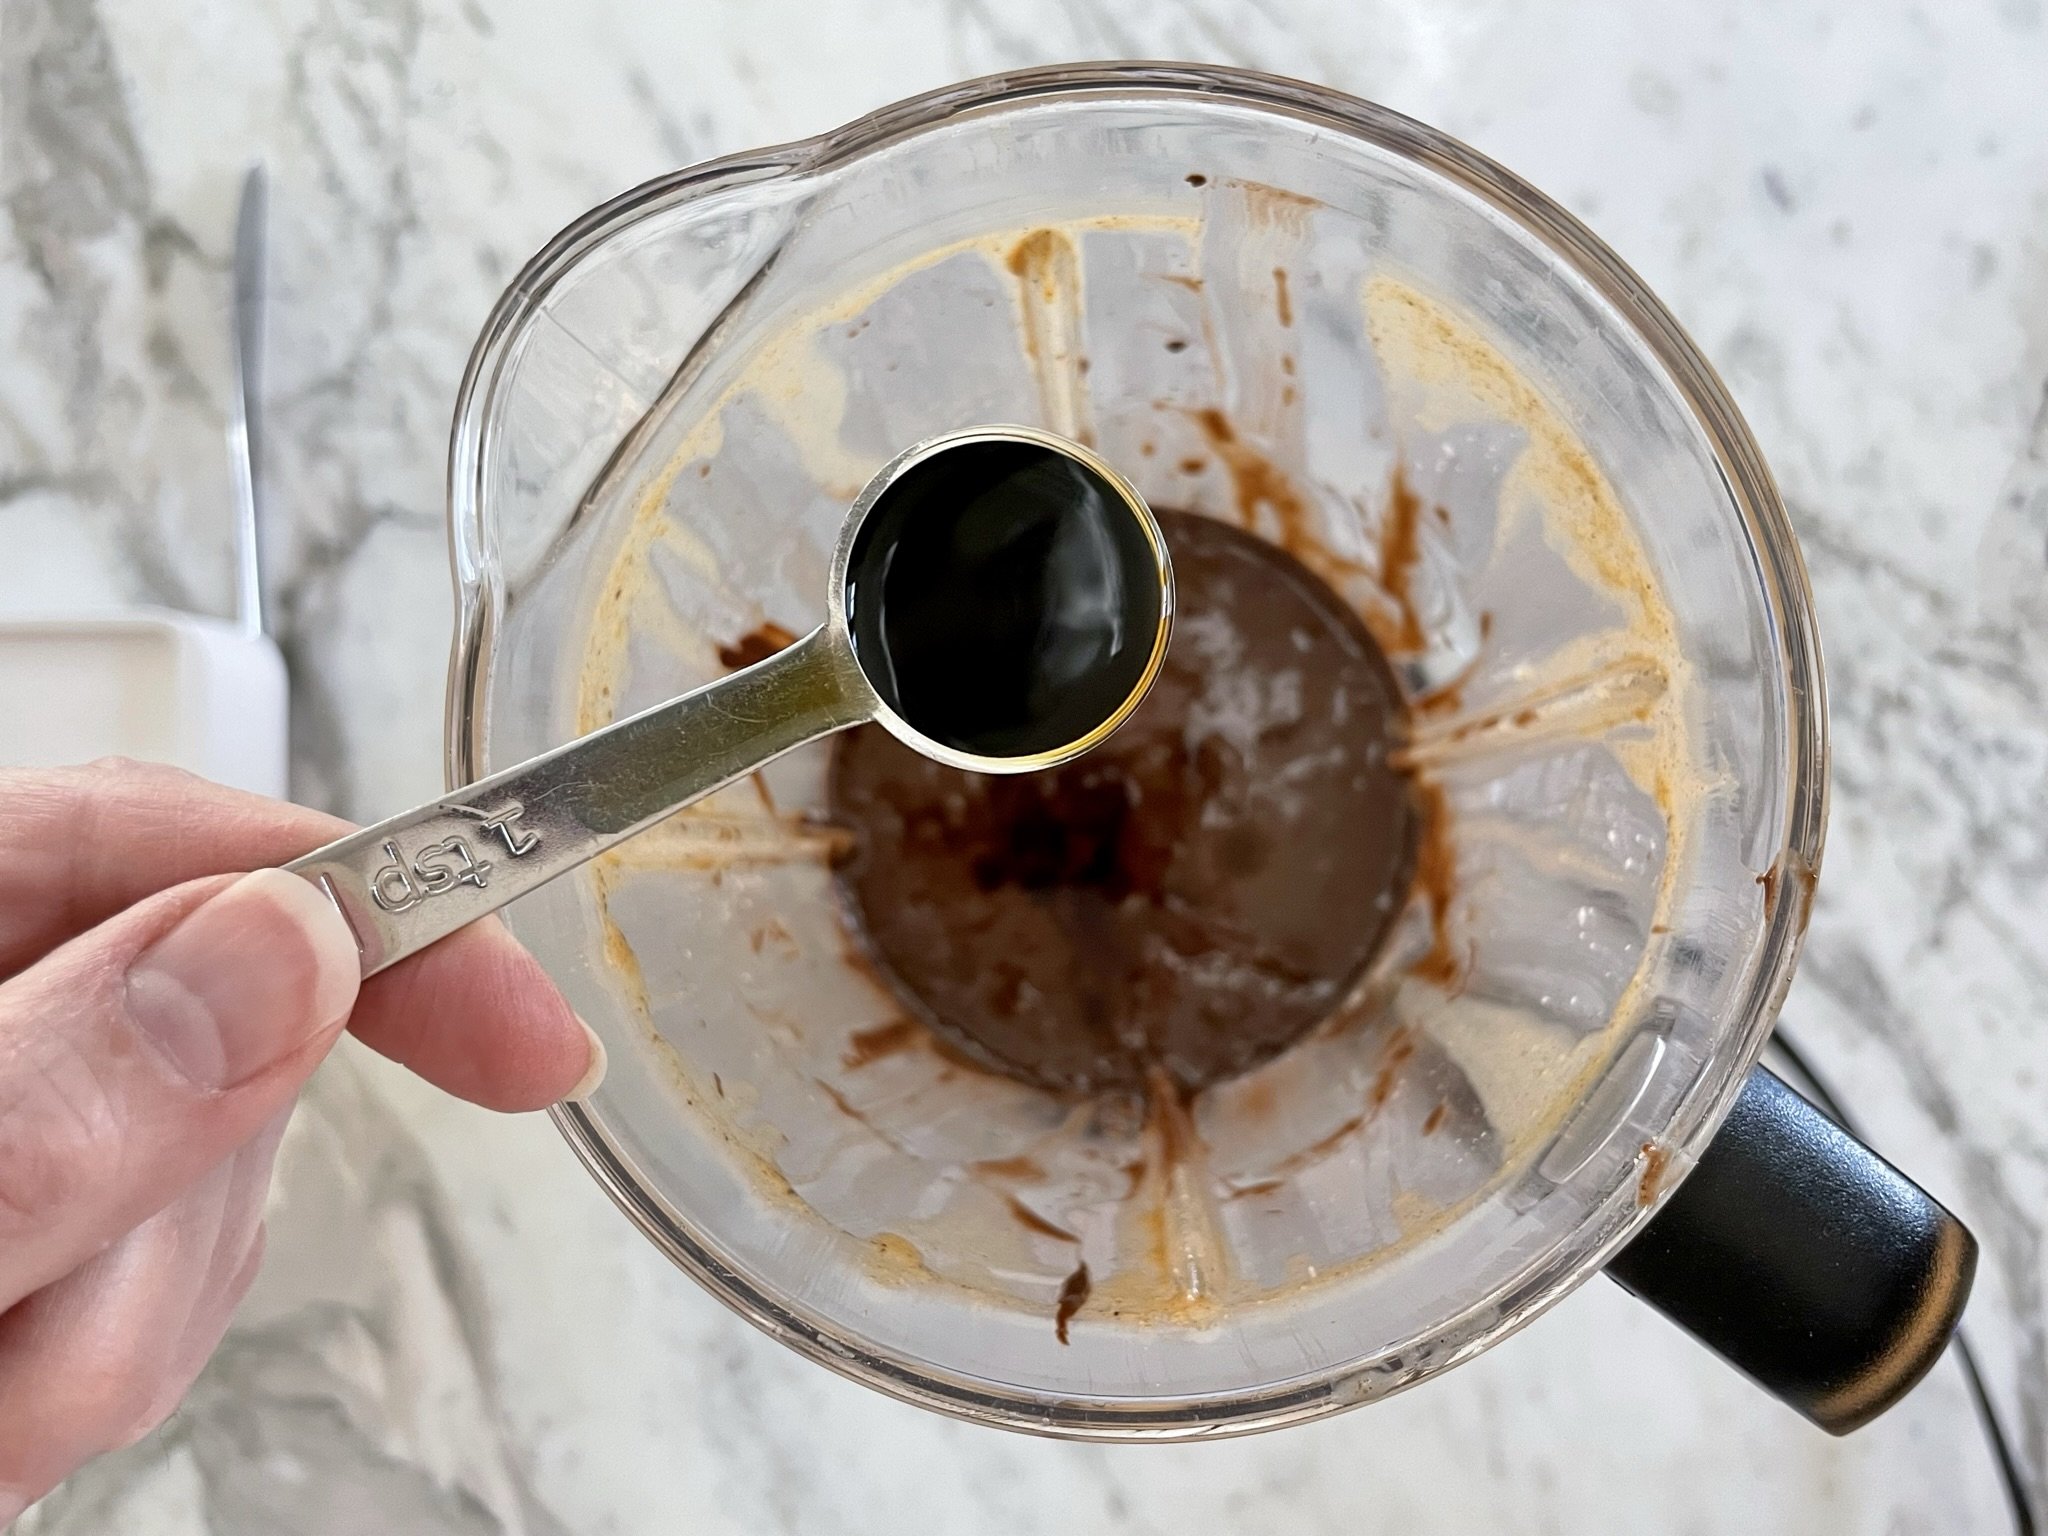
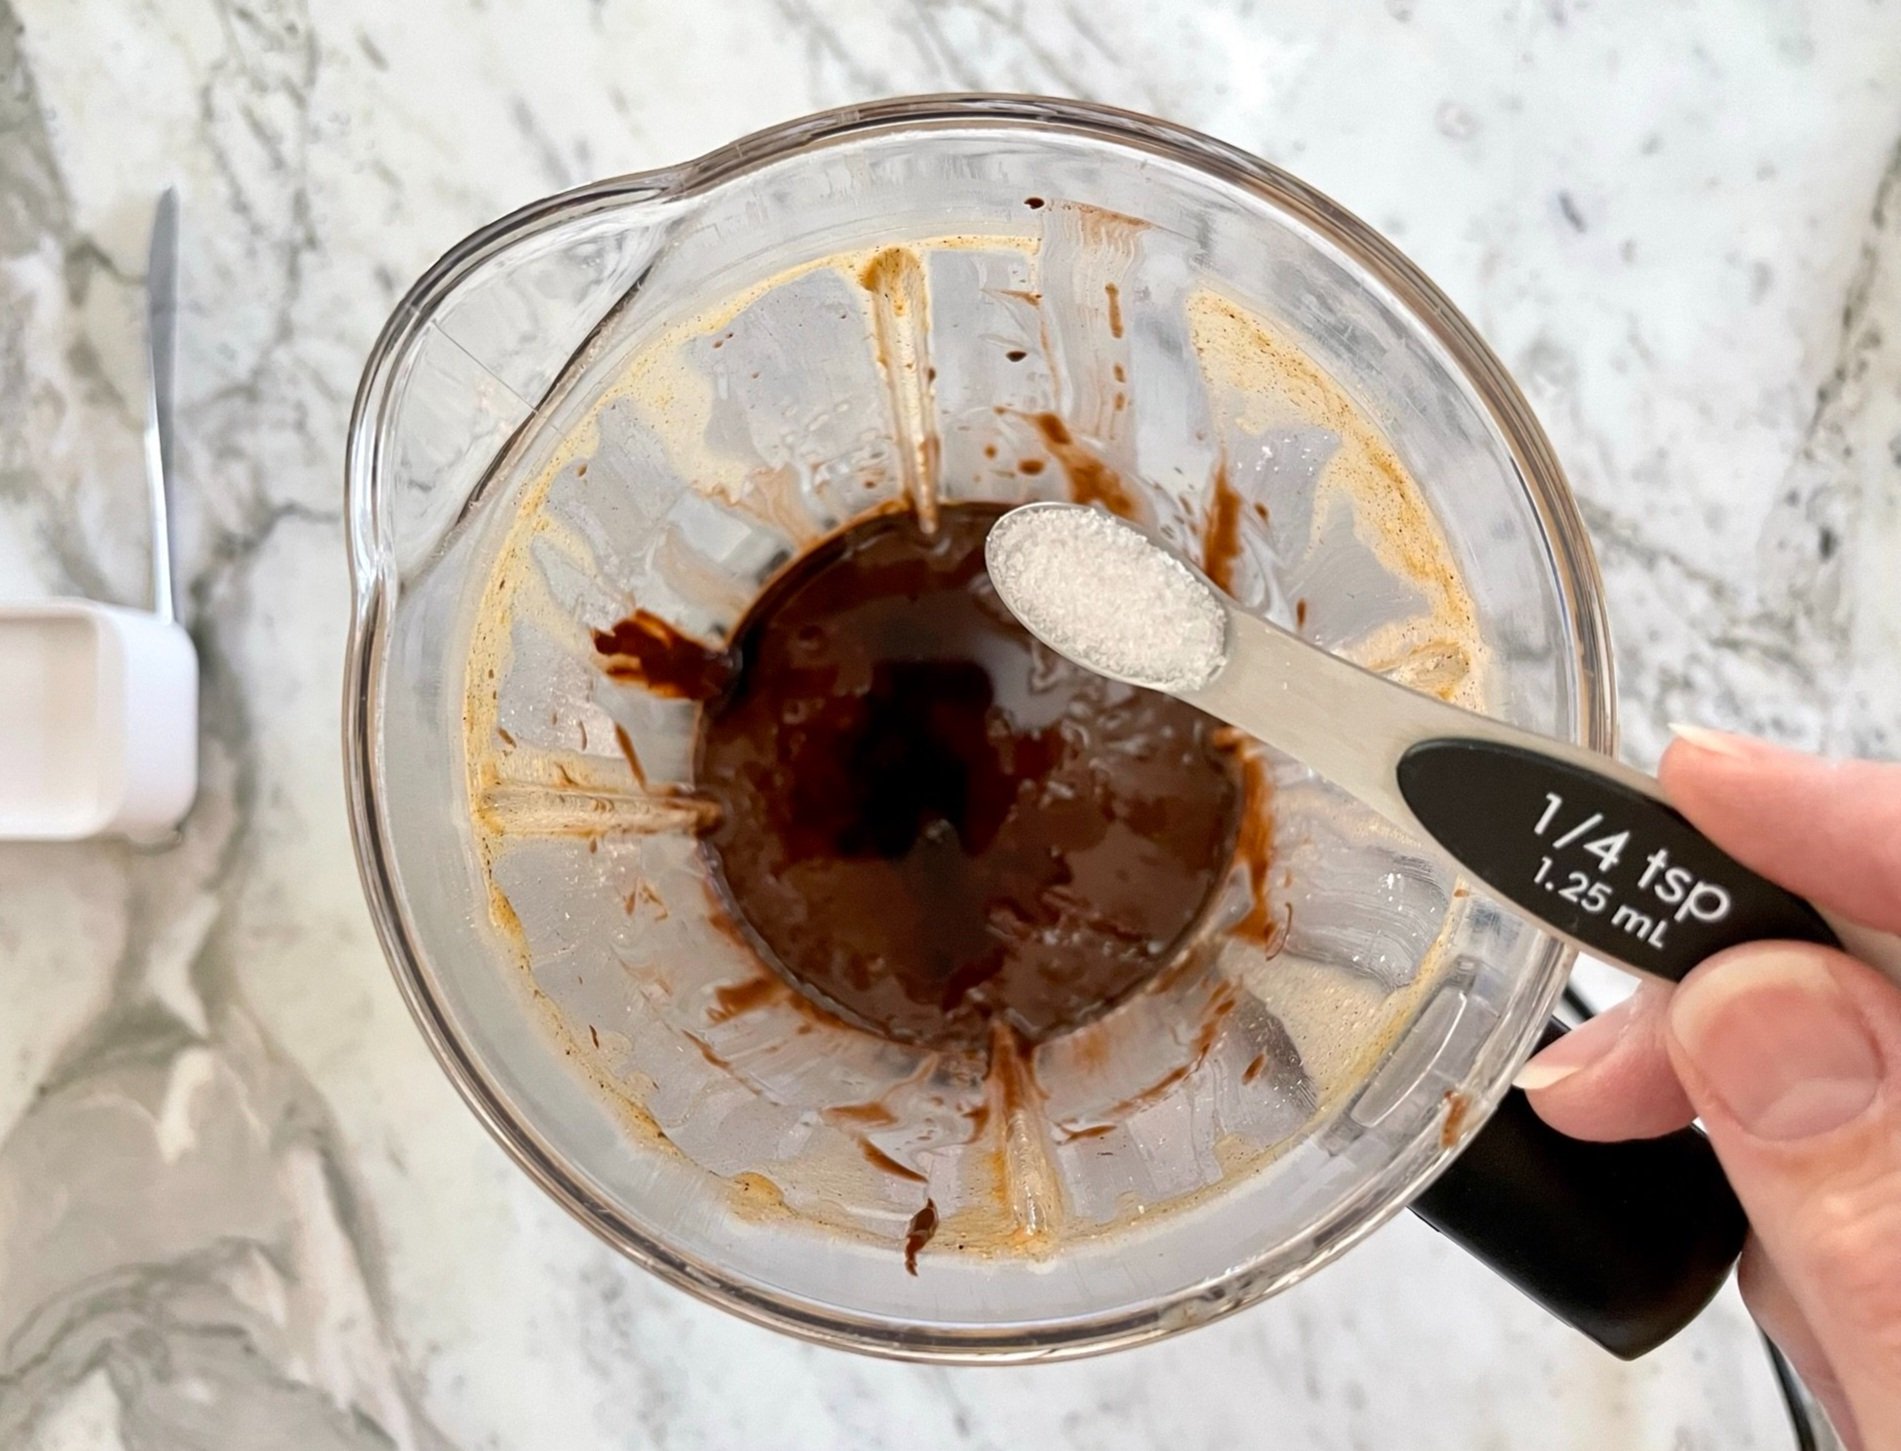
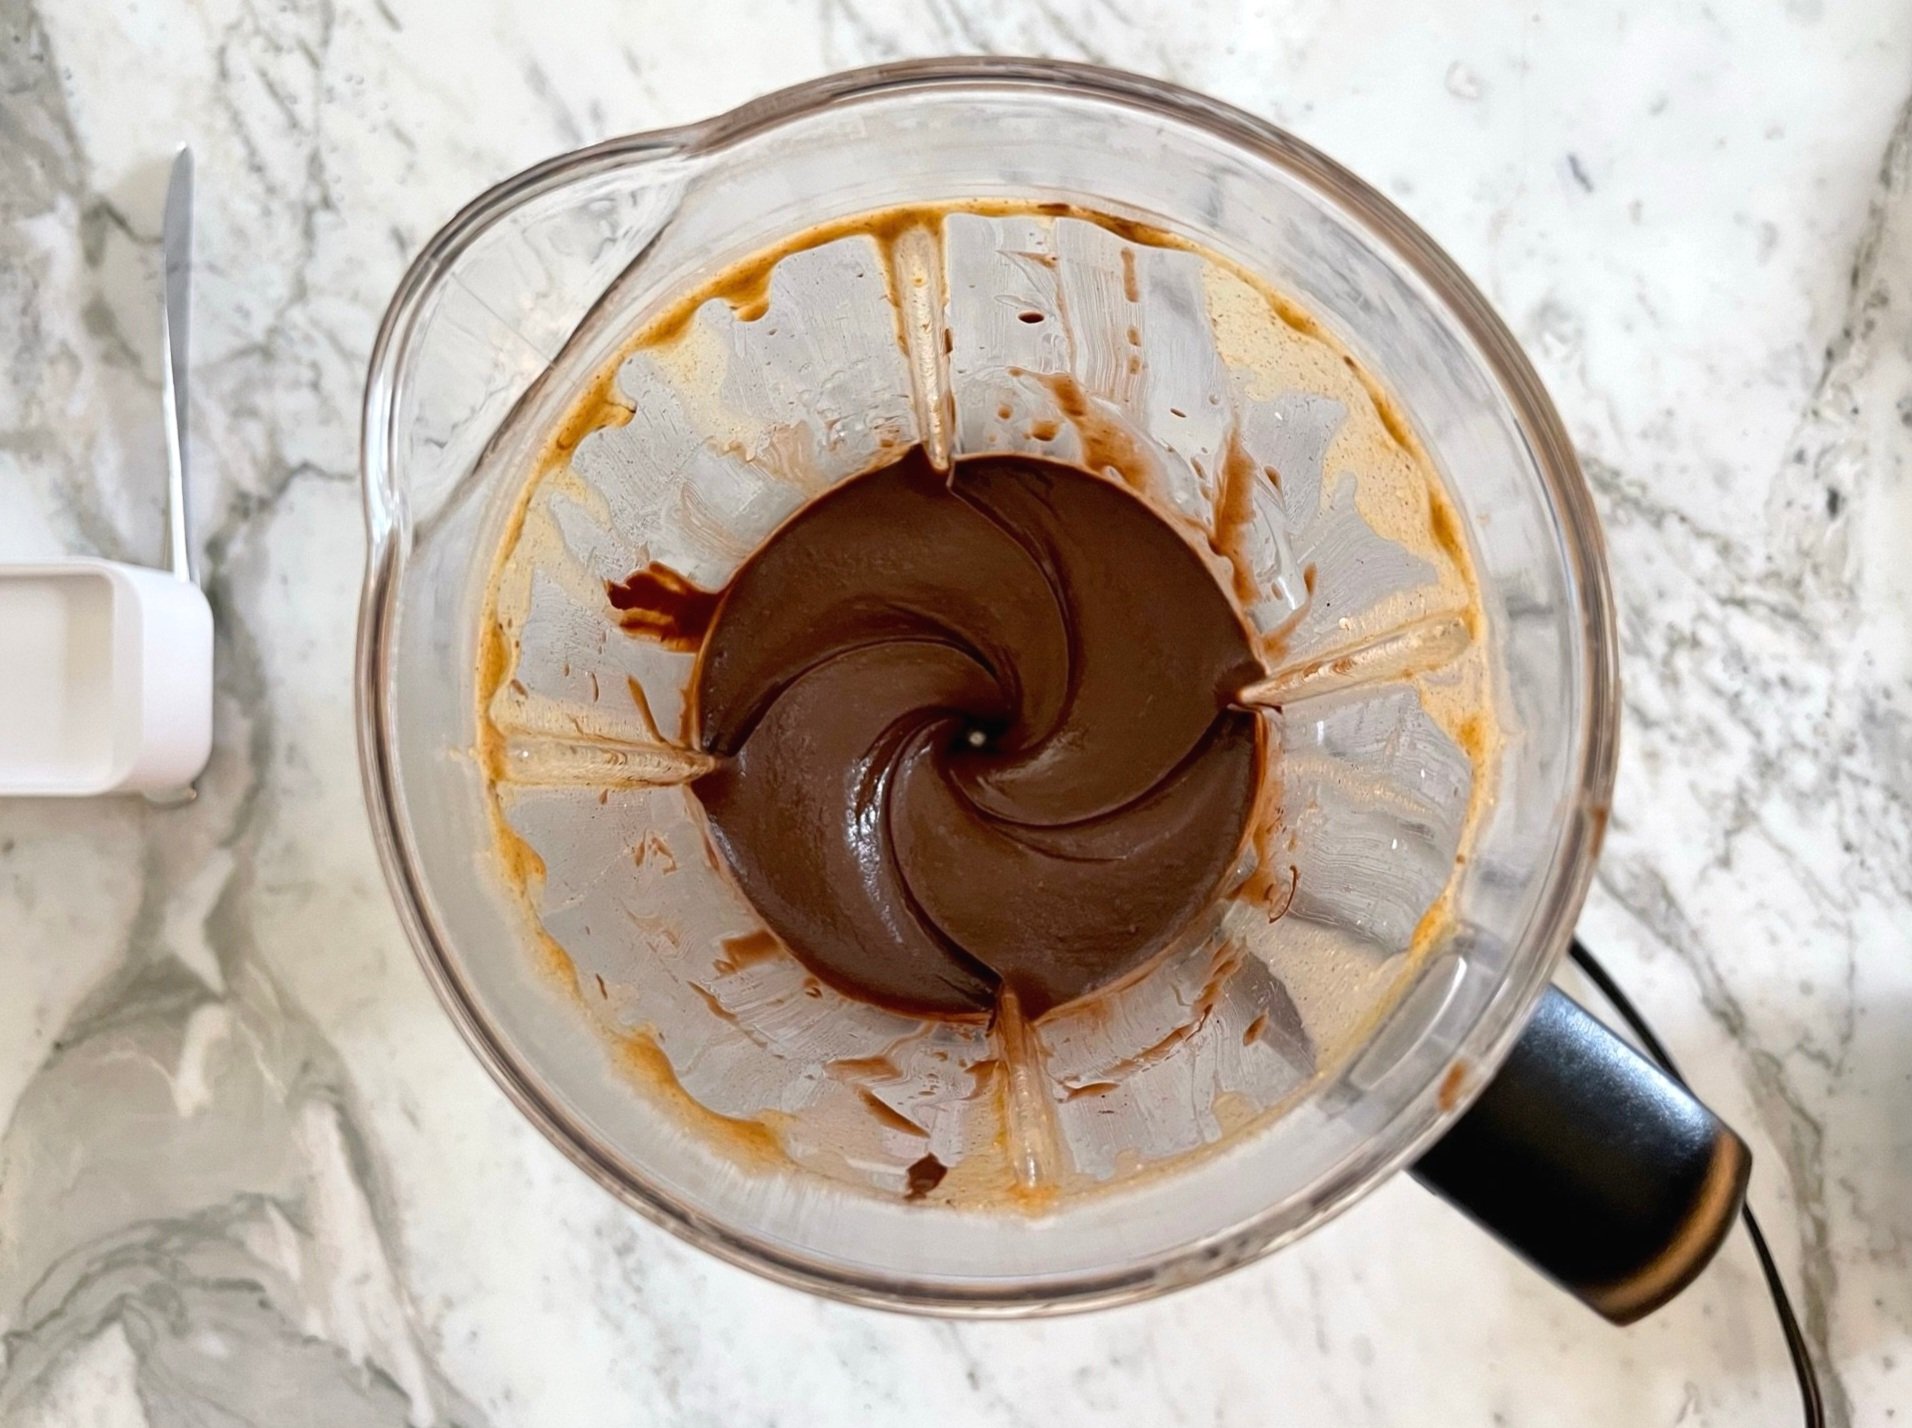
Add warm melted chocolate, 1 teaspoon pure vanilla extract, and ¼ teaspoon sea salt. Cover and process until smooth and creamy (see Note below). Scrape again, and transfer to an airtight glass container. Allow to cool uncovered at room temperature.
Note: The hazelnut spread may appear liquidy due to the heat generated from processing in the high speed blender. The mixture will become thicker as the spread cools. Refrigeration will solidify the spread.
STEP 8b
Once completely cooled, cover, and refrigerate until ready to use.
SERVING SUGGESTIONS
Enjoy on toast, Graham crackers, fresh strawberries, ice cream, or even by the spoonful!
Note: Store refrigerated in an airtight glass container for up to one month. For a softer consistency, allow the spread to sit at room temperature for about 5 minutes, and stir before using.

NUTTY INDOOR S’MORES
It’s also amazing on my Nutty Indoor S’mores.
Notes:
Recipe can be made ahead!
Makes about 1 ¾ cups (28 servings, 1 tablespoon per serving).
VIDEO
How to Make Homemade Nutella the Healthy Way!
Blog Comments & Tips
What’s not to love about this rich & chocolaty spread?!
My Homemade Nutella recipe is rich and chocolaty, and quite addicting! This recipe uses only 7 ingredients and palm oil is NOT one of them, so it's much healthier than the original store bought version. My version of Nutella® also uses much less sugar, and in my taste testers’ opinions, the taste is even better than the original!
I combined dry roasted hazelnuts, semi-sweet chocolate, Dutch processed cocoa, powdered sugar, vanilla, and a touch of sea salt to produce a silky smooth spread that is delicious on so many things.
The original version of Nutella® was created in 1946 by an Italian pastry maker just after World War II. It was developed to satisfy the demand for chocolate, which was in short supply after the war. Hazelnuts which were more readily available at the time, were used to make up the bulk of the recipe. It was originally created as a paste that could be wrapped and sliced. Later, Mr. Ferrero (the Italian pastry maker) altered the recipe to create a spreadable version that was packed in a jar. We have come to love the latter version of Nutella, which has been sold all over the world for decades.
Store bought Nutella ingredients include both milk and palm oil (neither of which are in my recipe). My version is dairy-free and uses coconut oil instead.
Health studies have also shown that the use of palm oil in products, can be quite unhealthy. In addition to the negative health effects of palm oil, harvesting and processing palm oil is considered a major driver of deforestation of some biodiverse forests, which is also destroying the habitats of some endangered species. Back to the recipe.
Despite how you feel about the health and environmental issues caused by the use of palm oil, I have yet to meet anyone who doesn’t like Nutella. Therefore, I encourage you to try this easy recipe, as it’s healthier as well as more environmentally conscious.
Even though there are a lot of steps, it’s actually a quick and easy recipe that can be done in less than 30 minutes!
Most of the steps are about stopping and scraping the blender (which takes only a few seconds). To create a smooth texture, it is important to scrape the blender often and thoroughly to make sure that the roasted hazelnuts are completely blended, and thoroughly combined with all the ingredients.
This delicious and chocolatey spread is fantastic on toast, Graham crackers, fresh strawberries, ice cream, or even by the spoonful! I also highly recommend making this recipe ahead to use in my Nutty Indoor S’mores recipe.
How do you ensure the best results from our recipe?
My 4 tips to making a smooth & delicious Homemade Nutella:
As always, use good quality ingredients including fresh dry roasted hazelnuts (I prefer the Trader Joe’s brand), Dutch processed cocoa, and semi-sweet chocolate chips.
Before beginning, taste and smell one or two of the hazelnuts to ensure they are not rancid. In the past, I’ve actually opened a fresh bag of roasted hazelnuts (which was many months away from the expiration date) and the nuts were rancid! The taste and sniff test always work and will ensure that you have a great tasting spread.
There are two major tips to ensure smoothness in this spread:
Although you can use a food processor, I found that a high-speed blender gets the best (and smoothest) results for this simple recipe (either the NutriBullet high speed blender, and the Vitamix high-speed blender work extremely well).
And, make sure to scrape the bottom and sides of the blender at each stage.
Test for smoothness, and keep processing if you feel any grit. Just be very cautious, as the nut mixture will be fairly hot because of the heat from the motor of the blender.
It’s time to customize and Pimp Our Recipe.
Pimp Our Recipe:
Make it Dairy-Free: All ingredients are non-dairy in this recipe, except the semi-sweet chocolate chips. It’s an easy fix, as you can easily find vegan brands of semi-sweet chocolate chips. Try either of these vegan brands: Enjoy Life semi sweet chocolate mini chips, or Pascha organic semi sweet chocolate baking chips.
Enjoy and let me know what you think by commenting below, rating my recipes, subscribing, following, and liking the recipes on Pinterest, Instagram, Facebook, and YouTube! Don’t forget to subscribe to get updates on new recipes and tips & tricks.
Happy Cooking!
Mich
Footnote: Remember to scrape the bottom and sides of the blender at every stage!

Nutella® is a registered trademark of Ferrero Foodservice.
Adapted from the Homemade Nutella recipe by crunchycreamysweet.com, I used it as a base recipe. I altered their recipe and reduced the sweetness a bit, as well as intensified the flavors and textures by using Dutch processed cocoa, and double dry roasted hazelnuts. The techniques are also a bit different, but my recipe yielded a delightfully smooth and chocolaty spread that tastes better than the original version.
Every editorial product is independently selected. I may be compensated or receive an affiliate commission if you purchase products via these links. As an Amazon Associate, I earn from qualifying purchases.